How Do You Wear?
Disability Visibility: Mending the Disabled Experience of Wear
~~~
Senior Thesis Awarded High Honors
September 2024 – April 2025

Thesis Overview
Because of a vascular malformation I was born with, I’ve used forearm crutches for most of my life. It’s shaped how I move through the world — and how the world, and my clothing, moves against me.
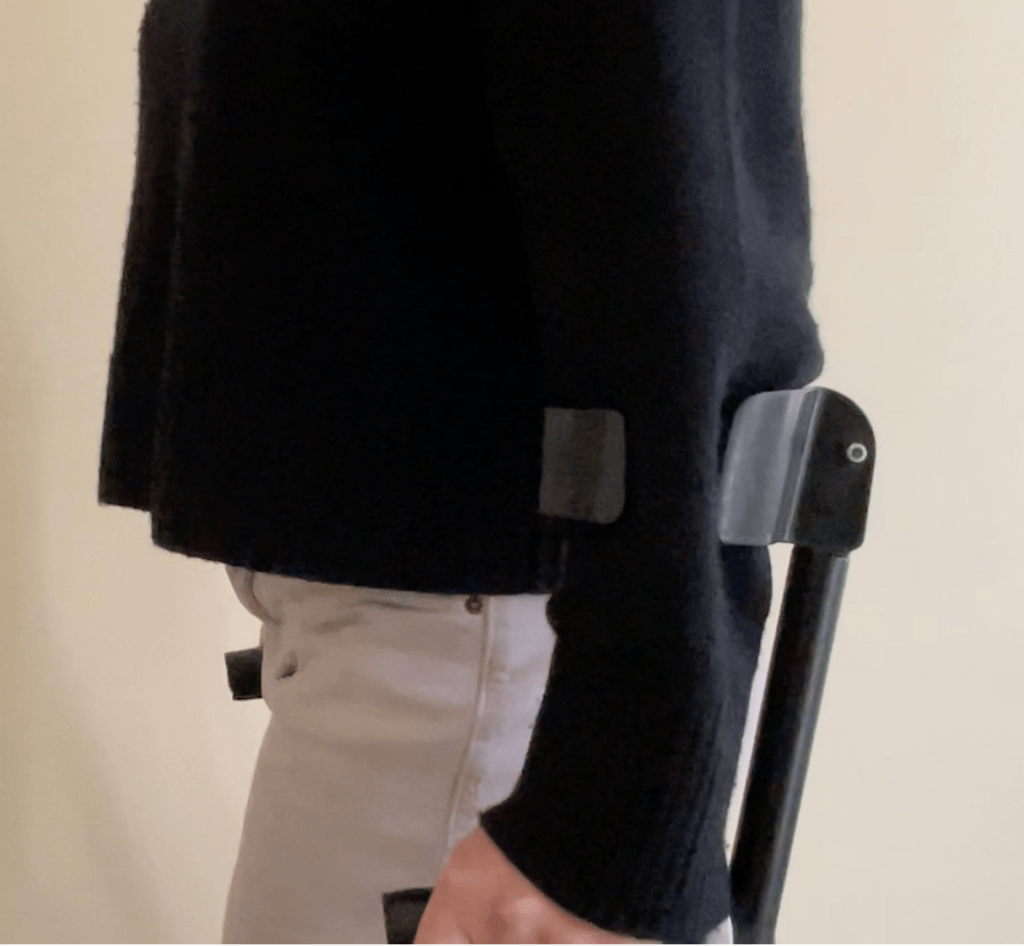


Disabled bodies interact with clothing differently — but most garments aren’t designed with that in mind. Adaptive tools like crutches and wheelchairs create friction points that accelerate wear in specific, repeated ways. For many of us, this means patching, hiding, or replacing clothing long before it should fail.
But the problem isn’t just material — it’s social. These wear patterns become silent markers that we’re not moving through the world the “normal” way. That kind of visibility can feel vulnerable. Many disabled people learn to conceal their tools or the signs of their use, not just for practicality, but to avoid the emotional labor of stares, questions, or assumptions.

My thesis explores this reality through both personal and collaborative lenses. Grounded in critical disability studies, it interrogates the medical and social models of disability while mapping the layered impacts of assistive devices on clothing, body perception, and social interaction.
Through co-design and material experimentation, I examine themes of wear and care, normalcy and stigma, emotional labor, and the intersection of fashion and adaptation.

This project started with a simple question:
What if wear could be designed into the garment? What if the breakdown became a reveal?
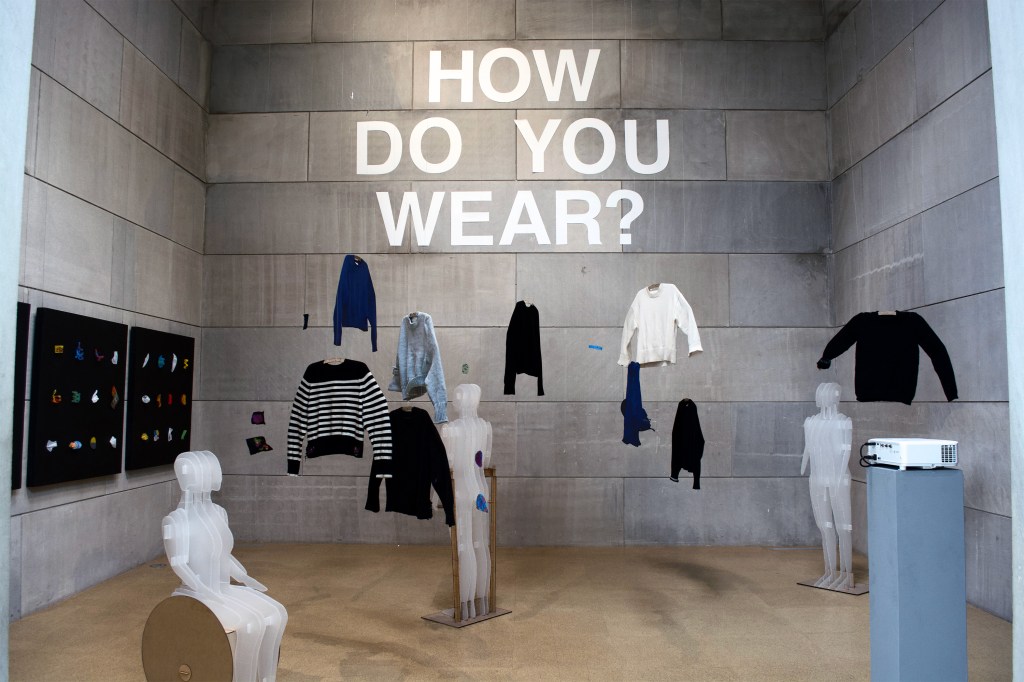
By inviting viewers into my exhibition which was held in Wesleyan’s Zilkha Gallery, my aim was to surface the often-invisible assumptions that shape our interactions with objects, people, and systems. The installation is both a call and a gesture — to see disability not as something to fix or conceal, but as a lived, material, and creative reality that reshapes design, fashion, and belonging.
Table of Contents
- Co-Designing Wear
- Everlane Sponsorship and Collaboration
- Research on and Application of 3D Printed Textiles
- System Level Change – Rethinking Manufacturing
- Creating the Exhibition
- Final Exhibition
- Looking Forwards
Co-Designing Wear
This project began with my own clothing — my own wear patterns, my own story. But from the start, I knew I didn’t want to work in isolation. Disability isn’t a monolith, and neither are the ways our tools and bodies shape the materials around us.
Inspired by Grace Jun’s Fashion, Disability, and Co-Design, I invited two collaborators — Sarah and Emma — into the process. Jun’s framework emphasizes co-design not as token inclusion, but as an ethical and creative imperative: a way of designing with, not for. It was important to me that this project reflect not just my own experience, but the diversity, complexity, and joy of disabled embodiment.
Sarah
Sarah is a fellow Wesleyan senior and one of the first people I met on campus. She was born without a right hand.
[captions for all audio can be found on the video at the top of the page]
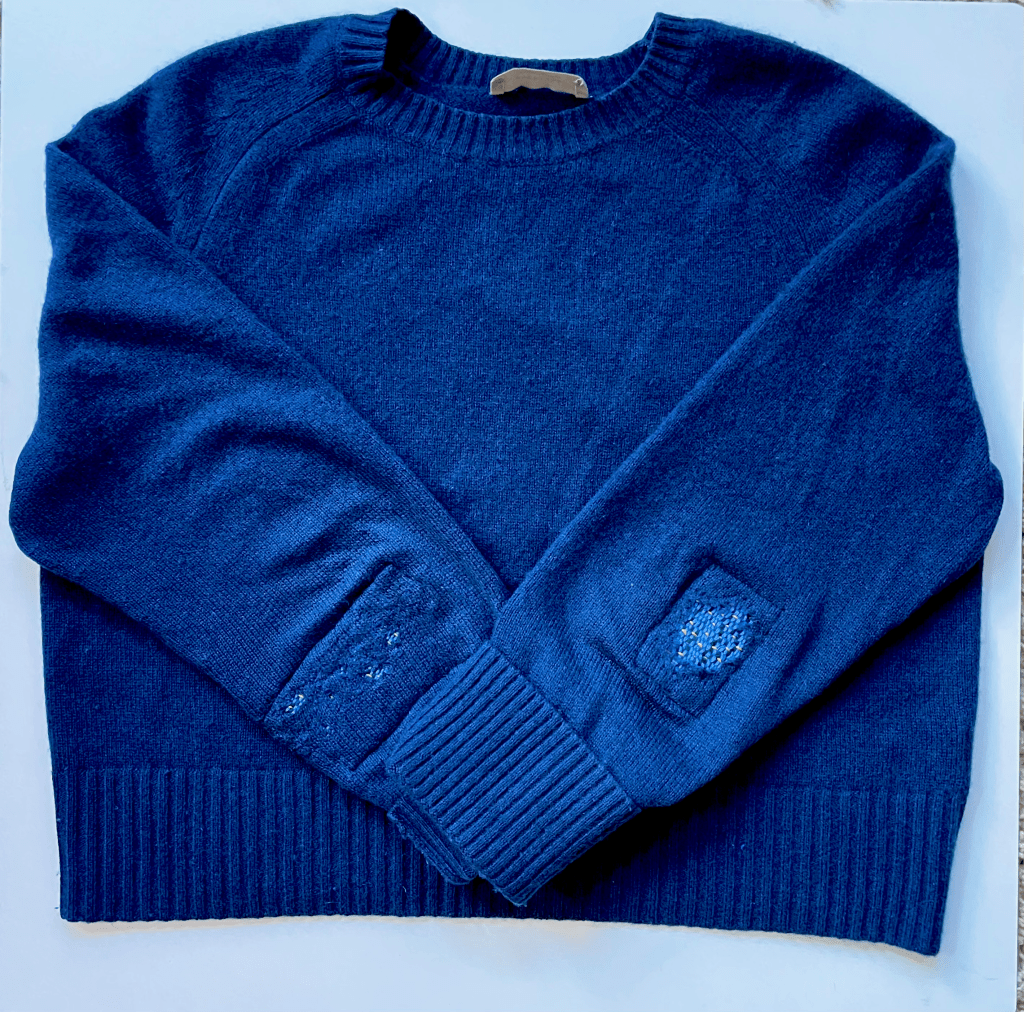
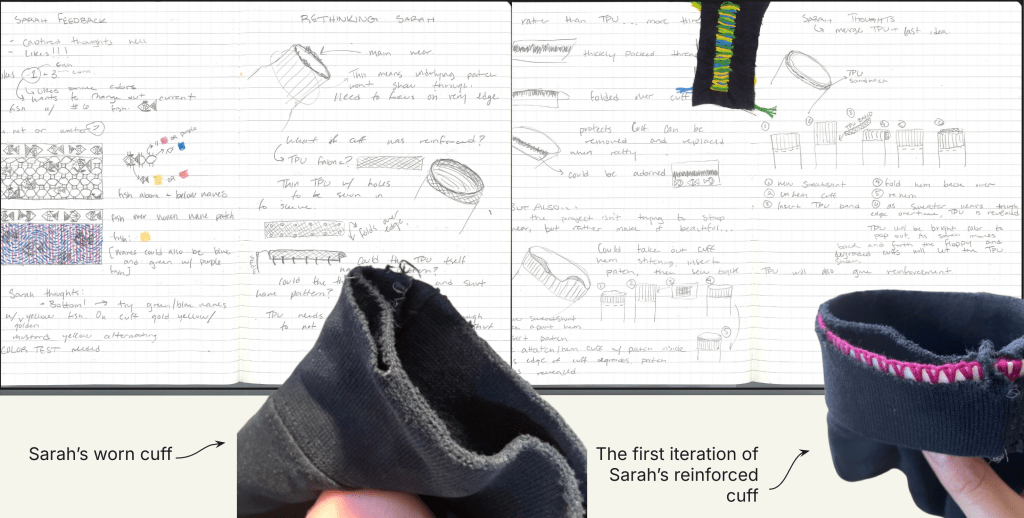
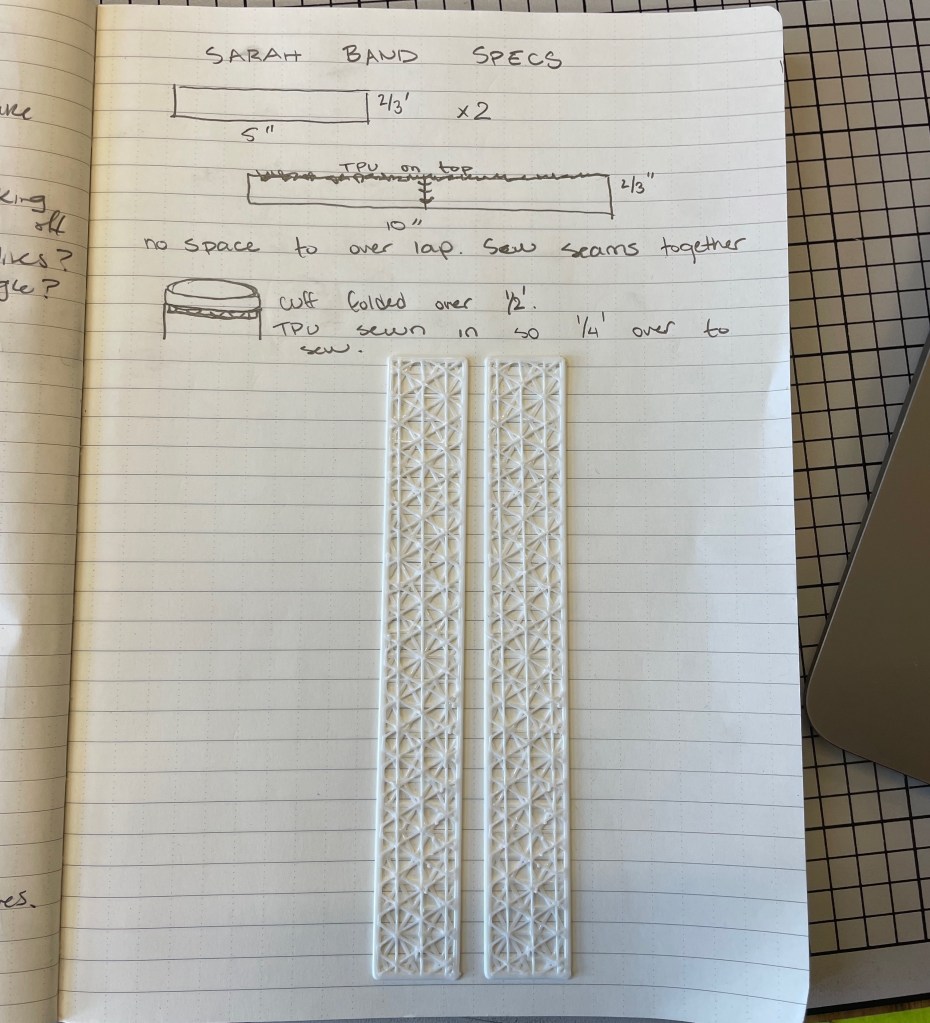
Sarah told me about her long habit of pulling her sleeve down to cover her right arm — a small, daily action that puts significant strain on her sweater cuffs. She wears through the fabric quickly, especially on the right side.


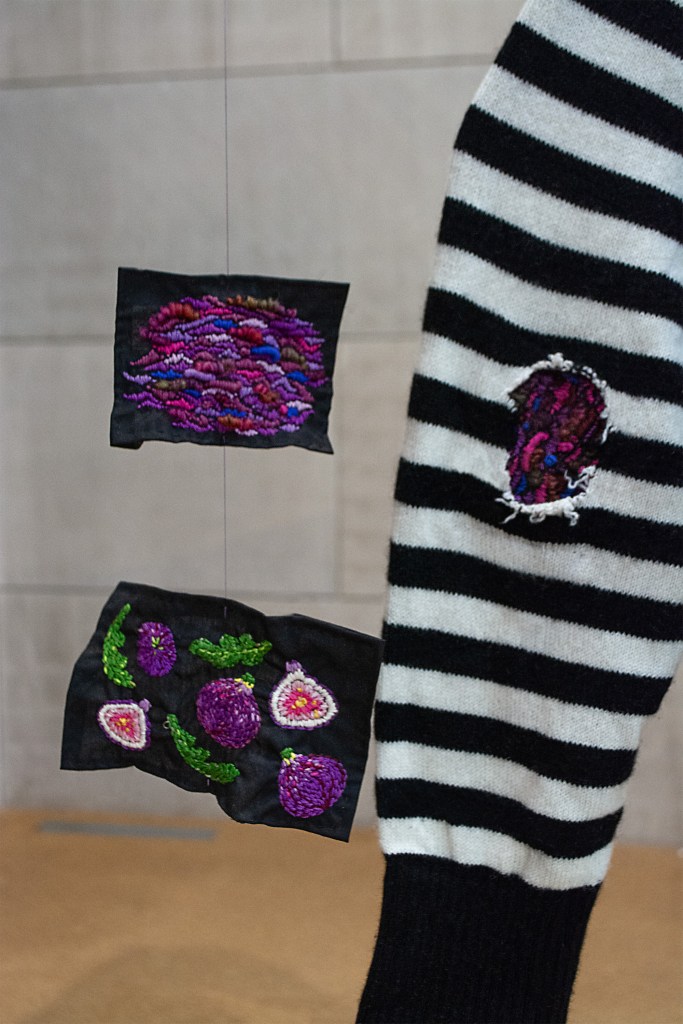
In our co-design sessions, Sarah chose to make this quiet pattern visible. We created a TPU-reinforced cuff (see later 3D printing section) that remains hidden until the surrounding fabric wears away. On her second sweater, she chose to place the strip externally — a reversal that turned the reinforcement into something proudly visible. What began as concealment became expression.
First thinking and work on Sarah’s cuff:

Emma
Emma and I met through our shared medical team at Boston Children’s Hospital. She’s a student at Northeastern and a full-time wheelchair user. Like me, she was born with a vascular malformation — and similar to me, she finds that her sweaters tend to wear out quickly at the elbows and hips, where her body rubs against her chair.


Emma told me a story I’ll never forget: once, a student saw her leg and vomited. Two years later, a child touched the same spot and said, “It looks like a galaxy.” That moment became our design cue.
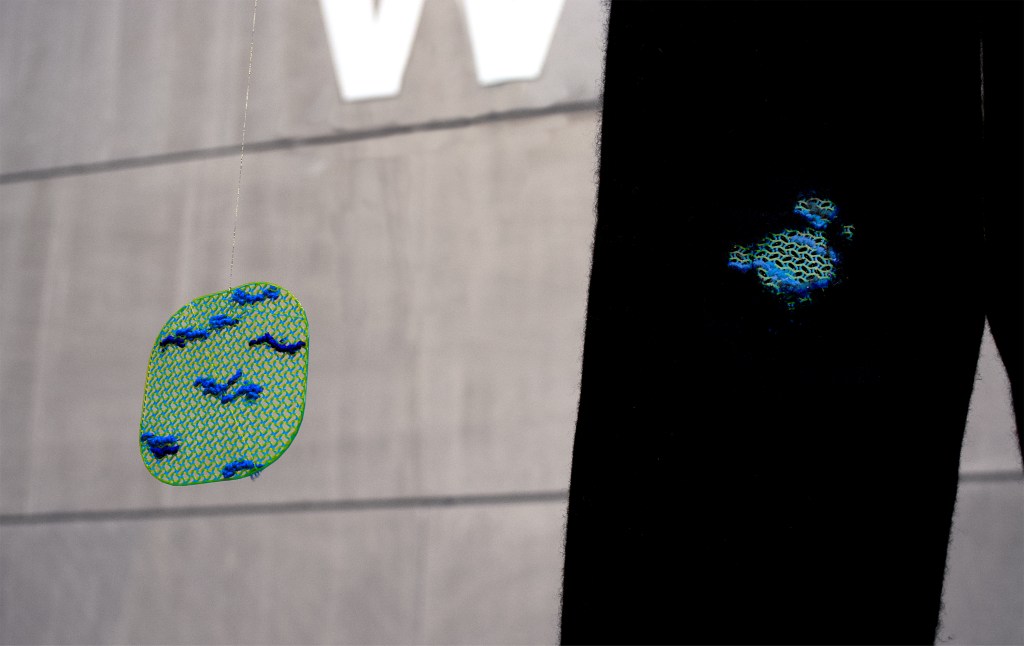
Together, we created patches that echoed the swirling shapes of her veins — abstracted and embroidered beneath the fabric. When the sweater wears down, the galaxy reveals itself.
First iteration’s of Emma’s sweaters:


Why Co-Design is so Important
These collaborations weren’t just additive. They challenged me to rethink the project’s scope. Each person’s wear pattern was shaped by their body, movement, and memory — and each deserved a design solution that matched its emotional and material logic.
Following Jun’s model, I treated each sweater as a site of narrative, care, and authorship — garments that didn’t just solve for wear, but gave space for the meaning behind it.
Co-design allowed this project to move beyond repair into something deeper: a practice of visibility, self-determination, and shared transformation.
Everlane Sponsorship and Collaboration
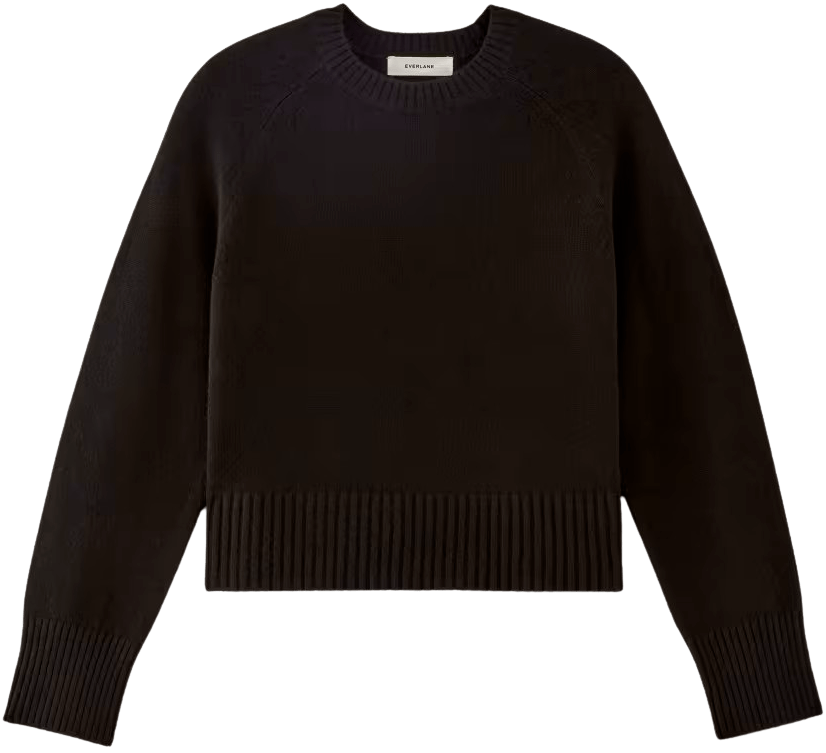
Because I was working through co-design with multiple collaborators, I needed a supply of real, high-quality garments to work with. Natural fibers like cashmere and cotton behave differently under friction from crutches or wheelchairs, and I wanted to test directly on sweaters that I knew were ethically sourced and 100% natural.
As a student, I couldn’t afford to buy enough garments for everyone involved. To do the work seriously, I needed a brand that could offer material support.
.
Why Everlane?
Everlane was the first brand where I noticed this problem — my own cashmere sweaters wore out at the forearms in under six months. The irony stuck with me: garments marketed as “lifelong” weren’t holding up under disabled use. Not because of poor quality — quite the opposite, because these garments were so organic, they actually hold up much worse to friction than synthetic garments.
That realization revealed a deeper overlap: disability and sustainability are connected. The assumption that high-quality clothing lasts is built around a normative body. If you use adaptive tools, lifespan looks different.
I also genuinely loved the brand — their ethical sourcing and transparency aligned with the values of my work (and their cashmere boxy crew is my favorite sweater.)
.
Cold Email –> Connection
I cold emailed Everlane’s Sr. Director of Sustainability & Sourcing, explaining my thesis, and hope for their sponsorship through donations of sweaters. To my delight they wrote back! Throughout my thesis we communicated back and forth with updates on material needs and where my thesis work was going.
Here is a deck I put together for one of our meetings which reiterates the project and provides examples of my usage of their sweaters:
Future Work with Everlane
As the project continued, I put together a deck outlining potential future collaborations — from reinforced patch kits to an adaptive sweater capsule to co-design partnerships with disabled communities.
Research on and Application of 3D Printed Textiles

Now that I had consistent support from Everlane — and knew I’d be able to produce more sweaters than originally planned — I ran into two new challenges. With three users (myself, Emma, and Sarah) and multiple wear patterns to design for, I needed to rethink my methods:
- Durability: My initial patch method — hand embroidery on cotton fabric — was soft and meaningful, but not built to withstand long-term wear. I needed something more resilient, but still flexible and textile-like. It had to move with the sweater and be sewable without compromising comfort.
- Scalability: While embroidery was personal and expressive, it was also labor-intensive. If I wanted to expand the project — or think toward systems-level implementation — I had to develop a faster, repeatable process that still allowed for individualization.
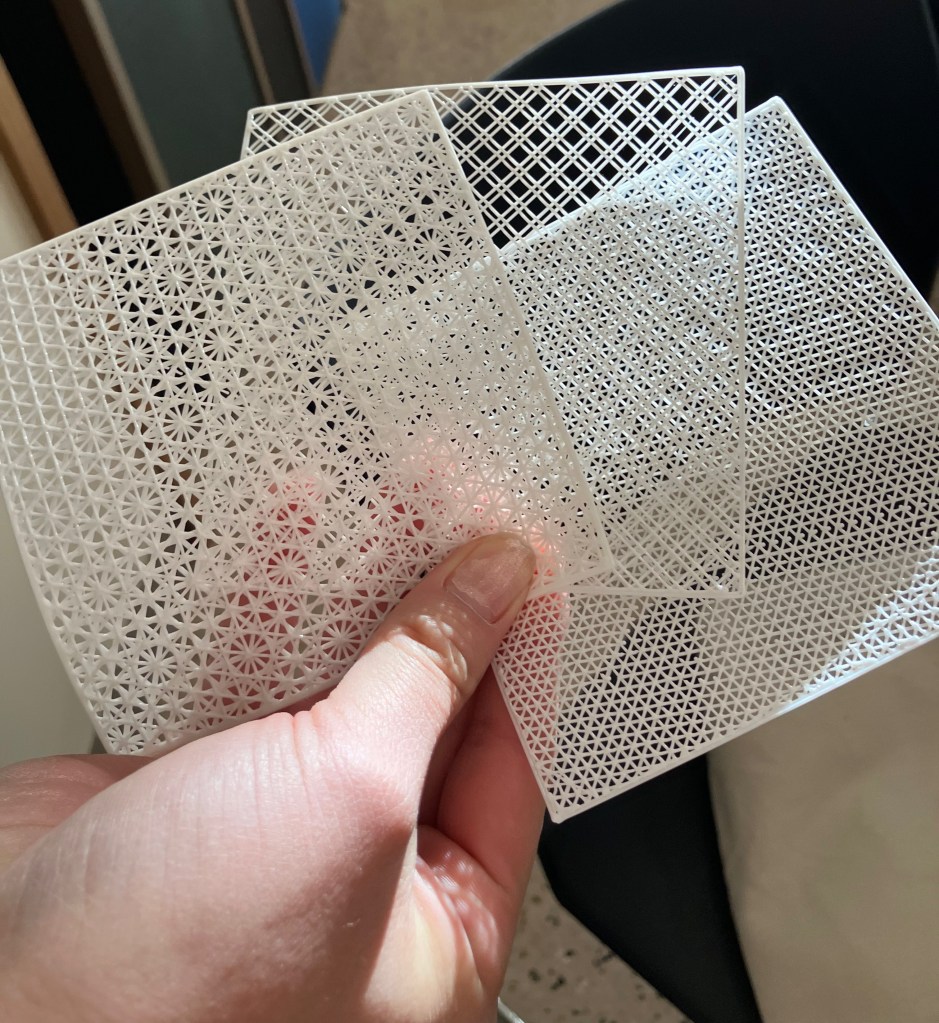
These questions led me to experiment with 3D printed textiles — specifically, using TPU filament to create patches that could reinforce sweaters while holding narrative and design intention. I had already done some initial research on 3D printed textiles from a project junior fall in which I created a 3D printed arm band tool so had a jumping off point.
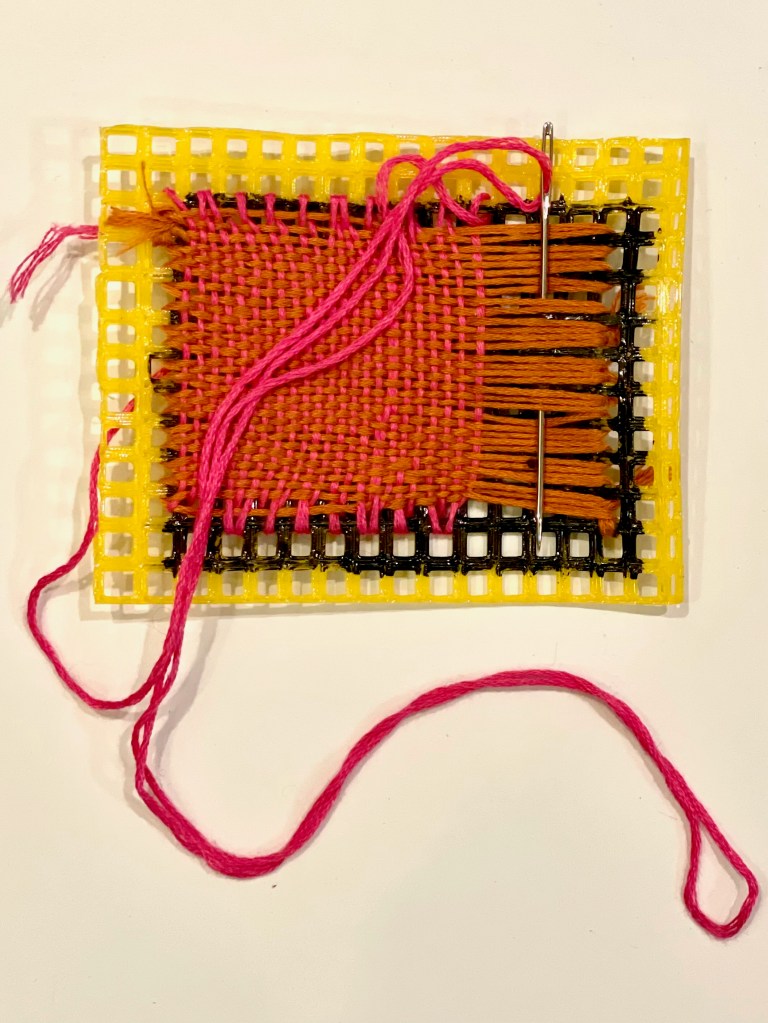


These first trials were super informative on both my possibilities and limitations. I knew that I could figure out how to get a thinner, more flexible pattern, however moving from Rhino to Cura created some issues. The 3D models that I brought into Cura were not being read by the slicer in the intended way and resulted in much thicker and therefore less flexible prints that would be uncomfortable to sew into sweaters.
In further trials I started to understand how to translate between these softwares better, figuring out how 3D models are read into the slicer and how the slicer then converts the file to gcode for the printer to read.
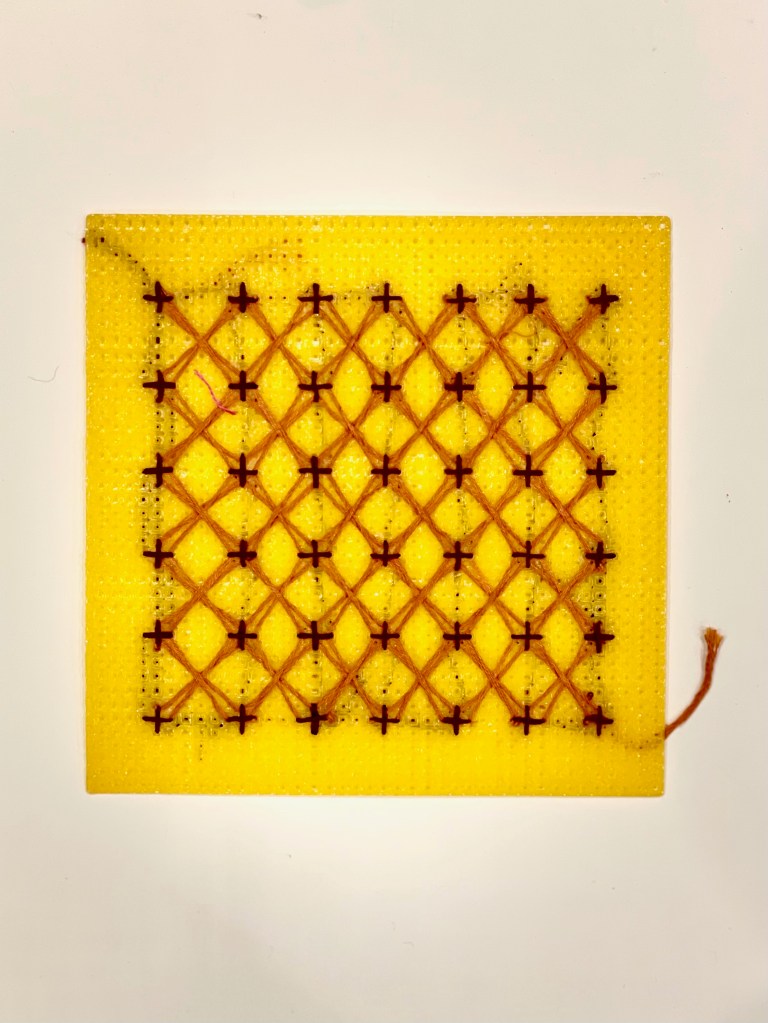
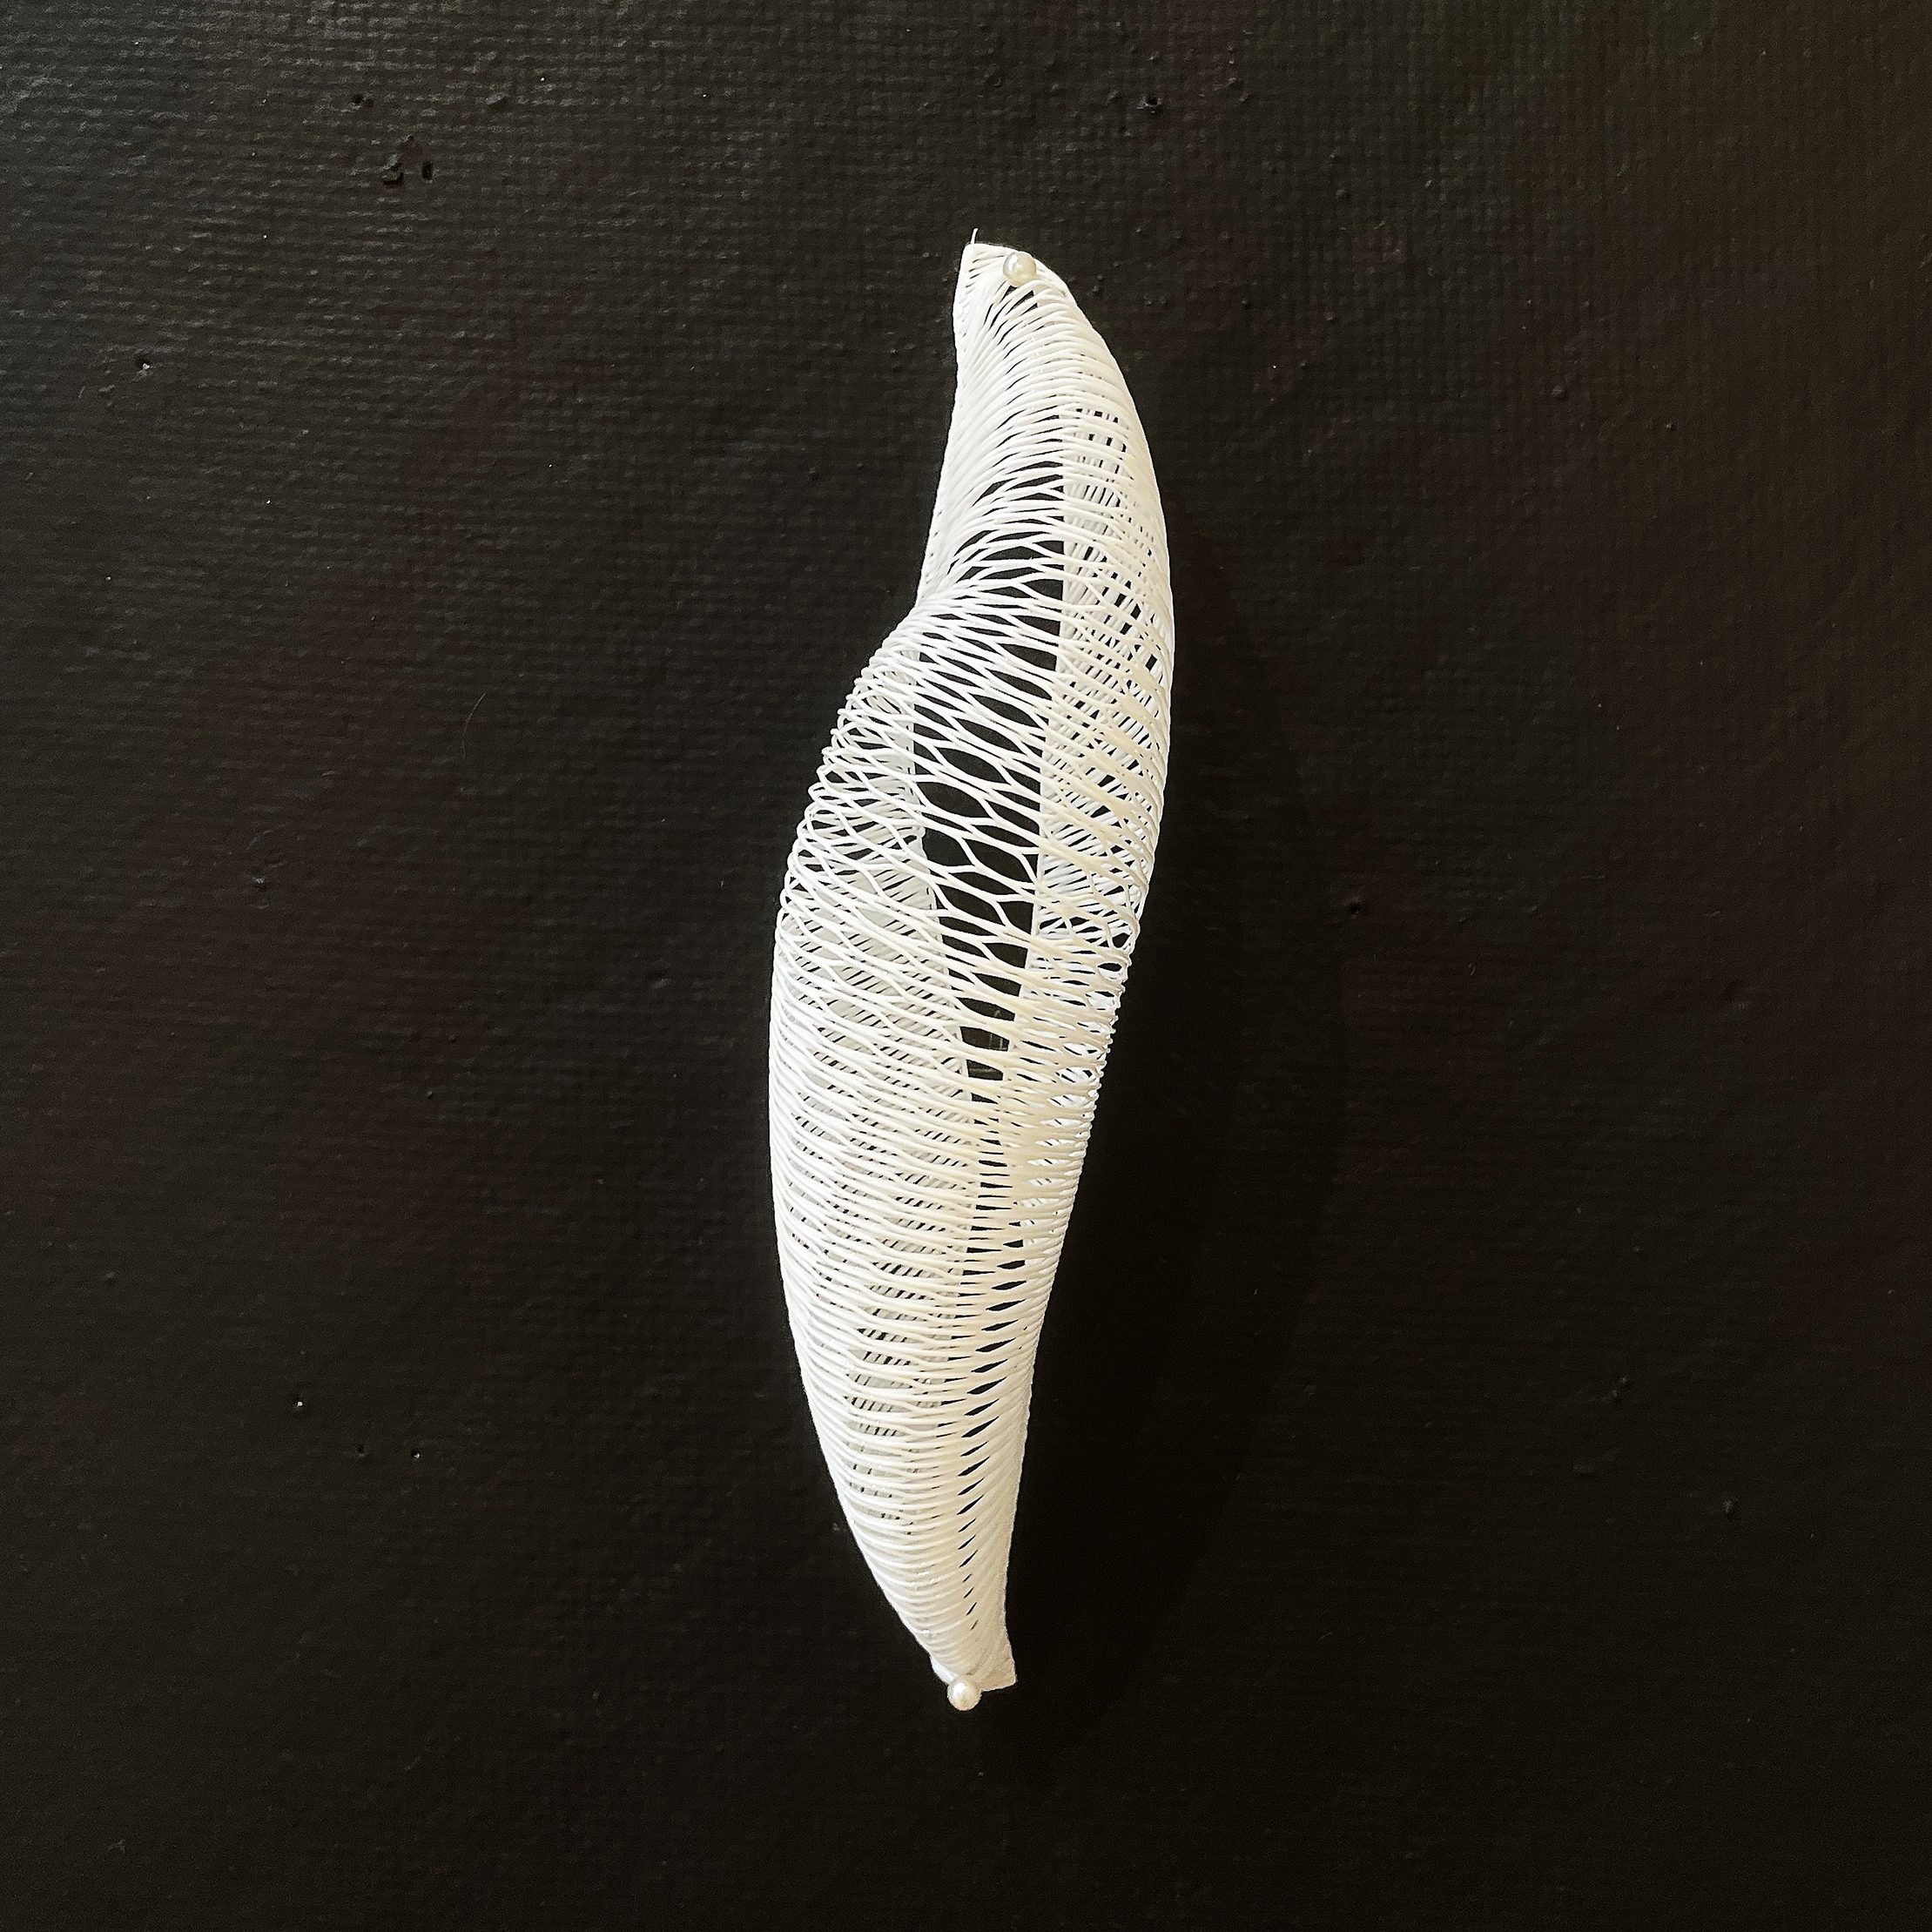
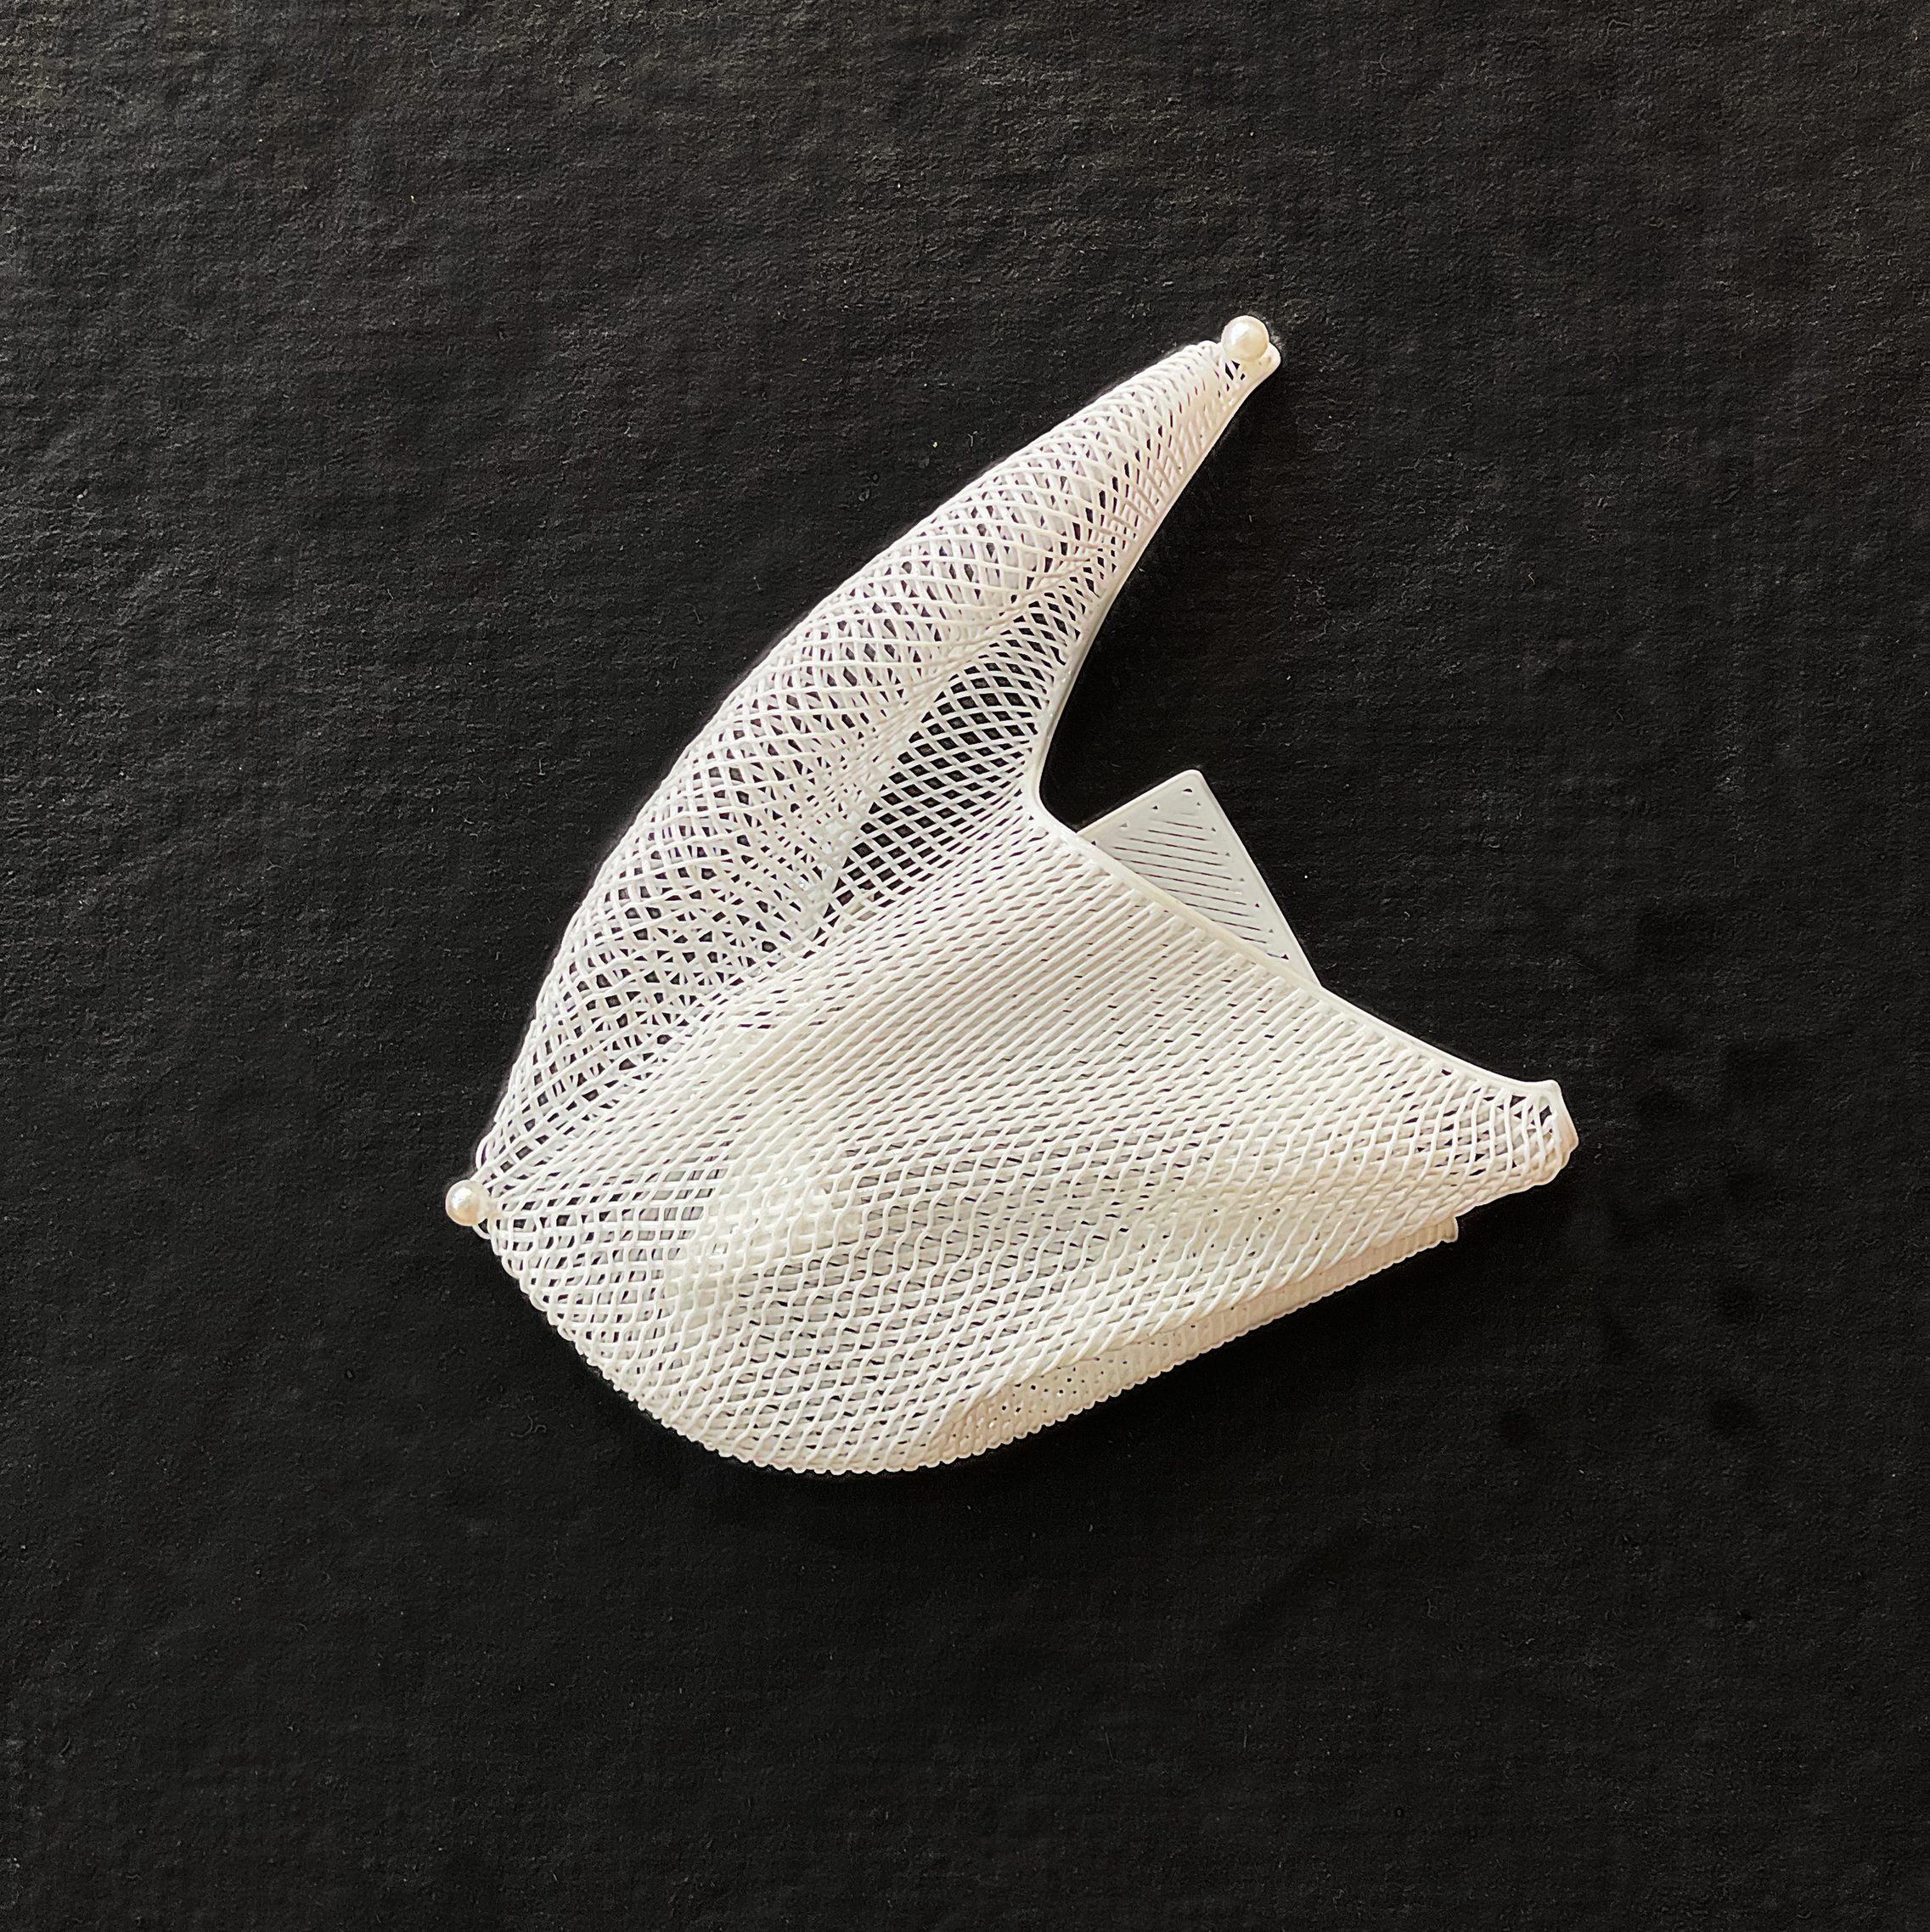
These next round of TPU textiles worked out much better. They were extremely durable yet still light, stretchy, and smooth. I could strategically add embroidery for aesthetic purposes but also to give some padding against the skin and the TPU textile still kept its material properties.
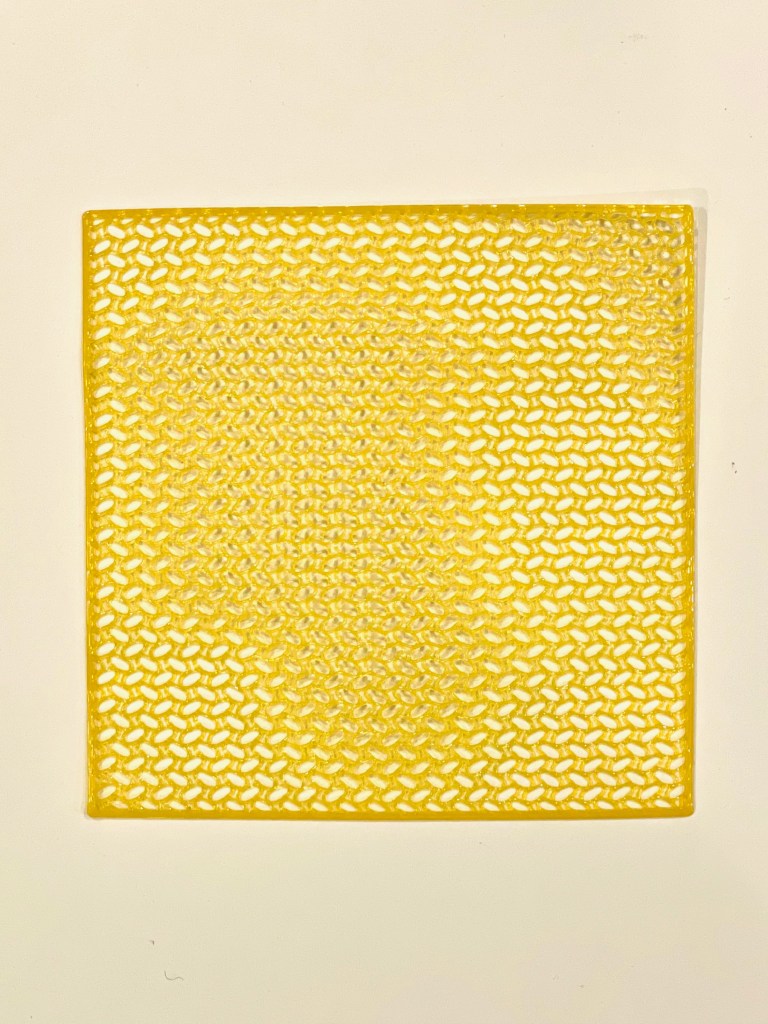

From here I was able to widen the possibilities of patterns and therefore material properties as I better understood my work flow and the abilities of my tools.


Where on the body would I need the most stretch? In what ways? Some of these geometries would be perfect for an elbow! In what ‘wear patterns’ should the textile be thicker/thinner? How airy can my patch be before it’s not durable? How best can I strike a balance between a hardy textile and an aesthetic adornment?
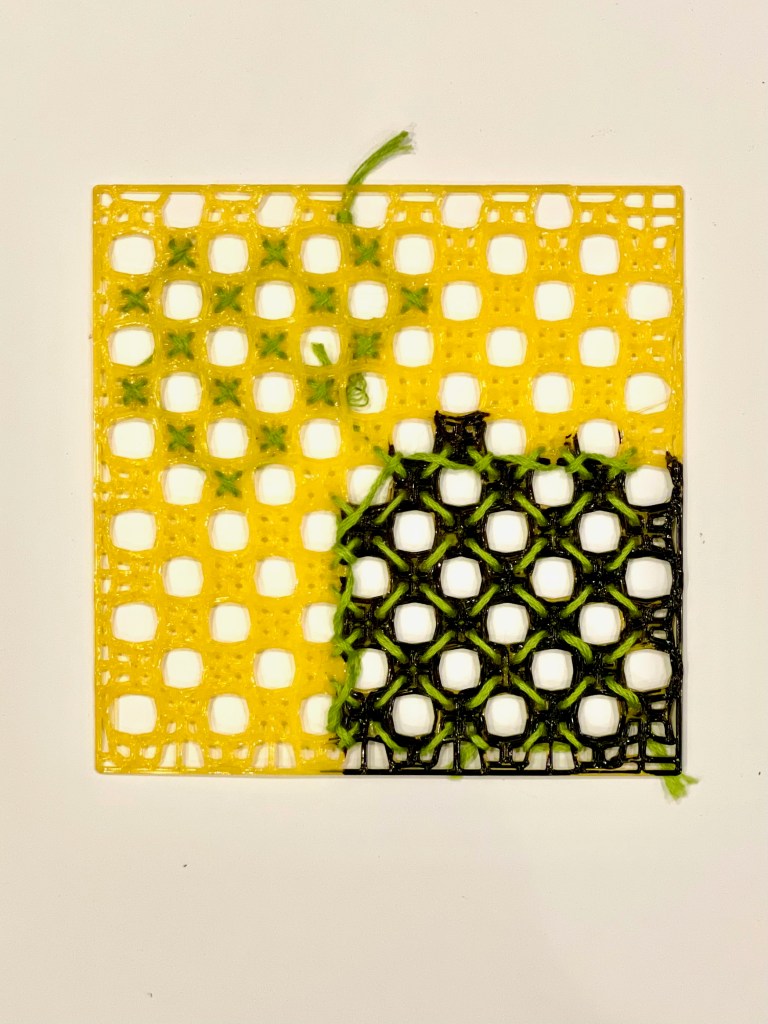
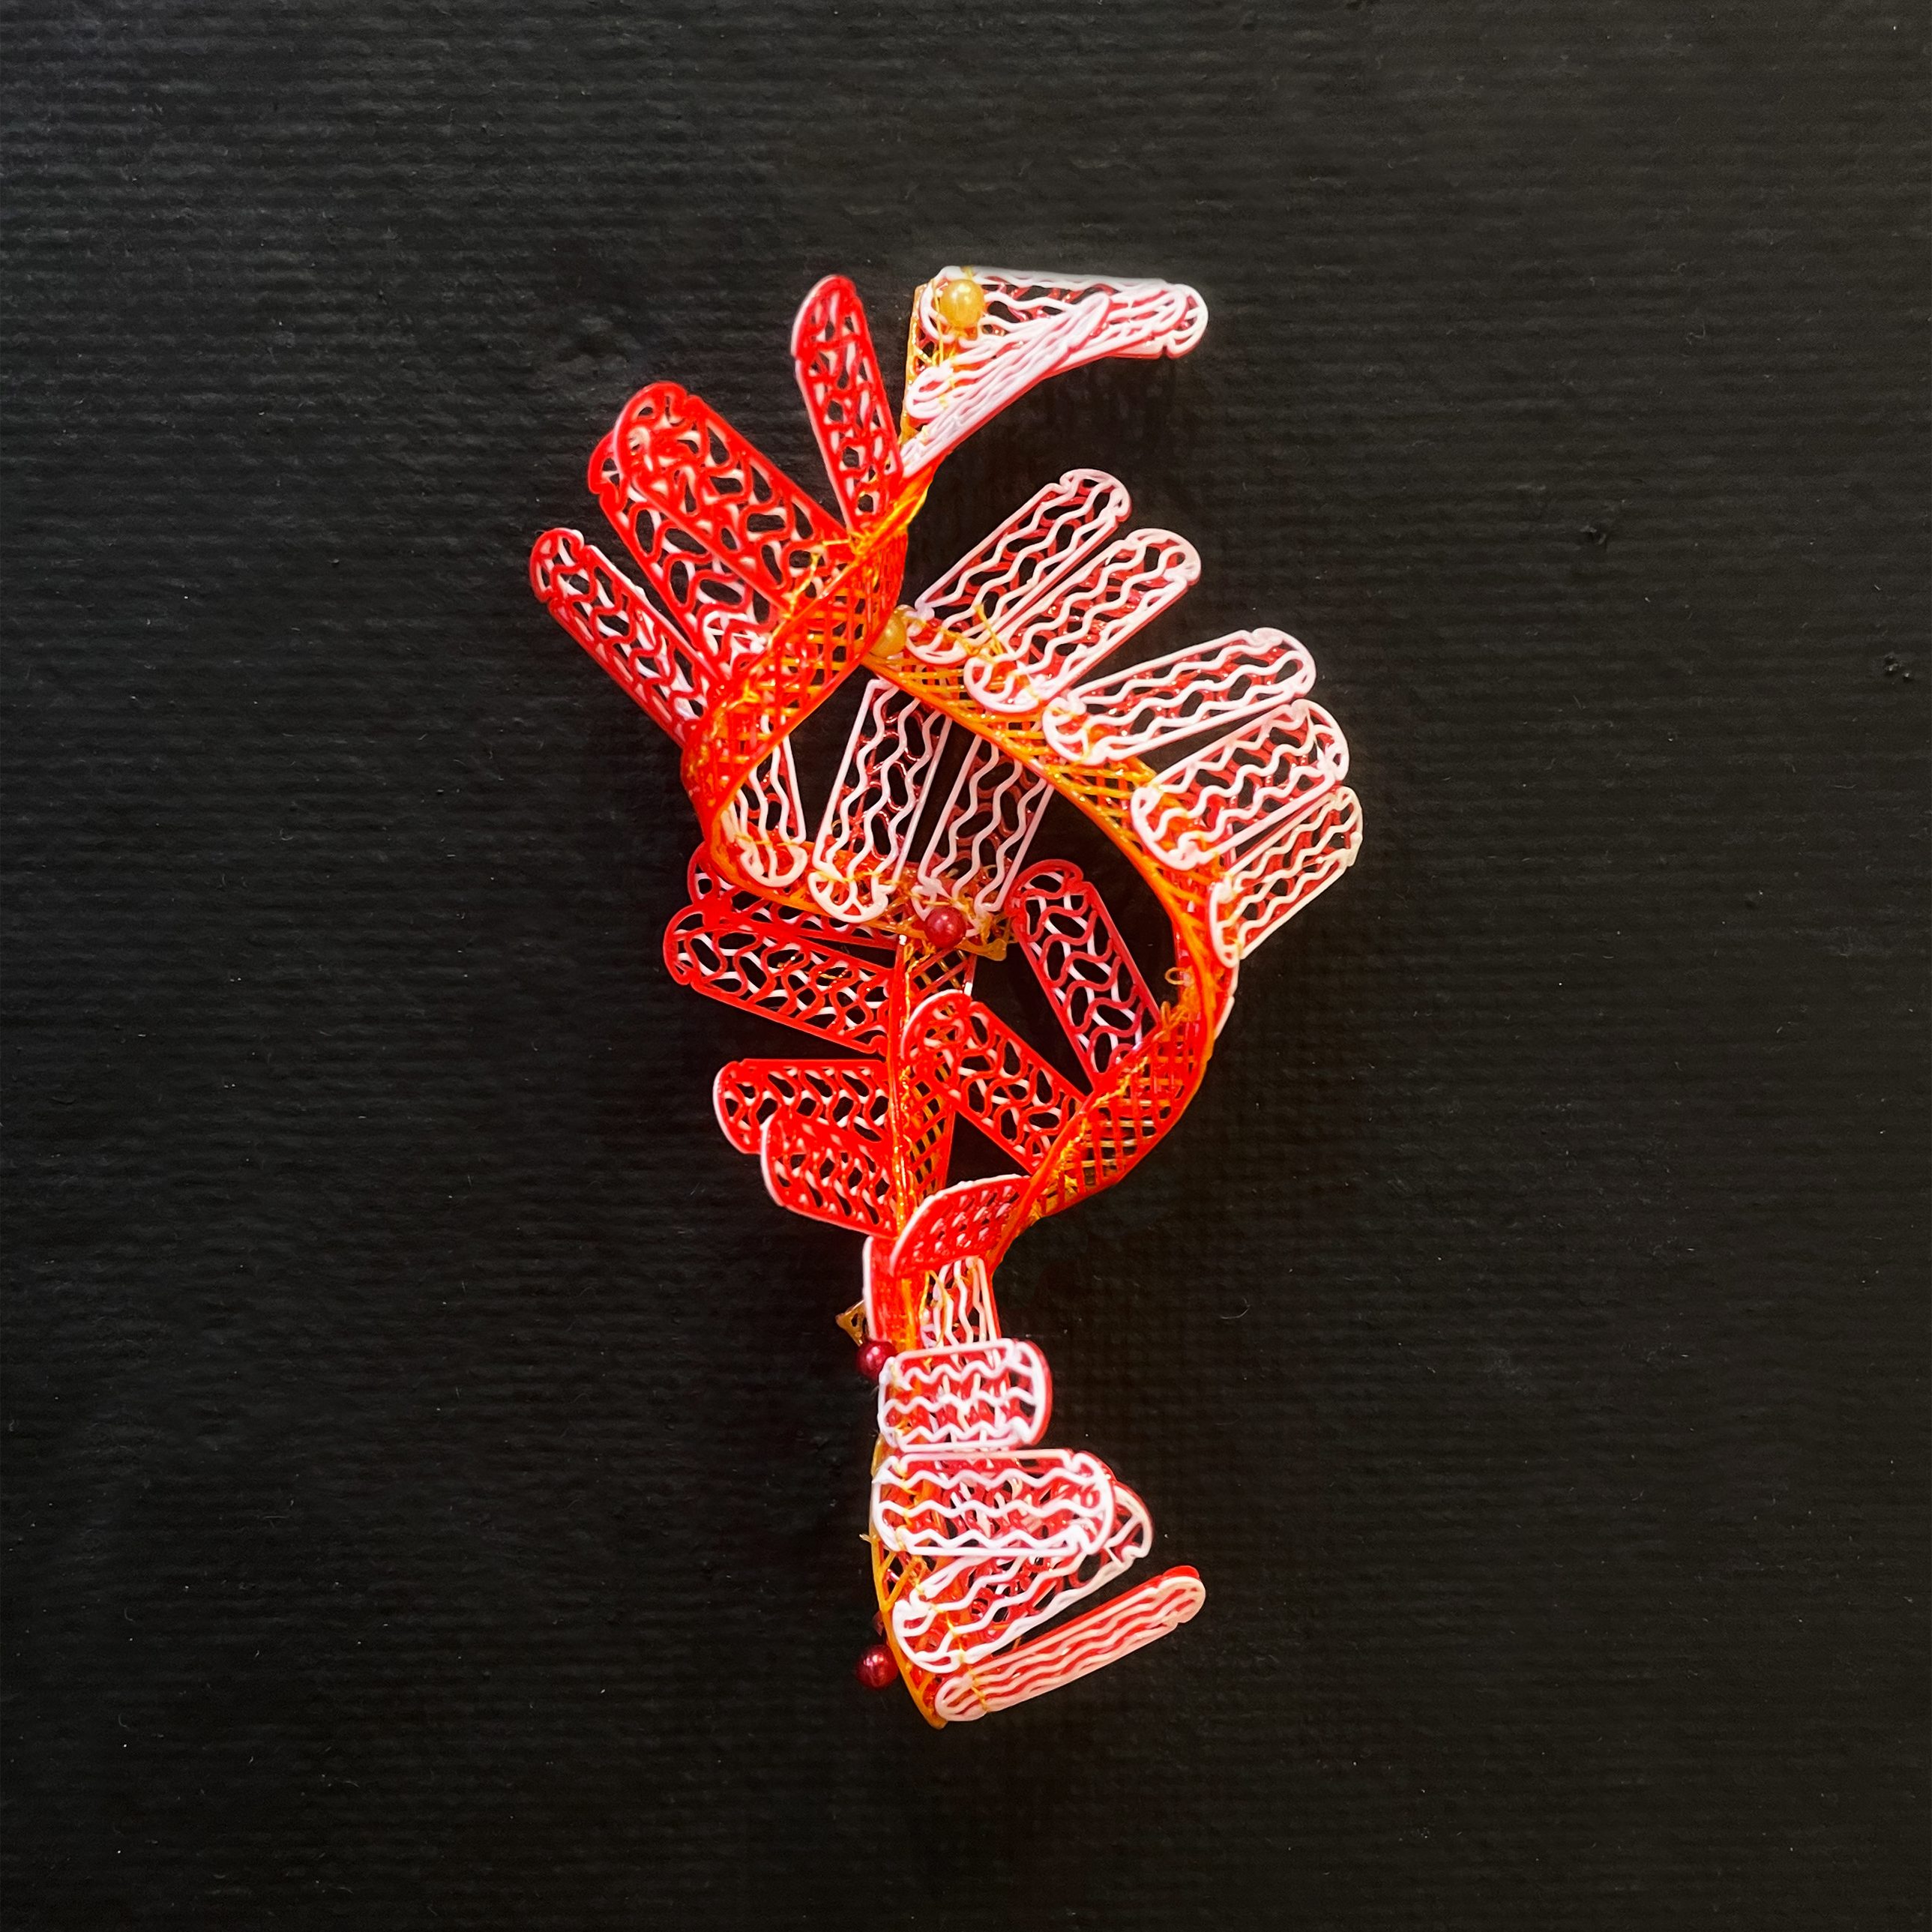
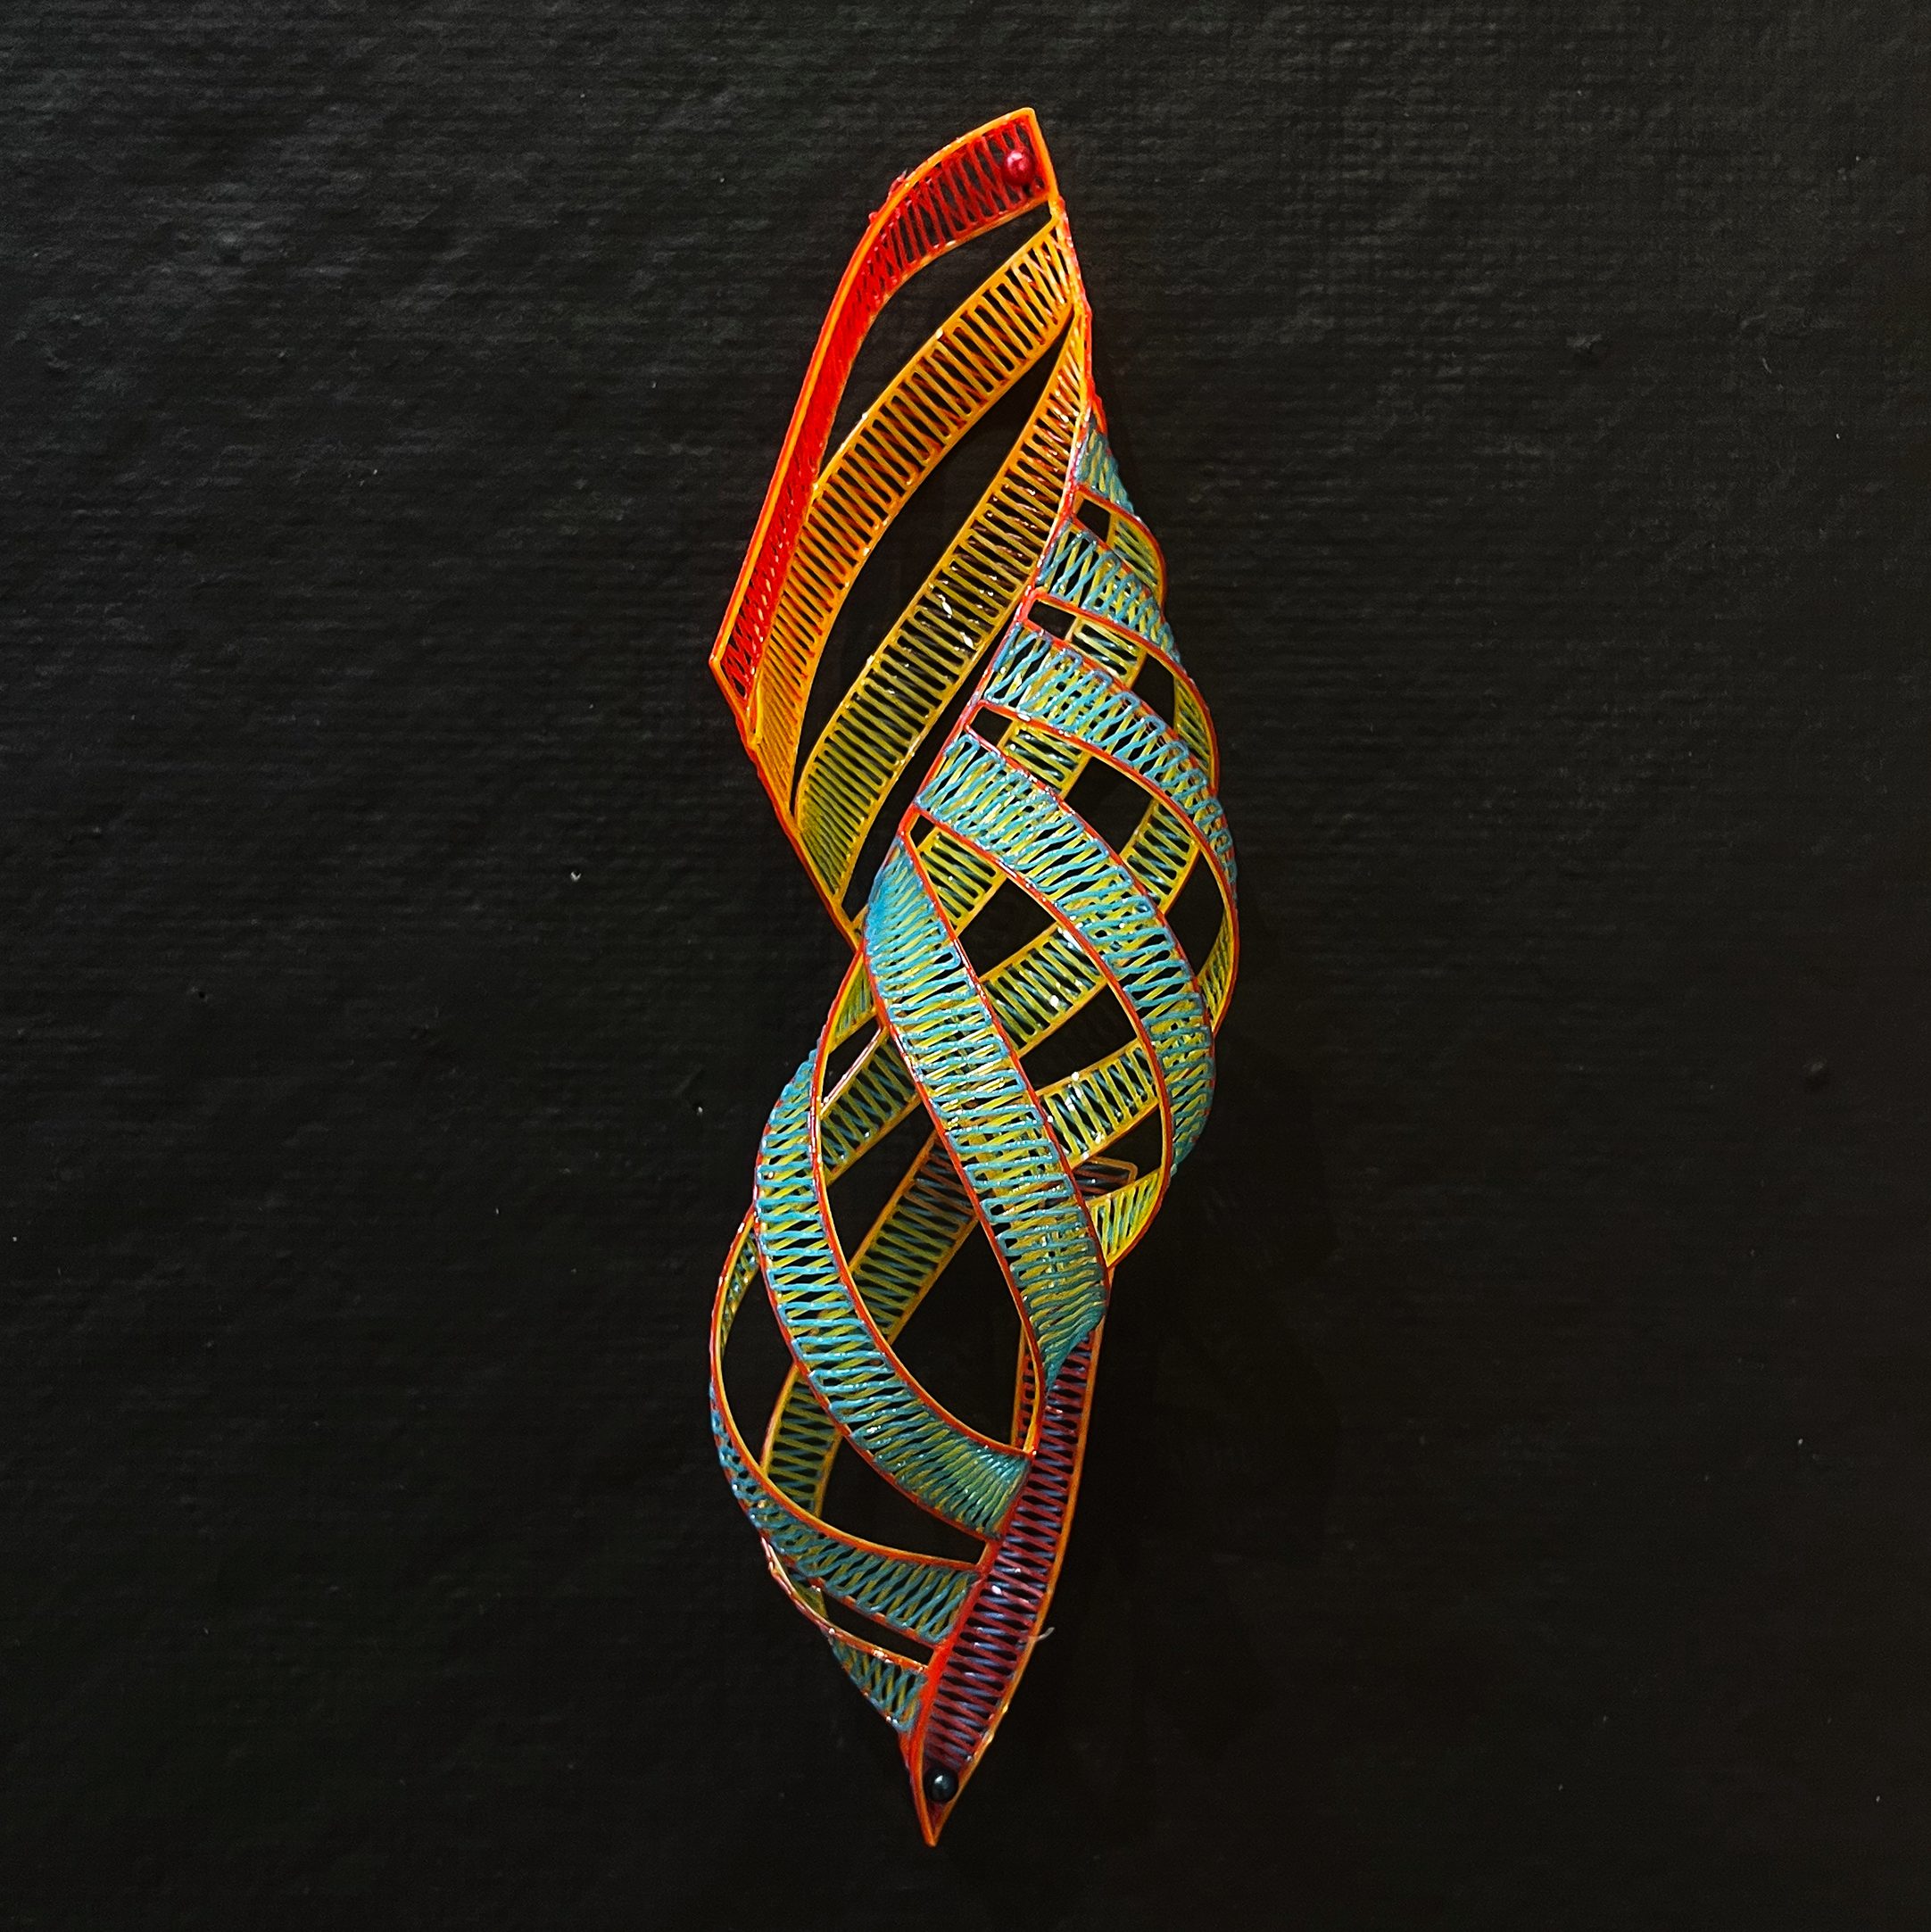
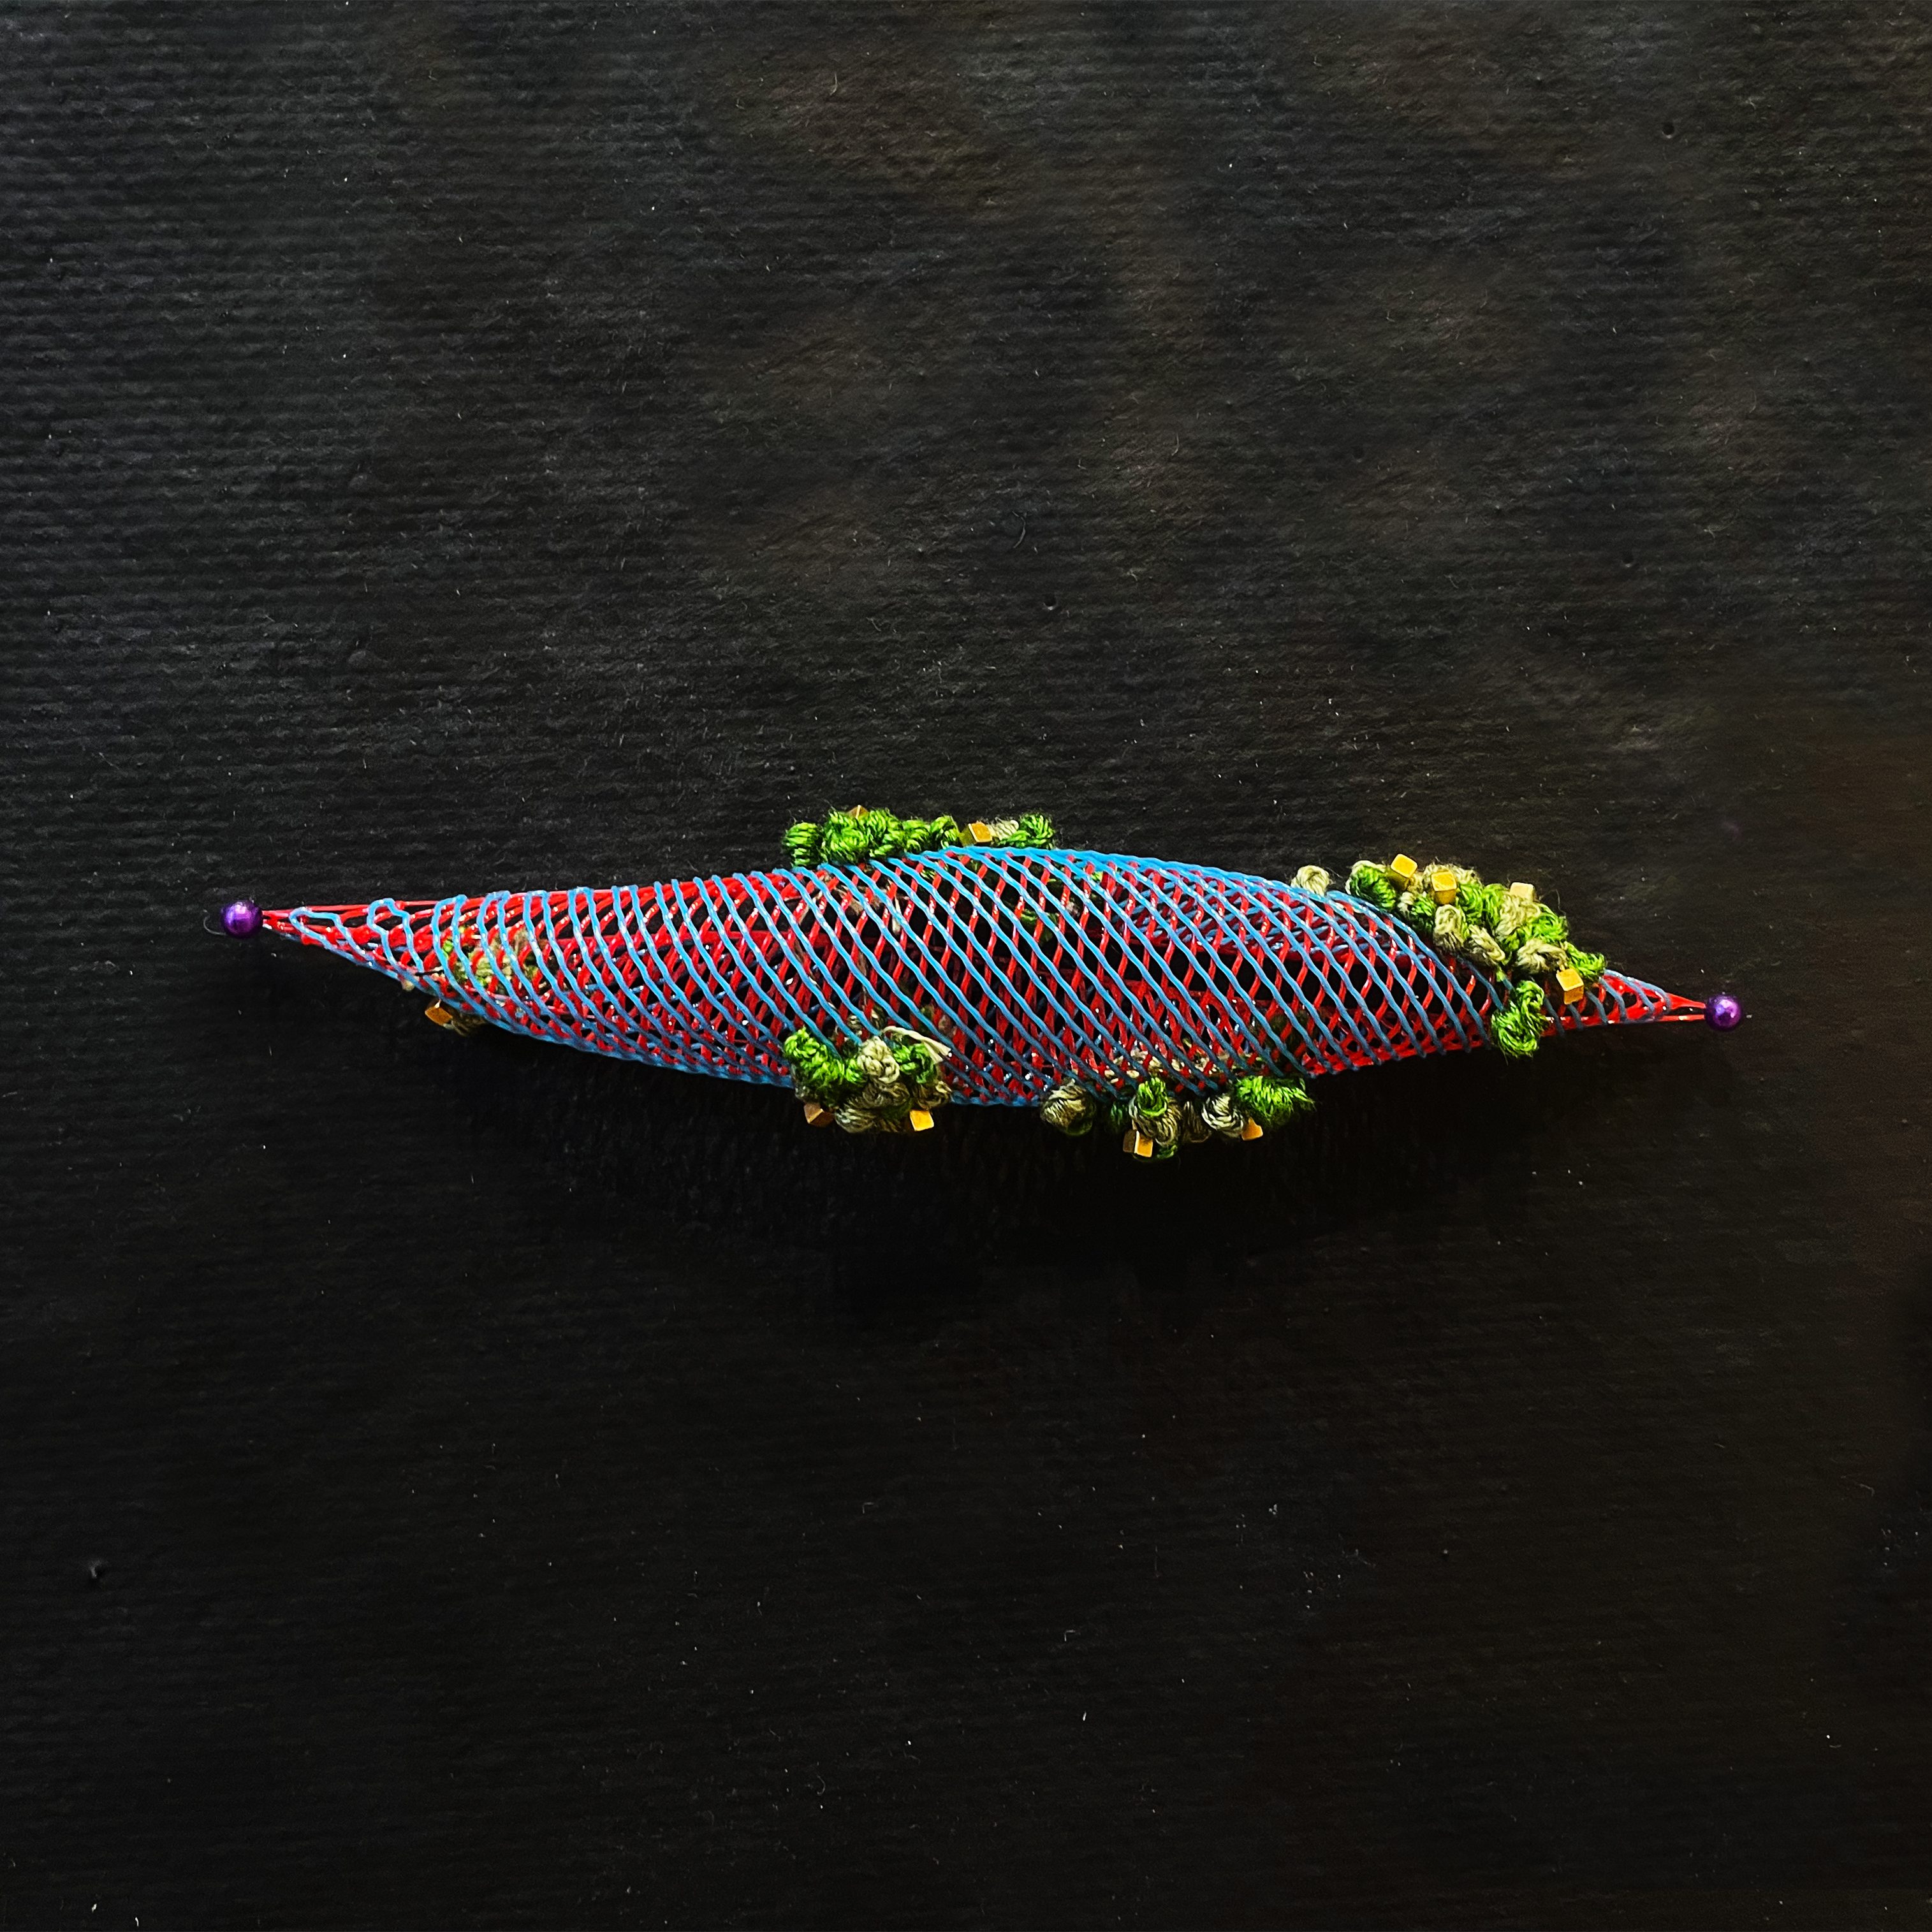
I then combined this research with my original hand embroidered patches to create new versions of the sweaters with TPU patches for each person. Along the way I started pushing the limits of the 3D printer’s capacity. Our printers in the Digital Design Studio at Wes only had one nozzle, so prints could only ever be one color. As well, the TPU manufacturer only created five colors; Red, blue, yellow, black, and white. I learned to manually override this system, creating multicolor prints and therefore expanding the three primary colors available to all possible permutations (red & yellow, yellow & red, red & blue, blue & red, etc.)
My TPU sweater:


In the final version [left picture] I have added embroidered waves to the patch, calling back to the Charles River
Sarah’s first TPU sweater:

cuff where Sarah gets the wear
Sarah’s second TPU sweater:
This ‘patch’ was visible from the onset of creation as Sarah was too excited to wait for the eventual wear down and reveal
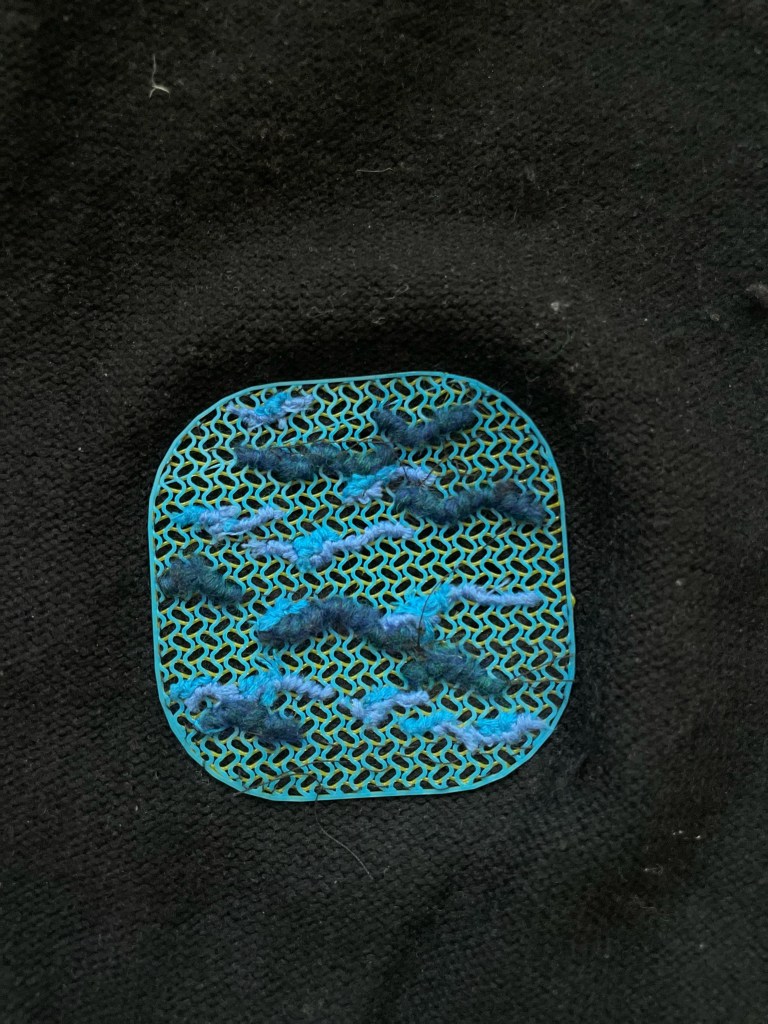
Emma’s TPU sweater
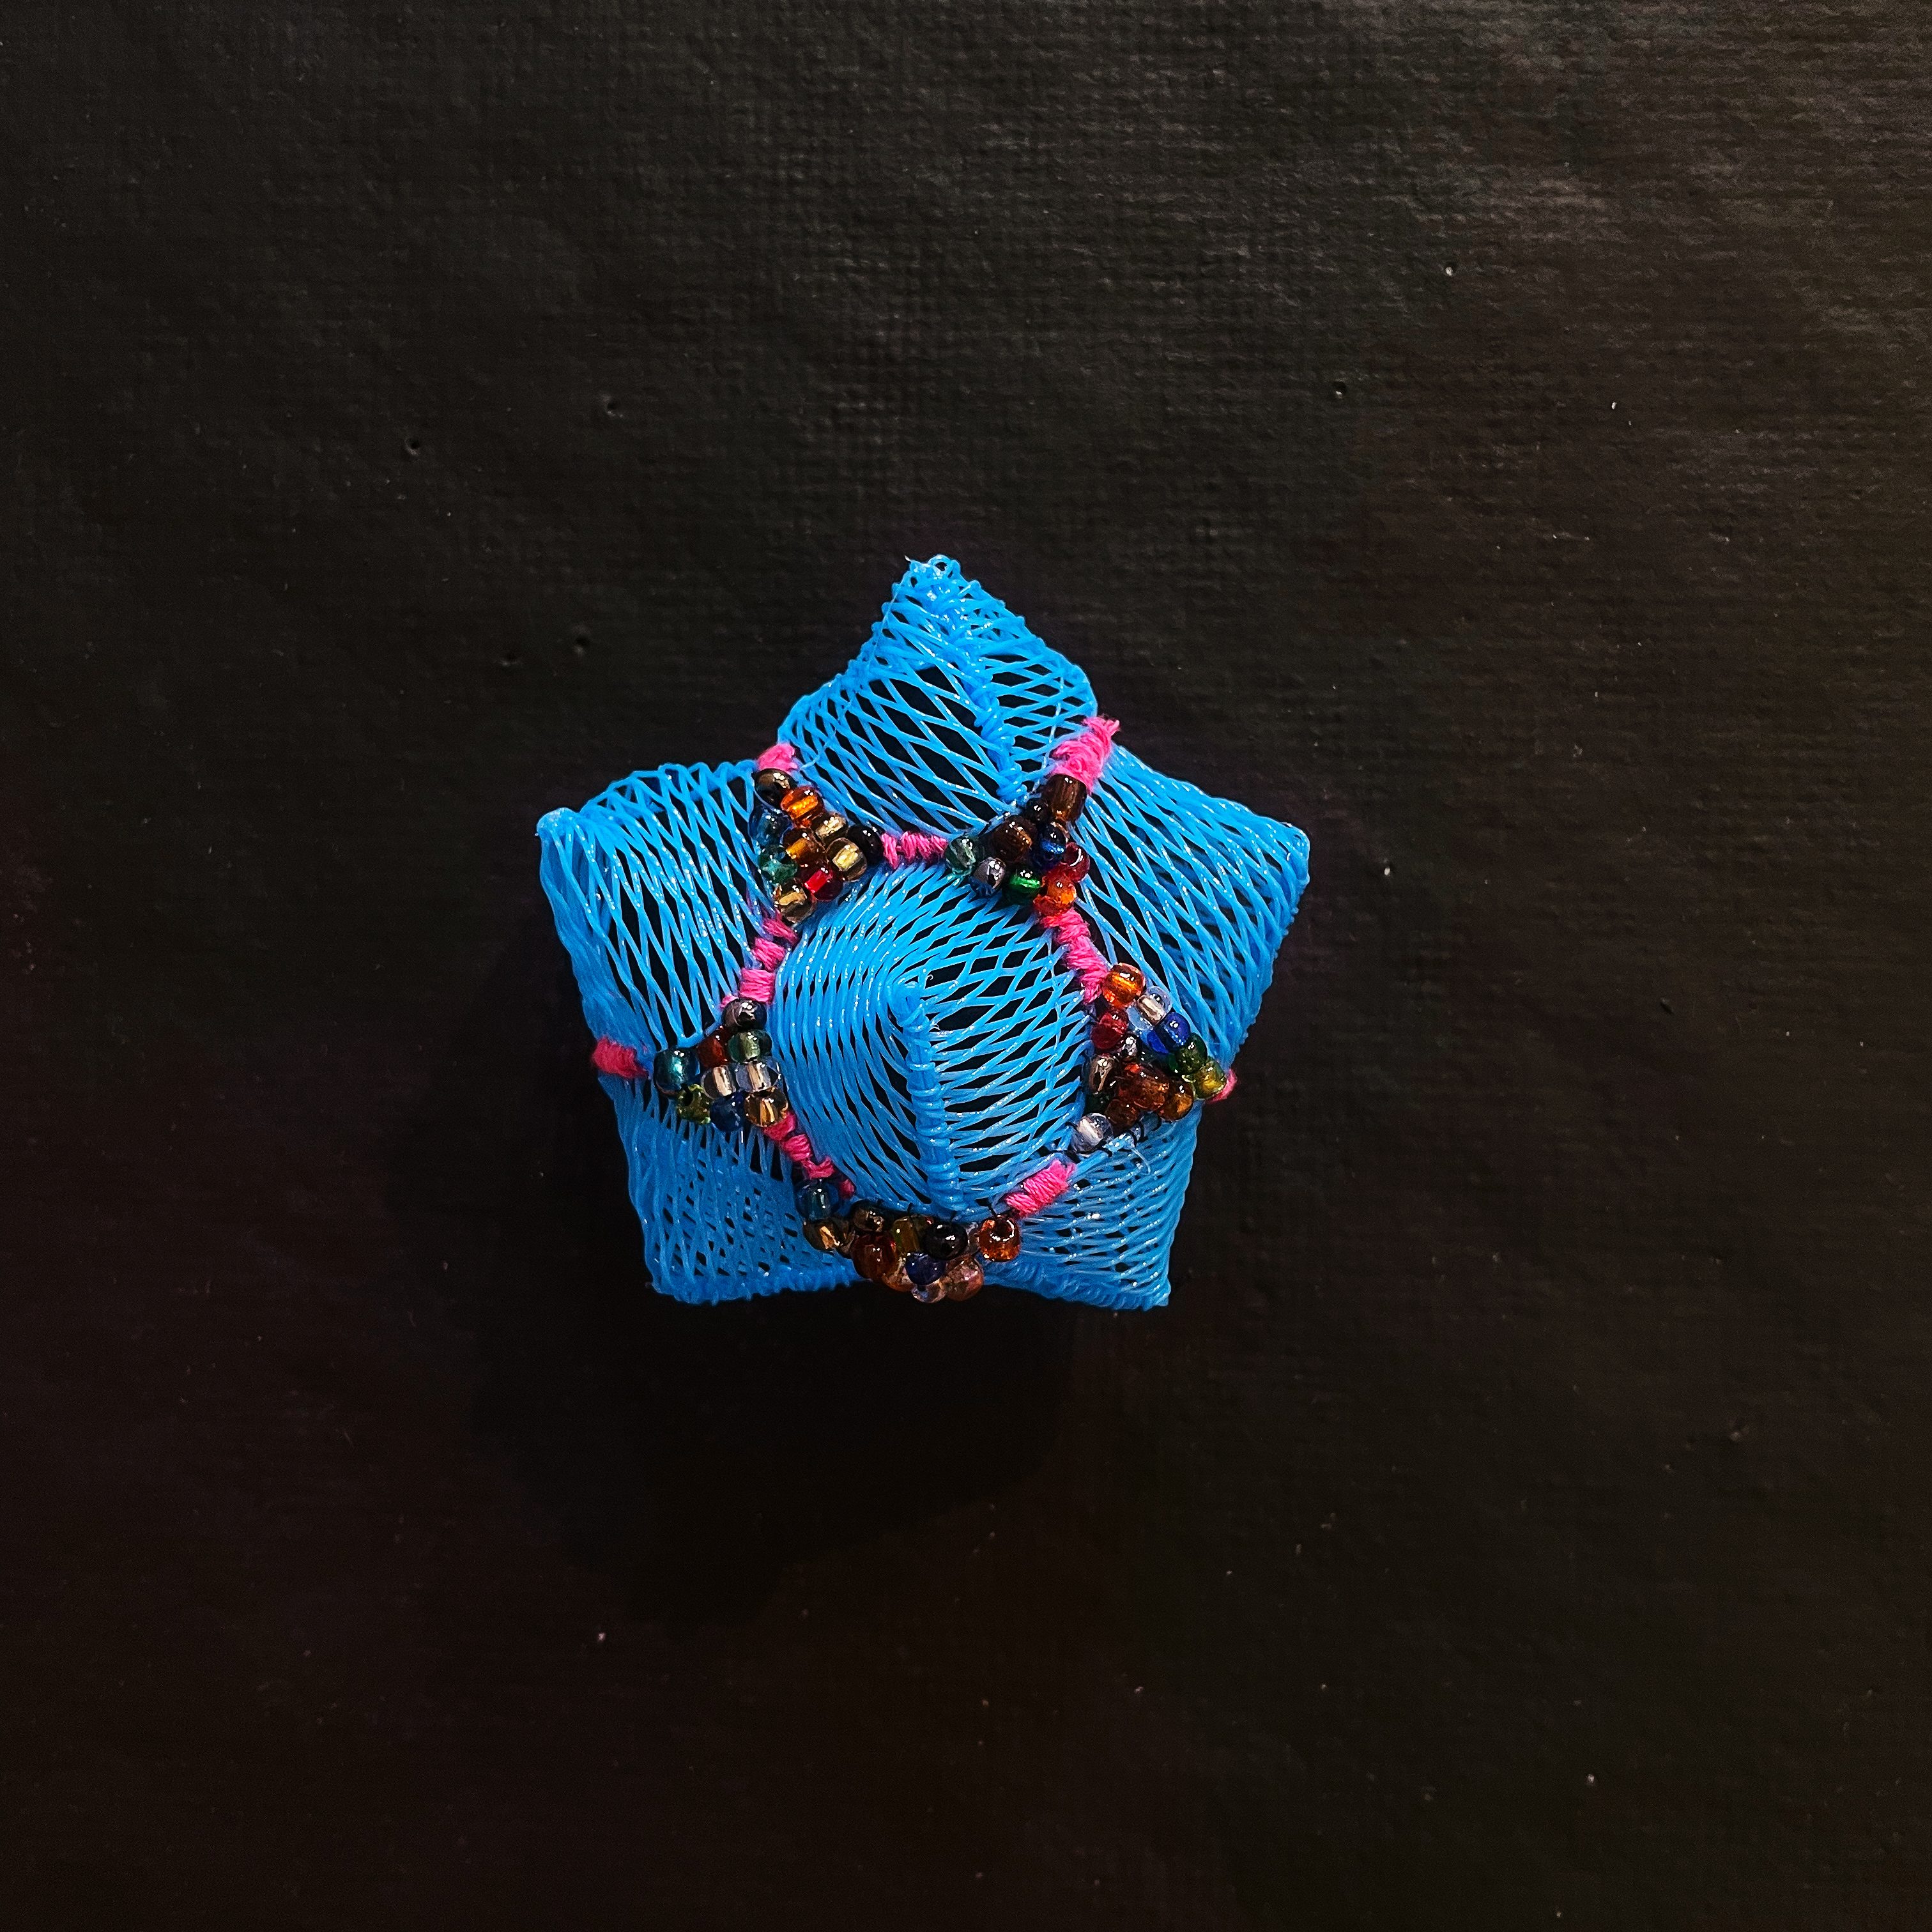
Emma’s two hip patches ended up being comprised of 26 pieces each. I really wanted to apply all that I had learn to these last patches and so added in some of the permeations of colors: red & blue, blue & yellow, blue & blue. As well, in line with Emma’s inspo board we brought in the organic amorphous shapes she liked.

In total there were 26 of these files

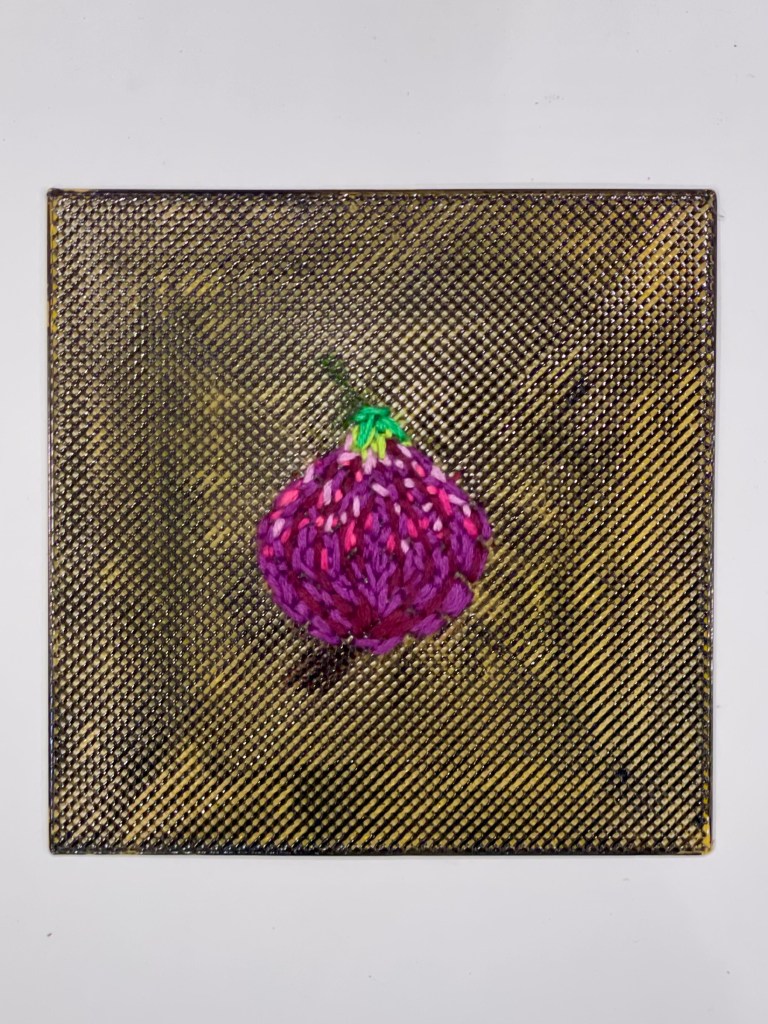
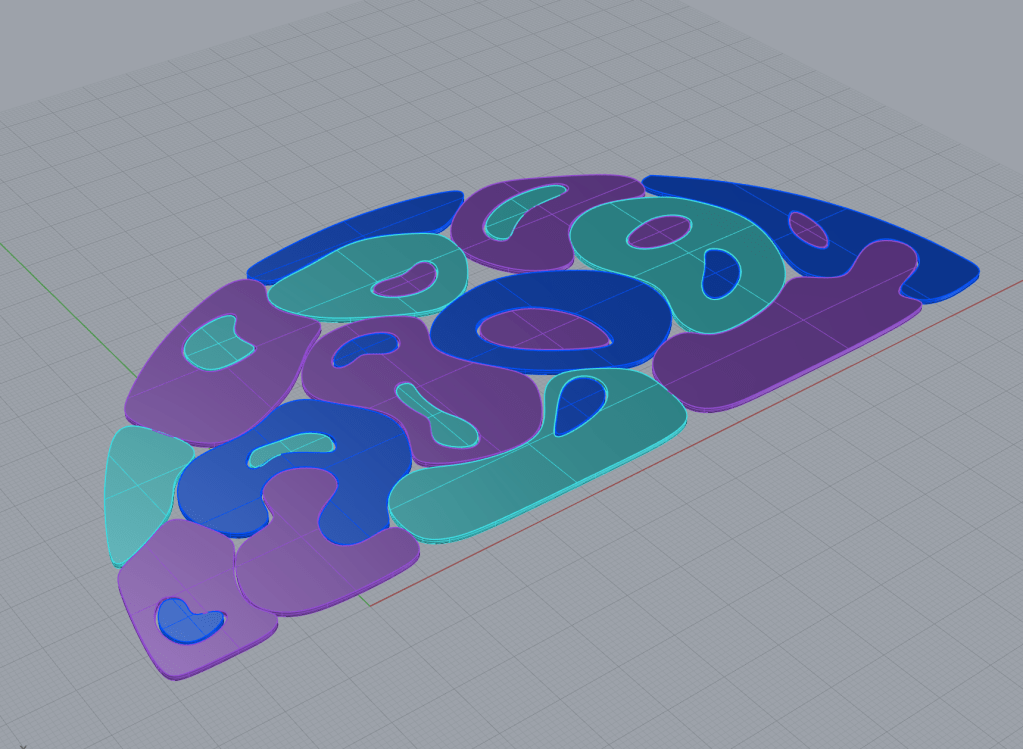
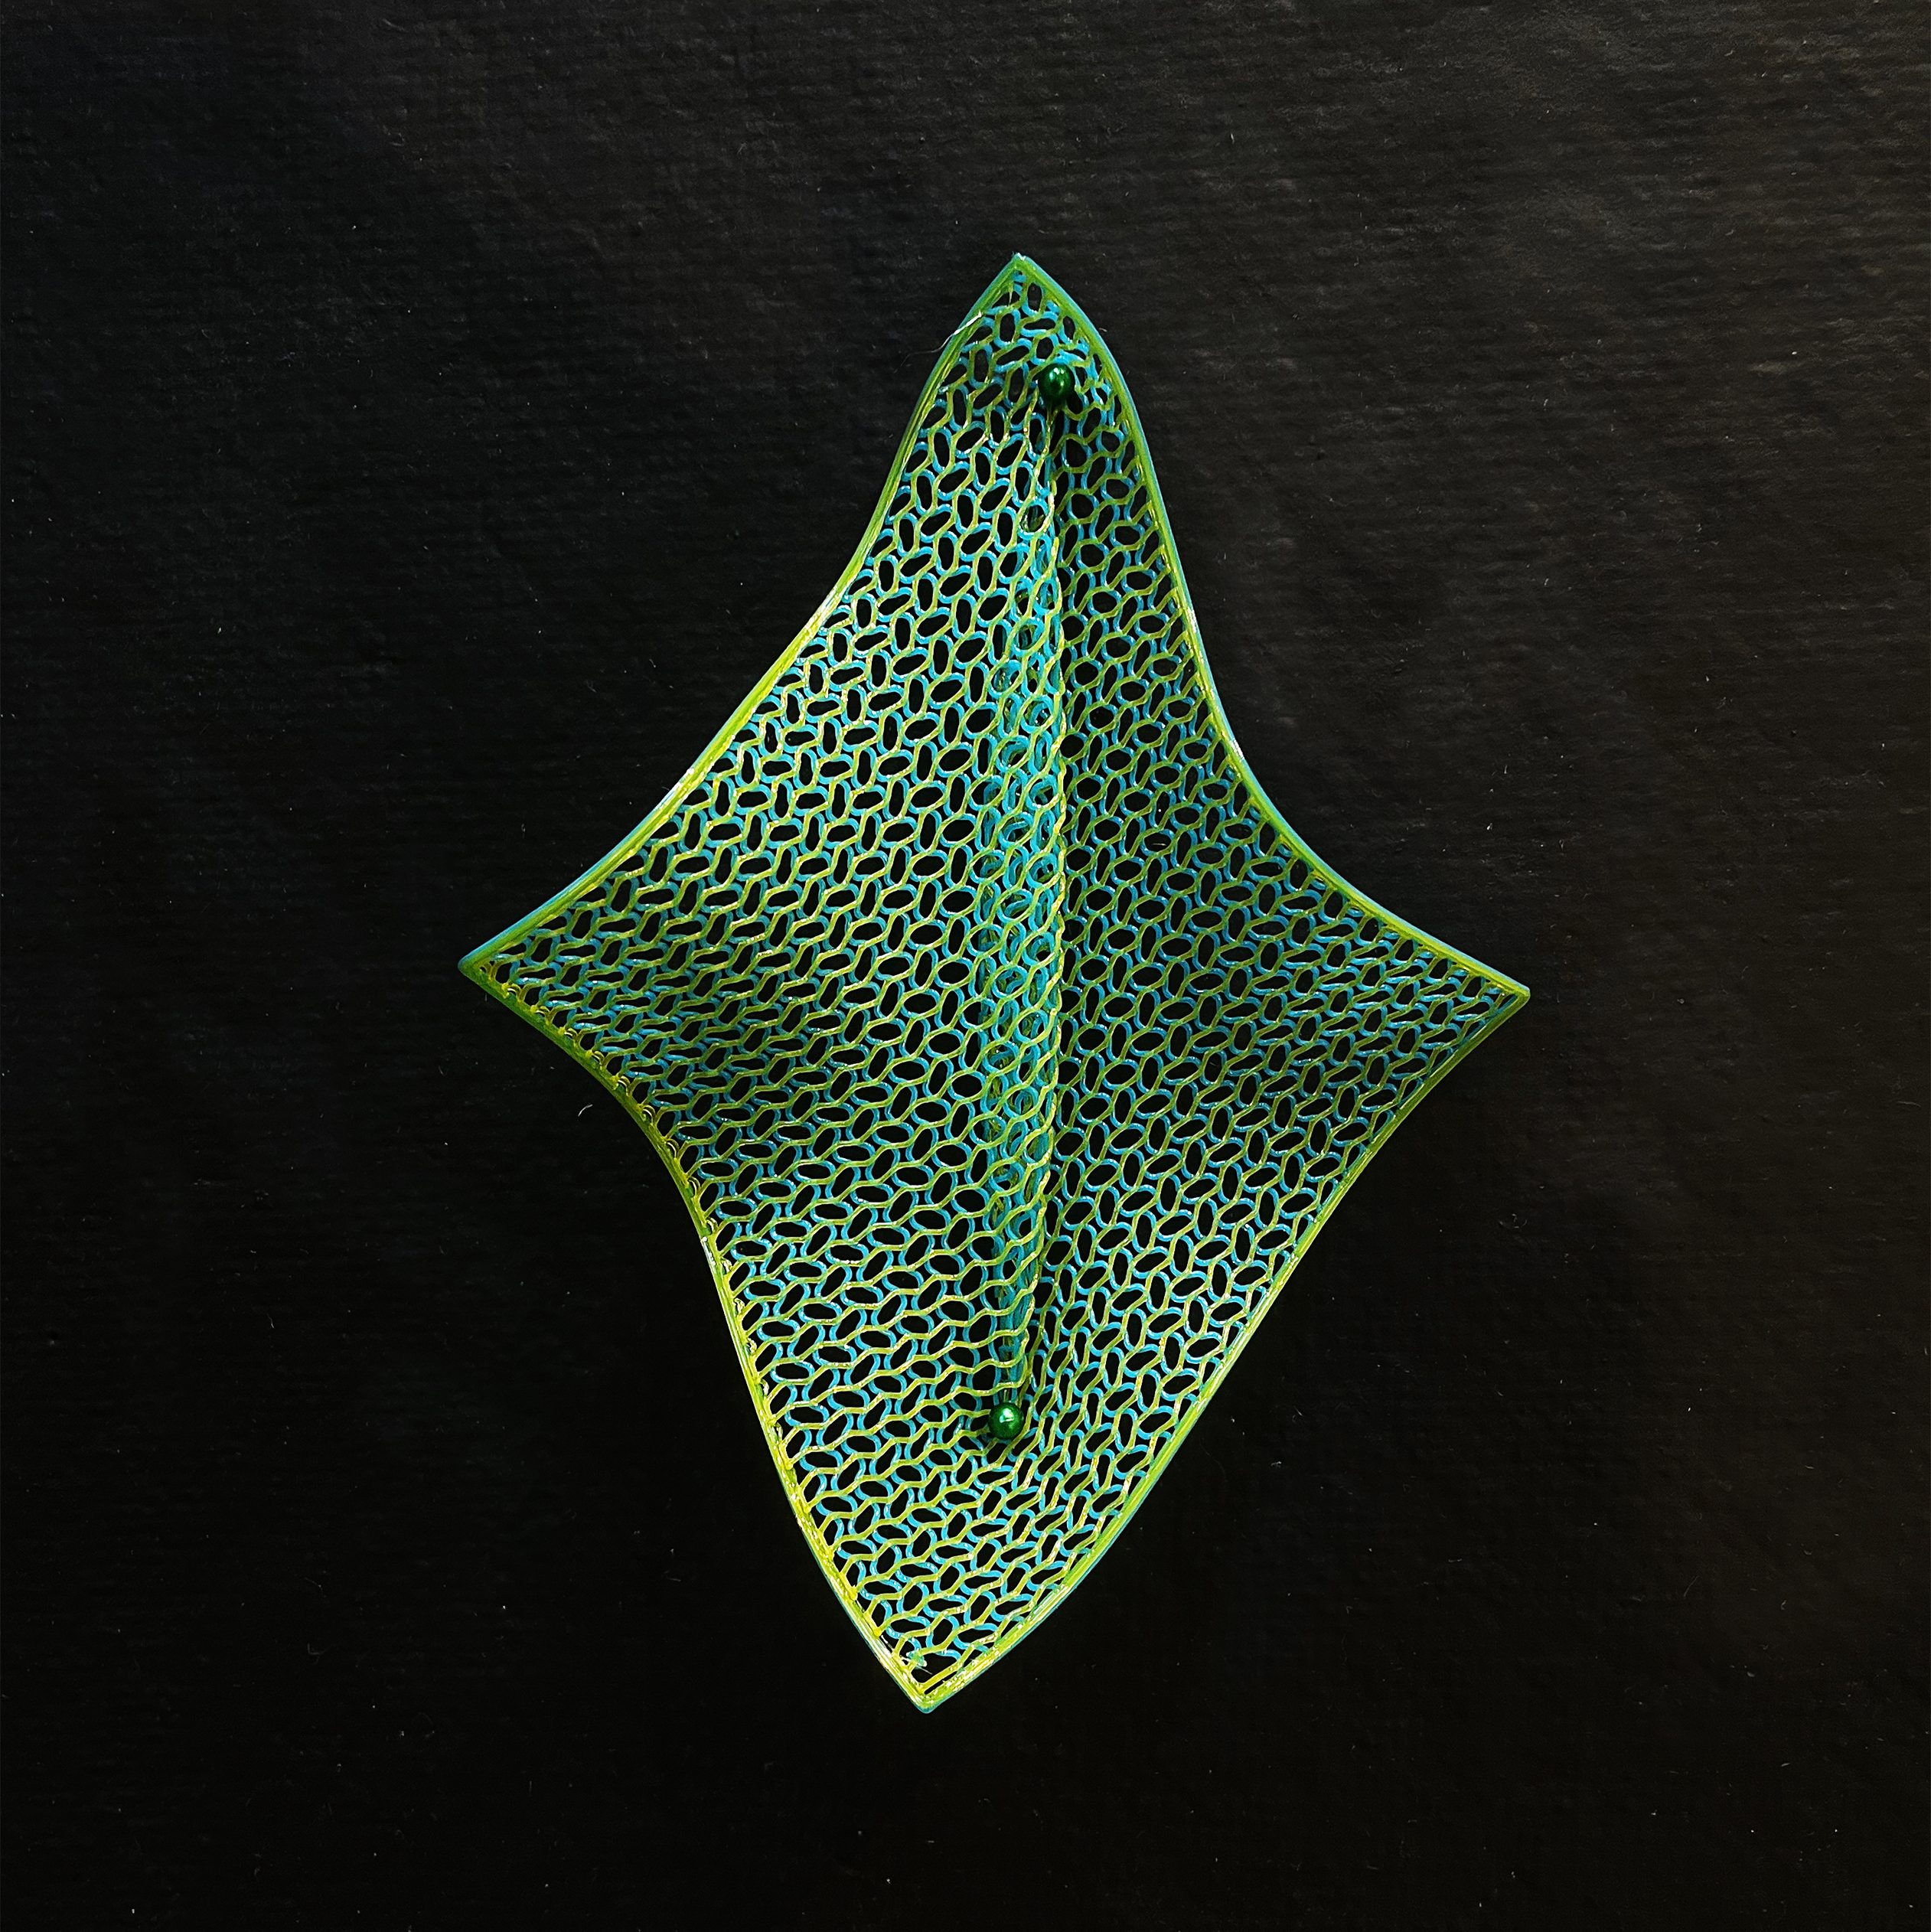
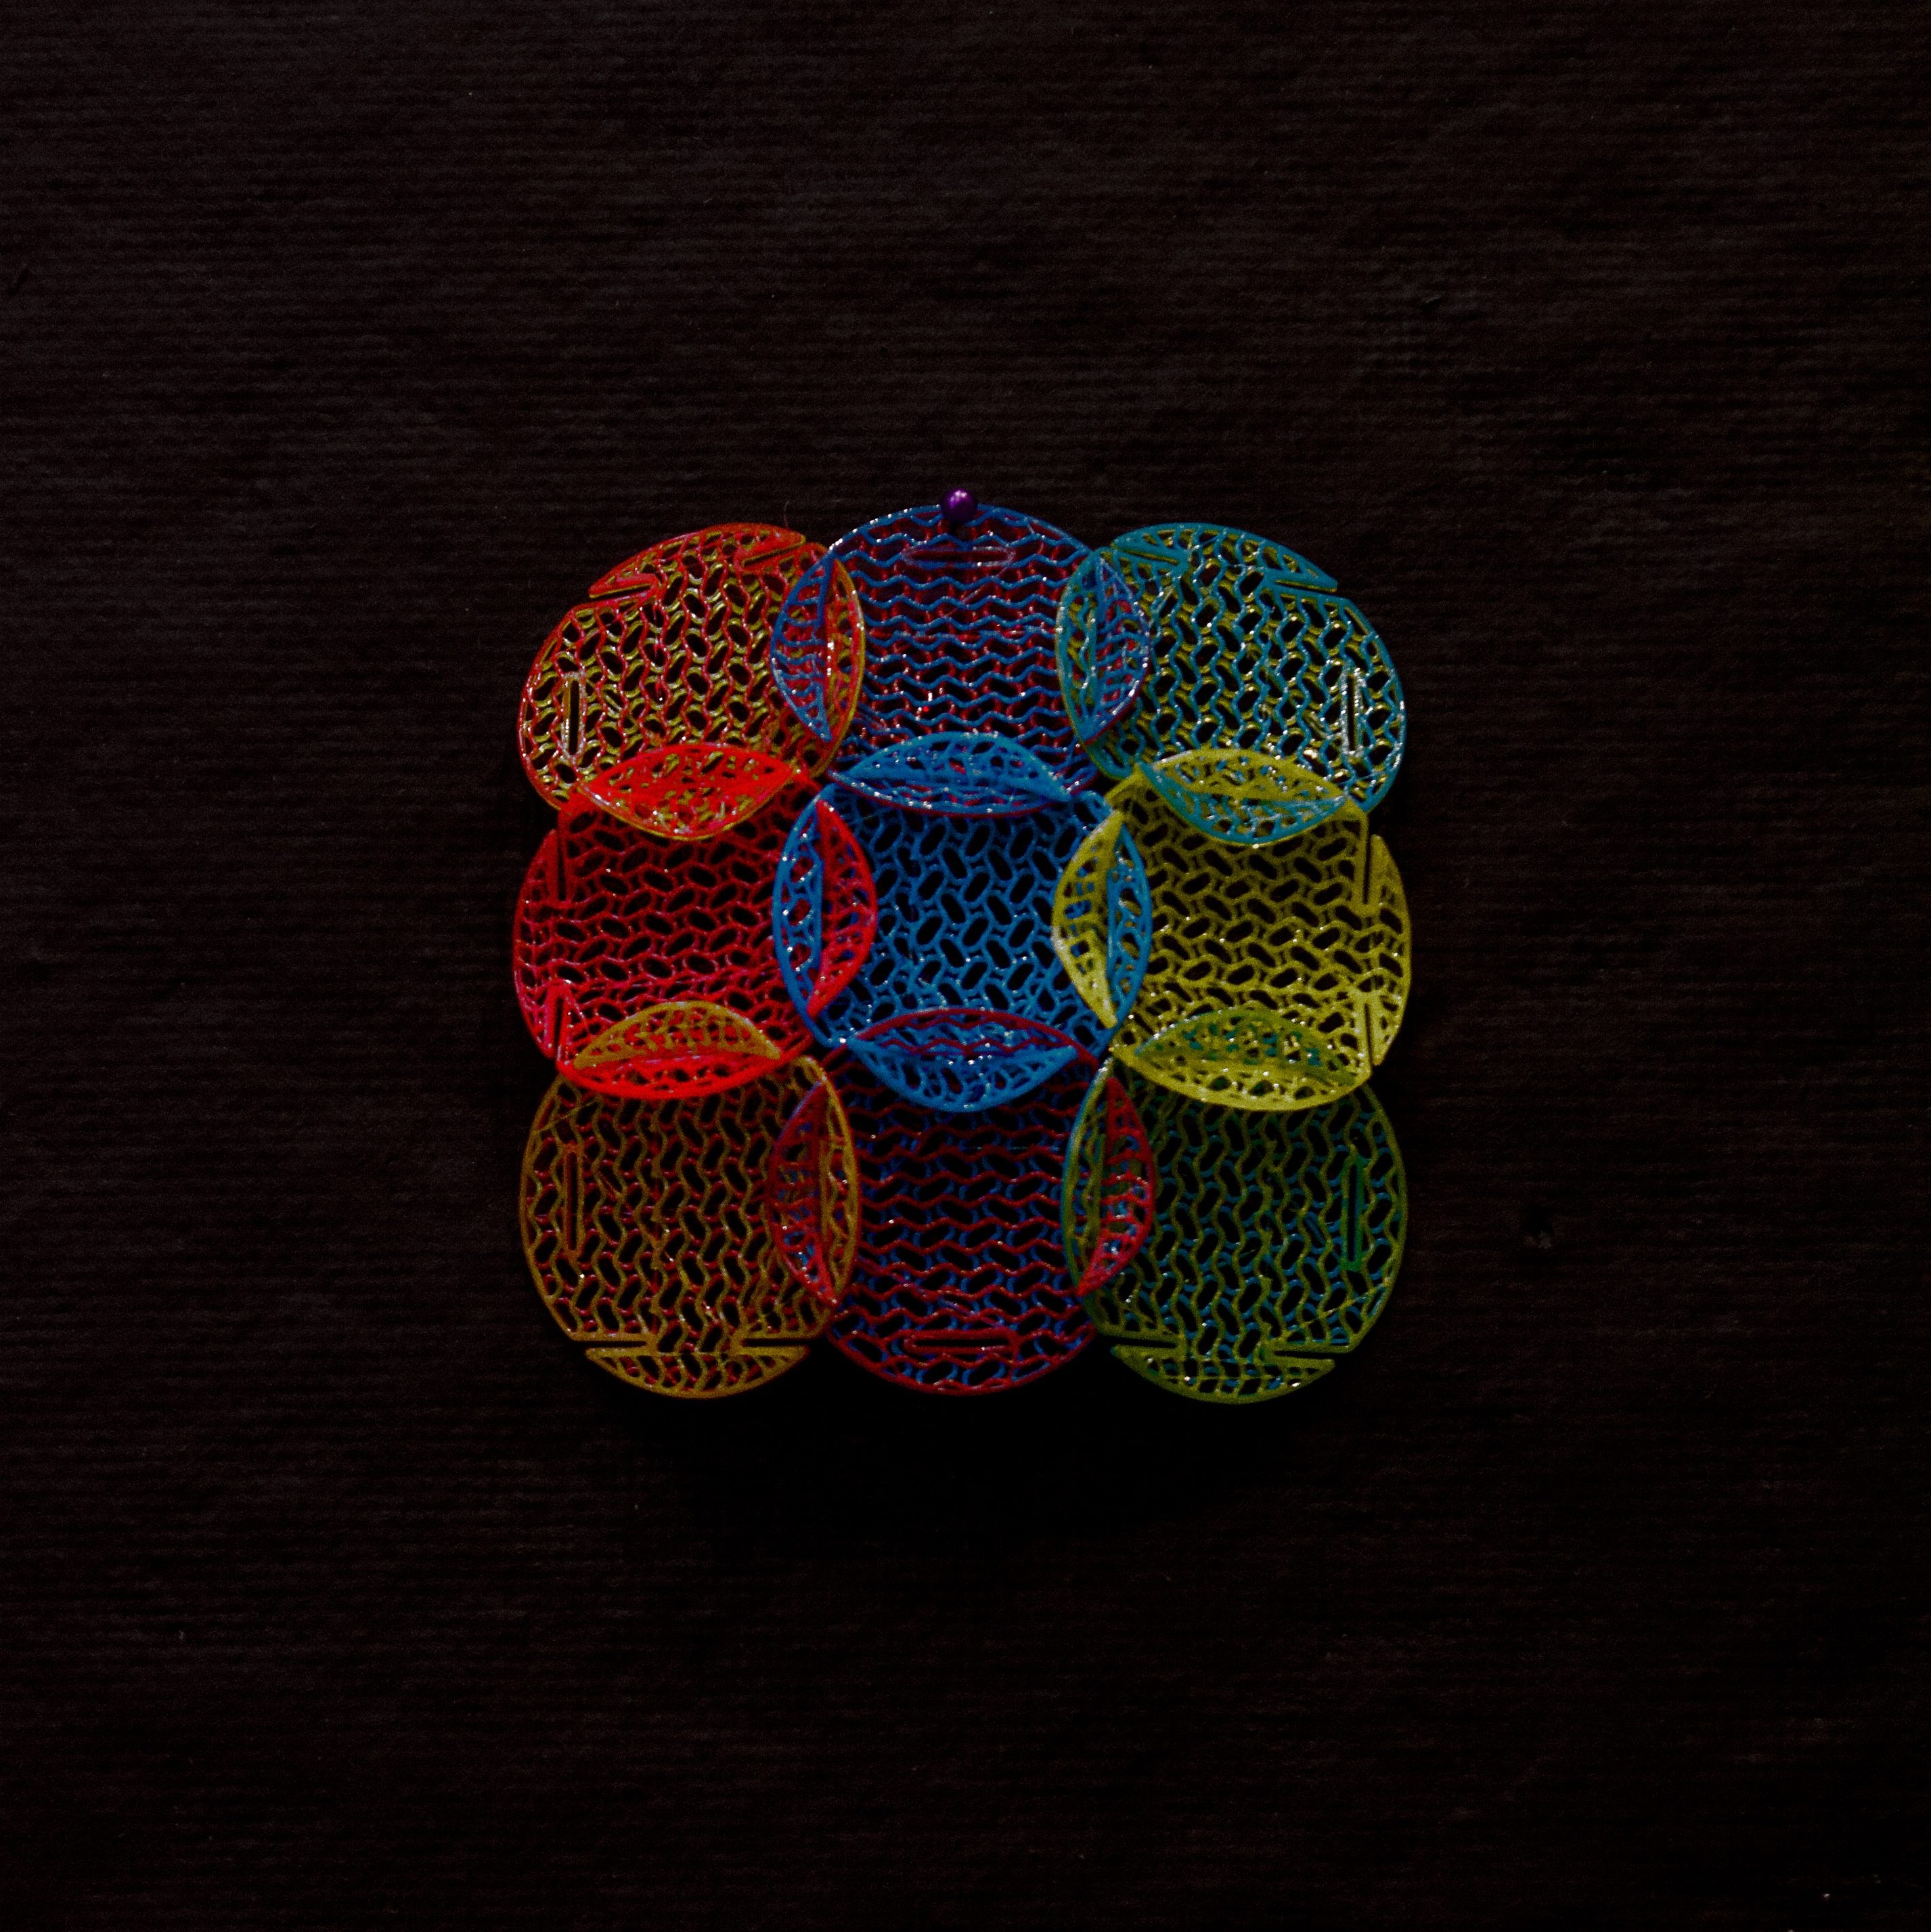
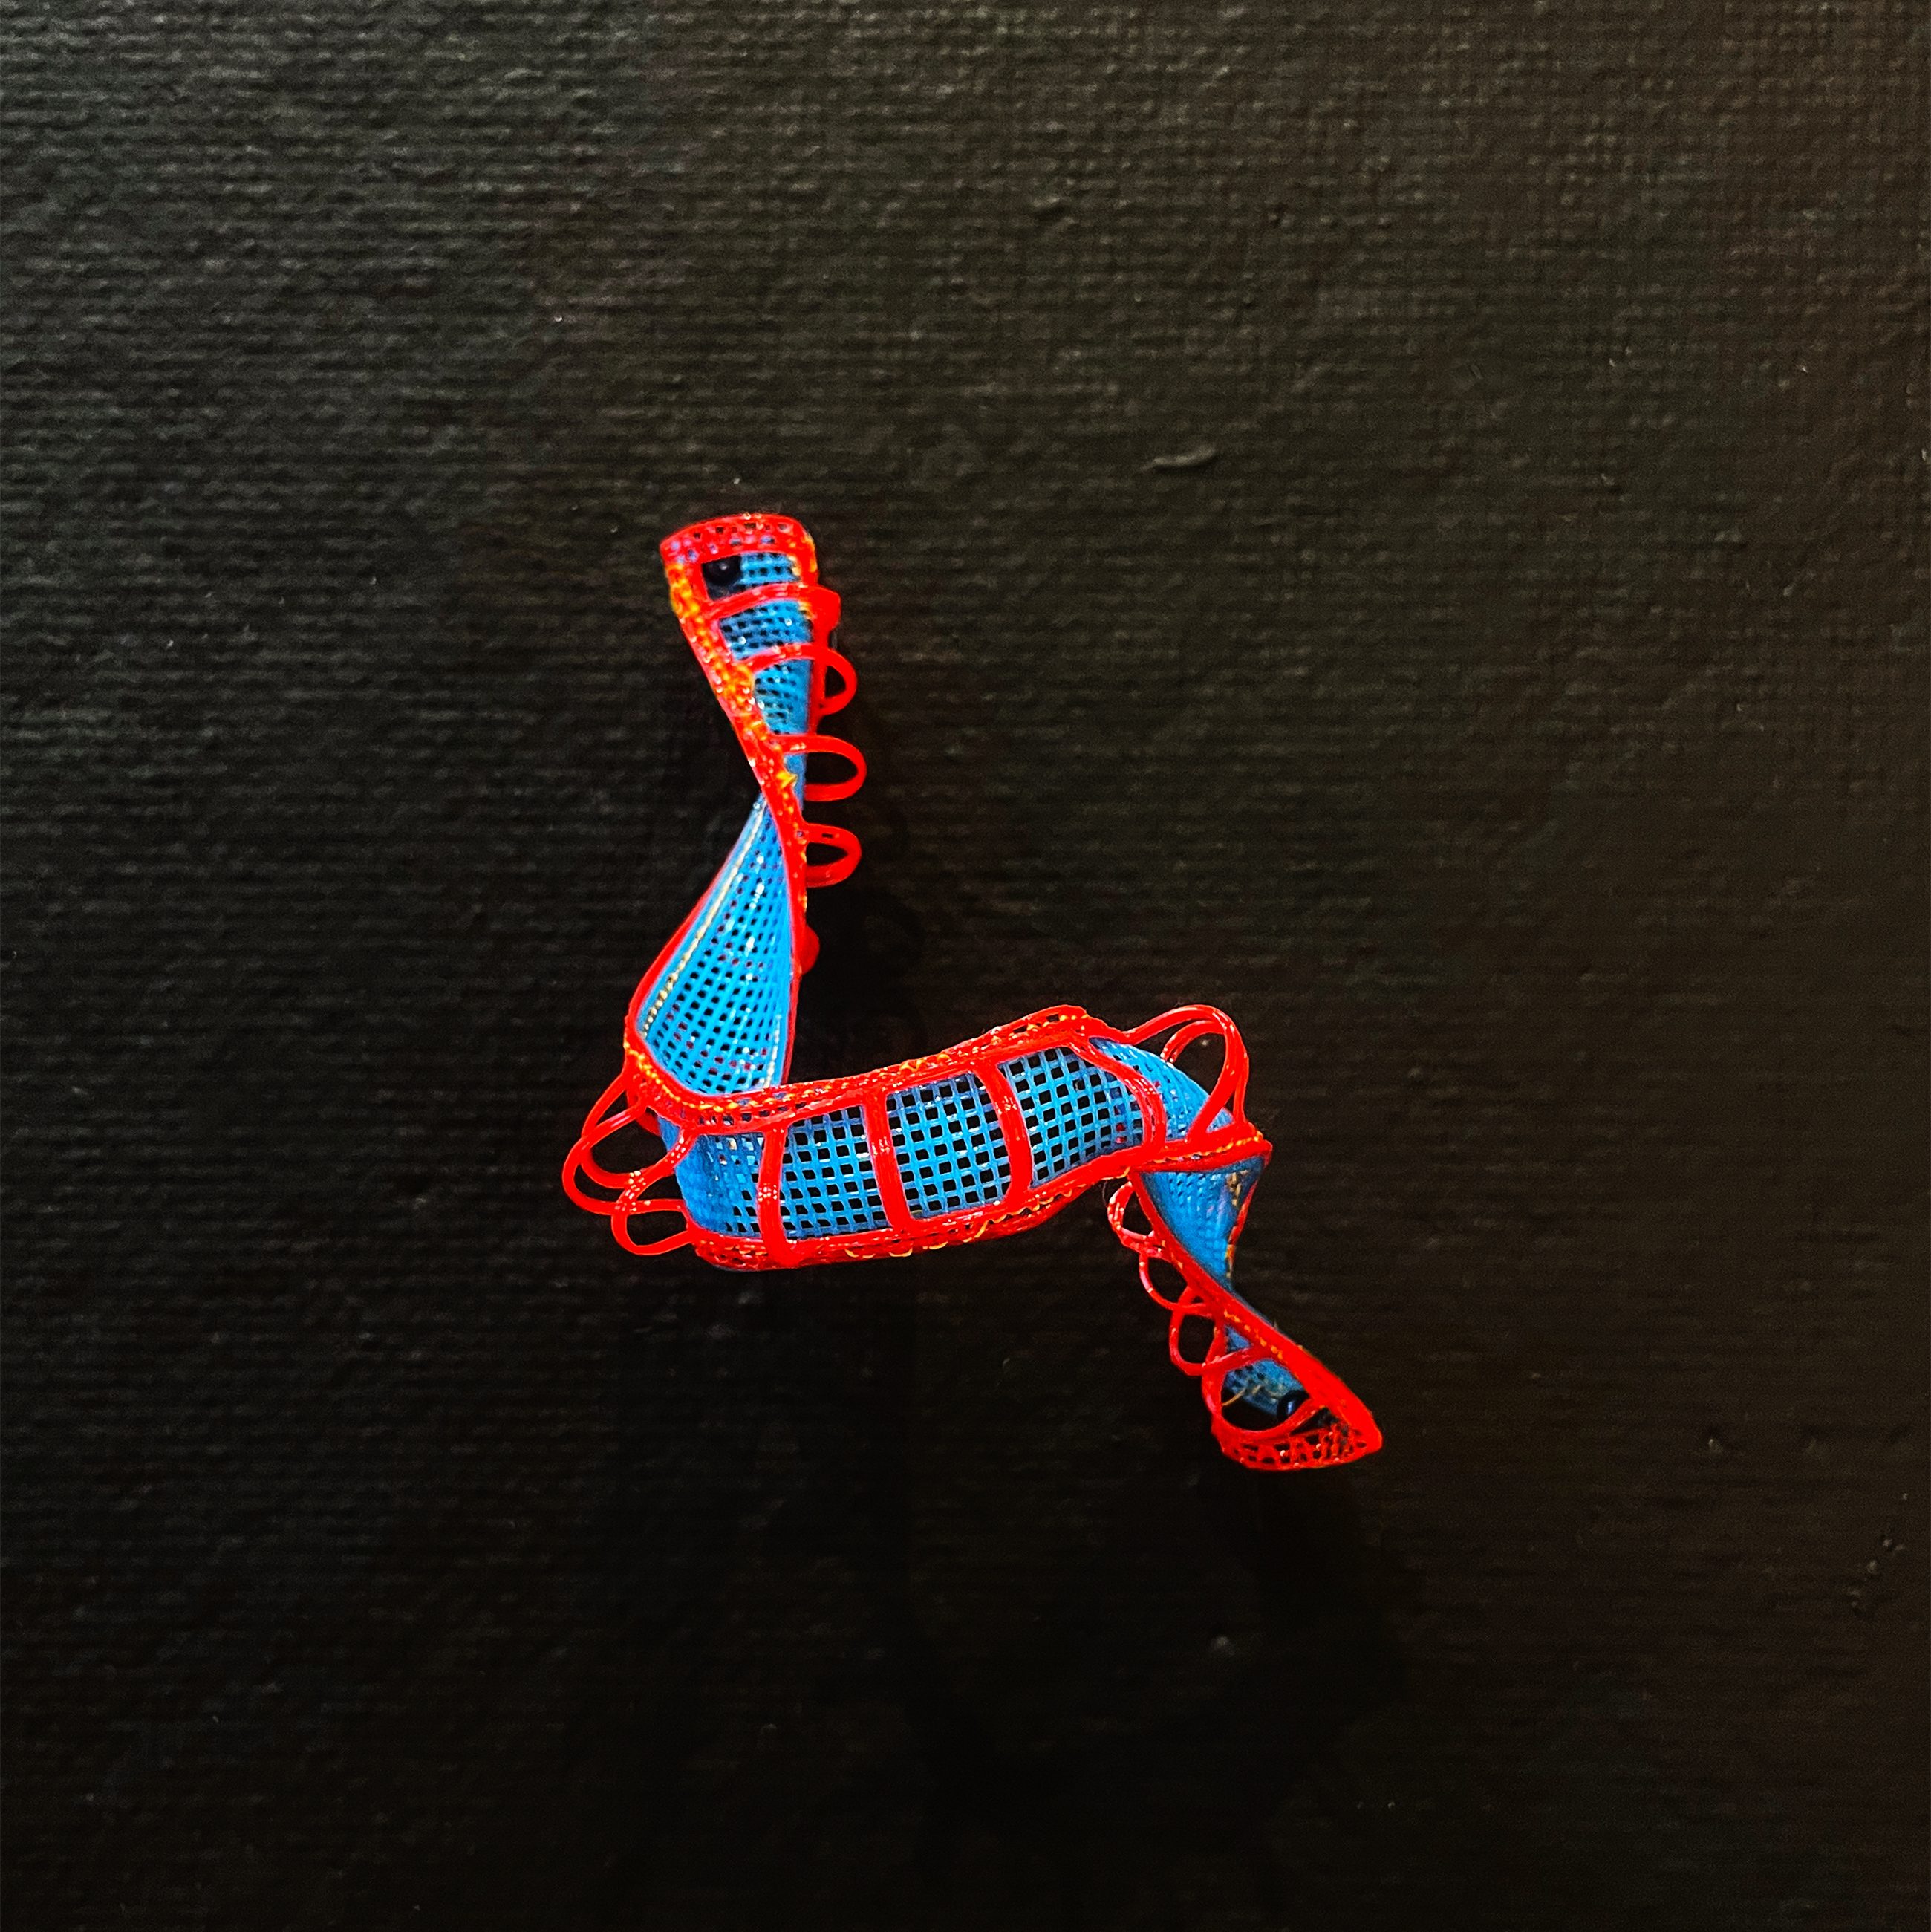
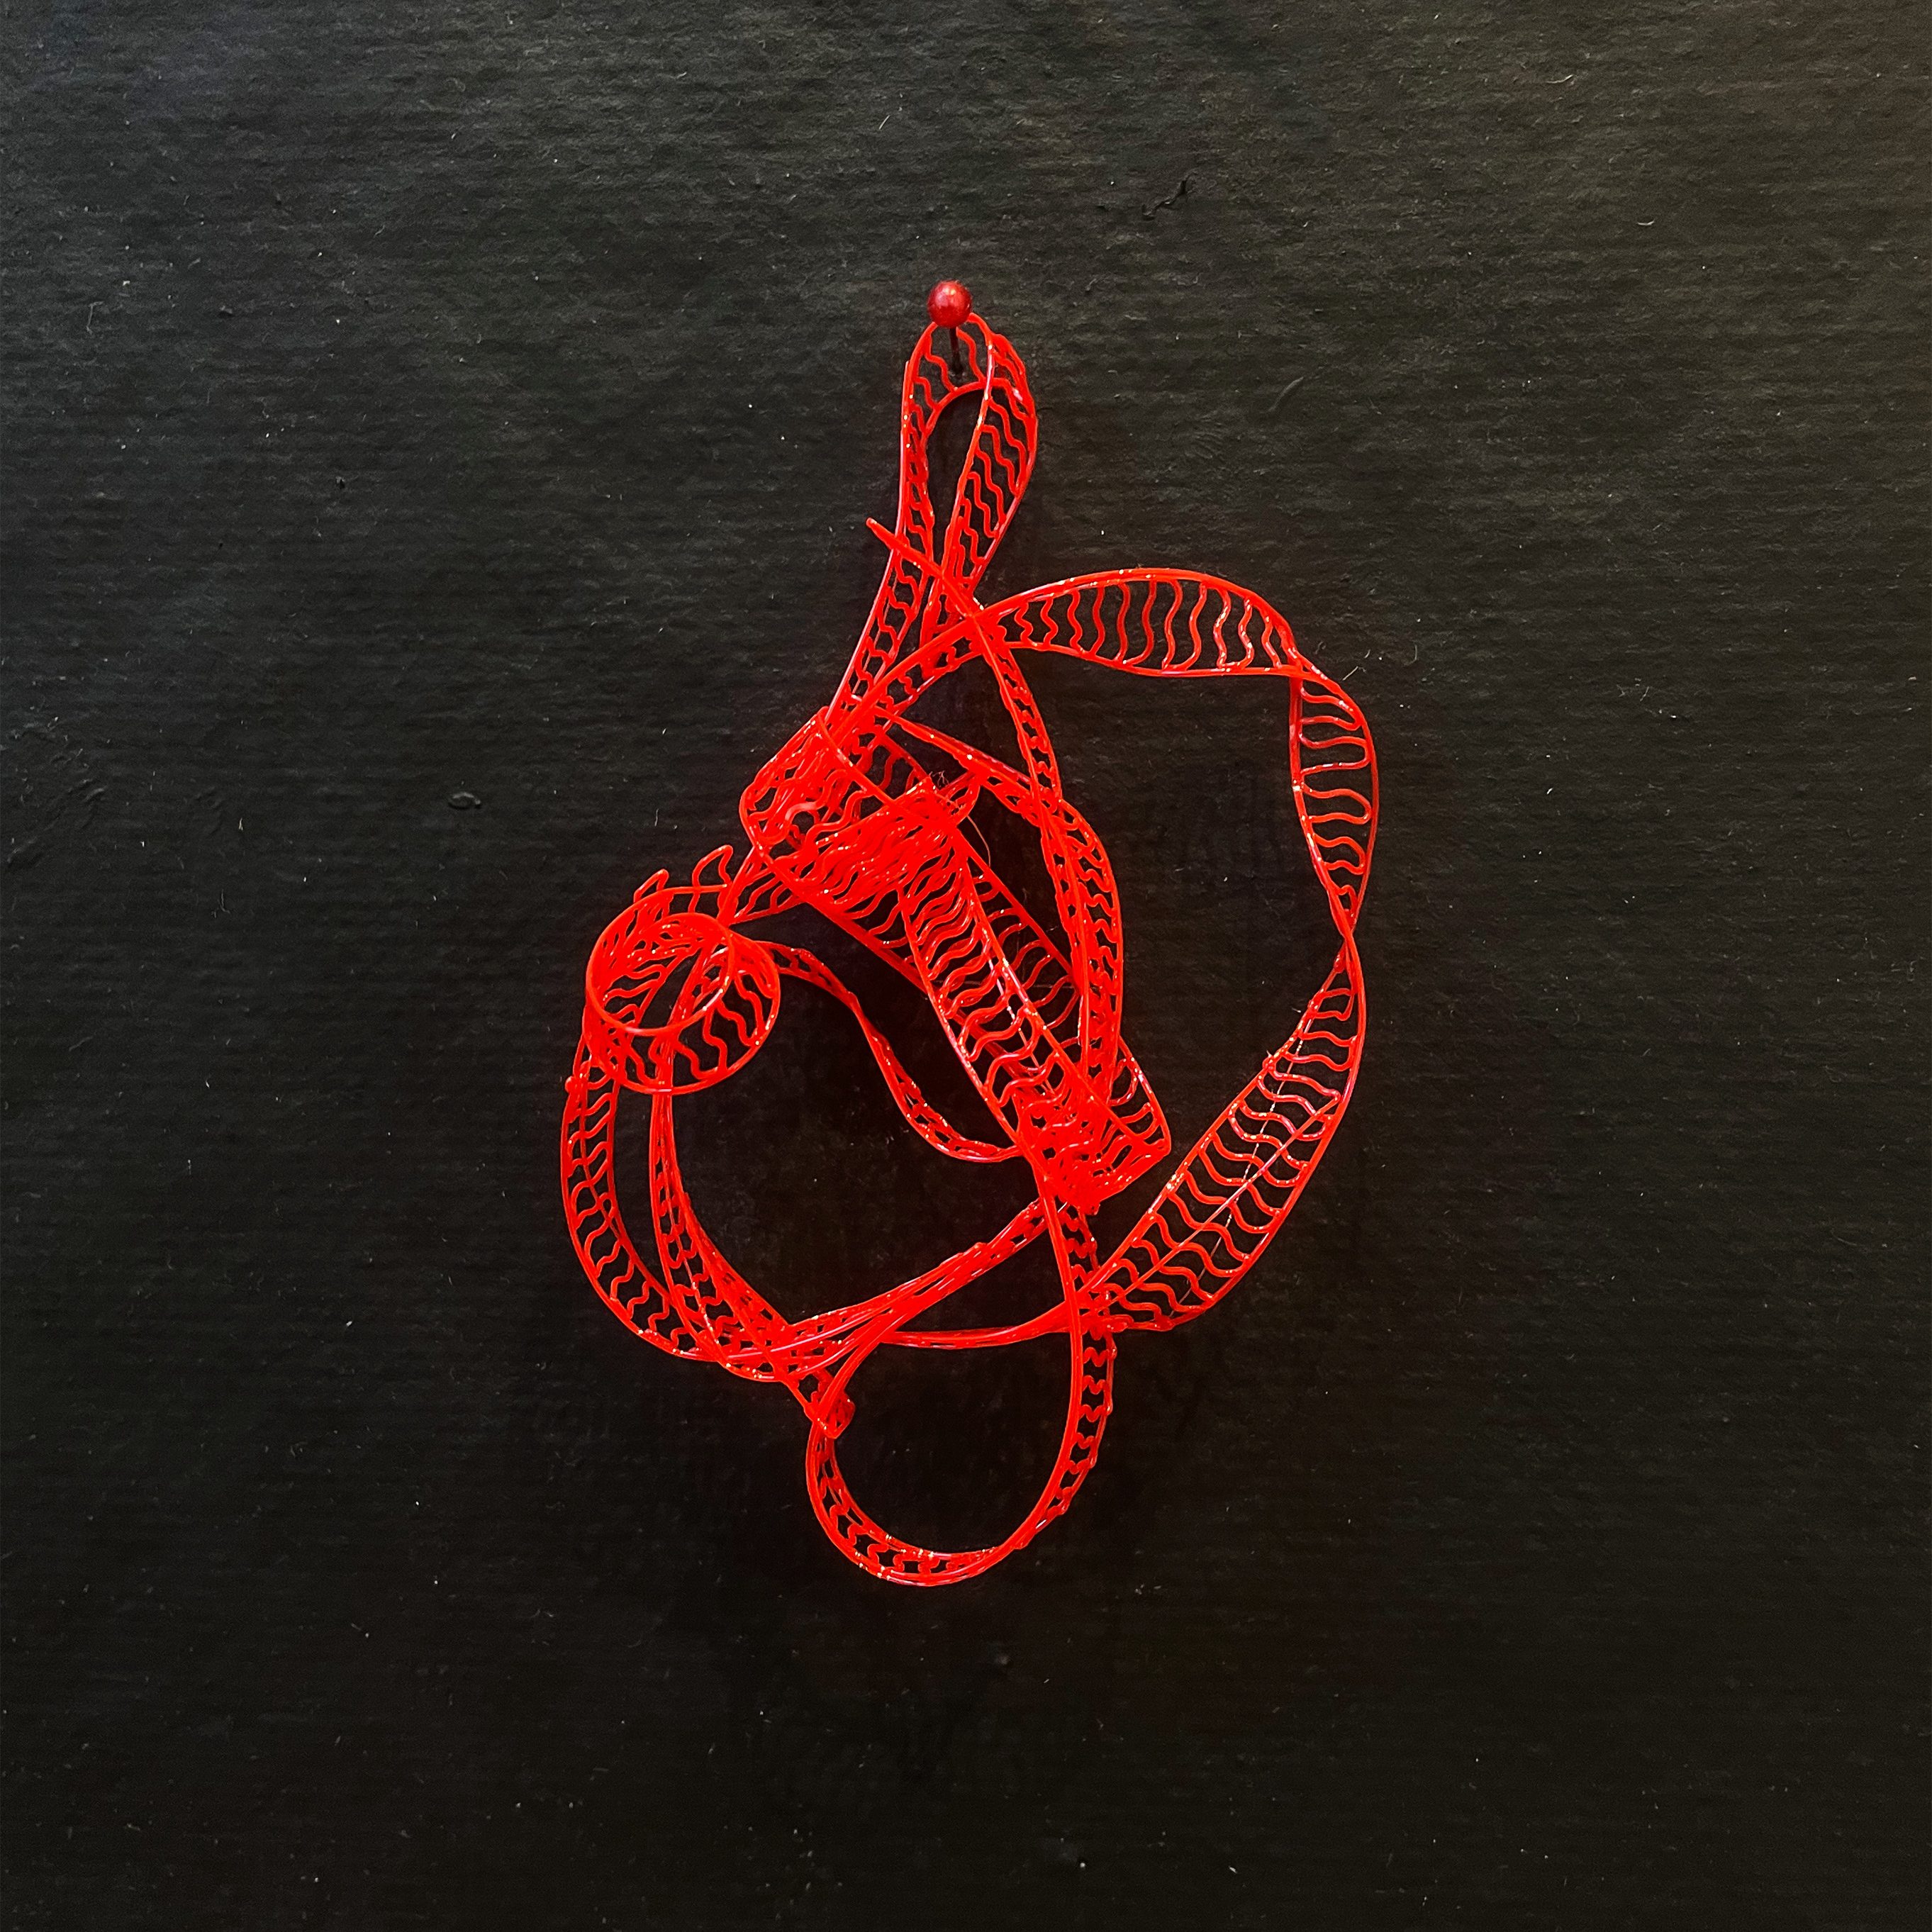
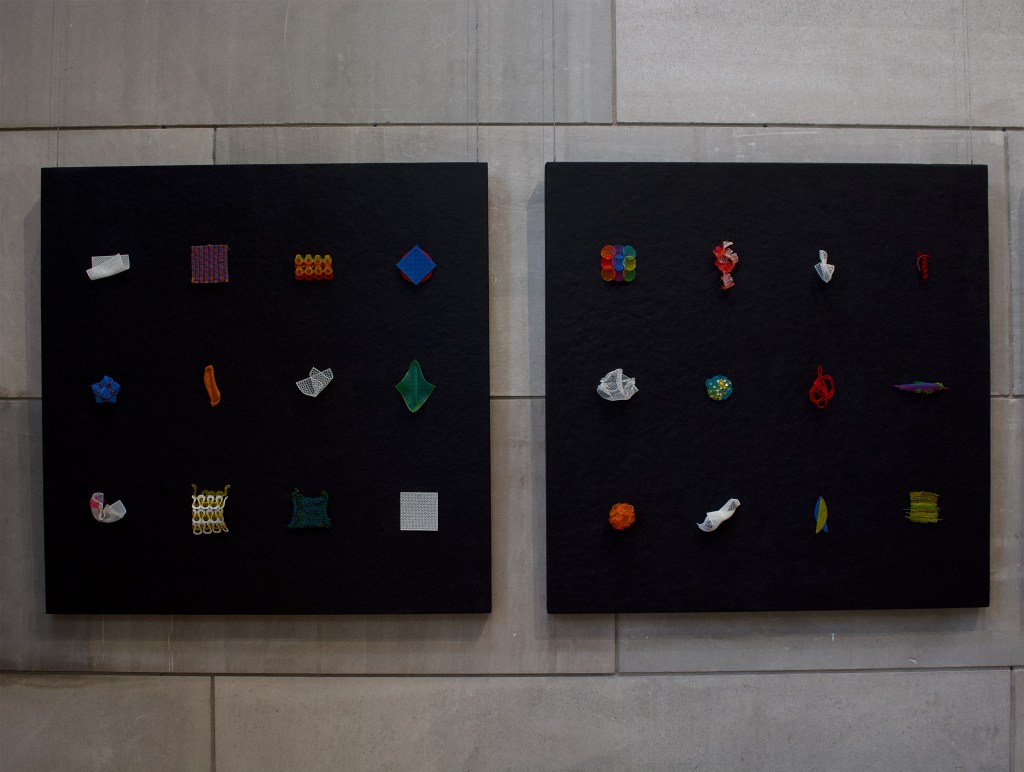
Once these patches were done, I kept experimenting throughout the rest of my thesis. I saw this work as an extension of the thesis, exploring structure, form and the body, connection, constraints, and a lot of ‘what if?’s. By the time my thesis came around I had produced 48 of these ‘squares’ that I mounted on black boards. Here are 20 of the 48 that were shown in the gallery.


System Level Change – Rethinking Manufacturing
Thus far my work could be seen a bandaid to the larger symptom of clothing not being created to under go such friction. To address unique wear patterns from the outset, integrating reinforced areas into the initial manufacturing process is needed. This proactive approach would then eliminate the need for after-the-fact patchwork, ensuring garments are both functional and aesthetically pleasing from the start.
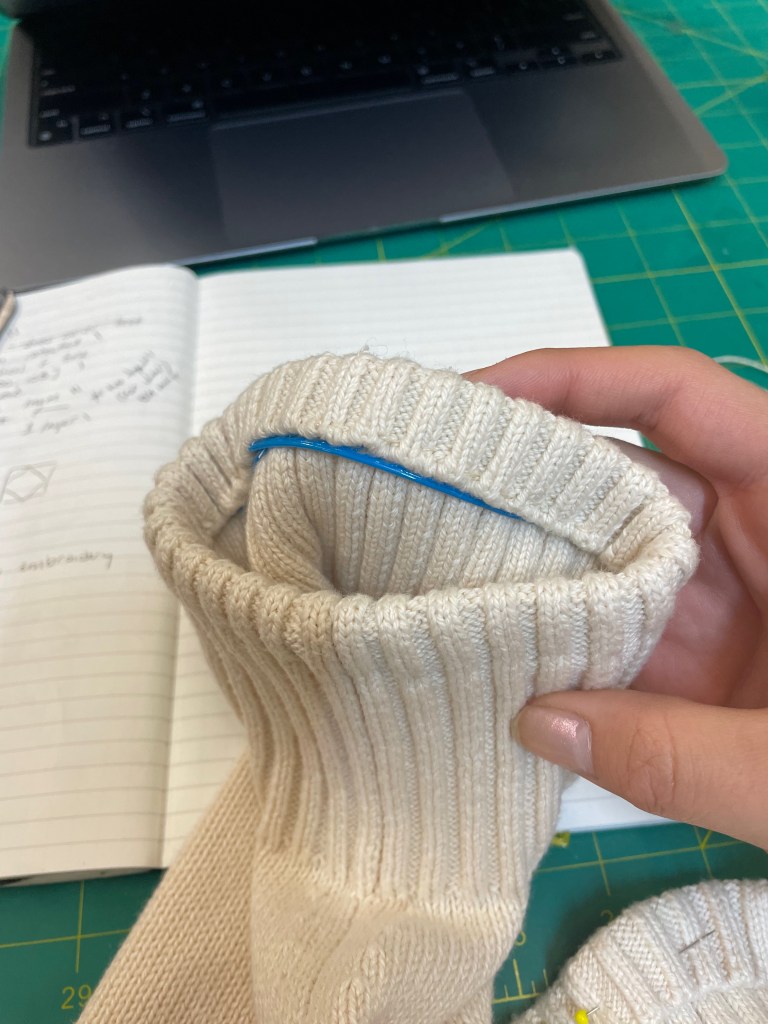
I started by testing out traditional methods for reinforcement like what you may see in the heel of a sock or a double sided garment.


While these methods worked well (image 1-4), I ran into the same initial issue; These were still organic materials and would therefore eventually degrade too.
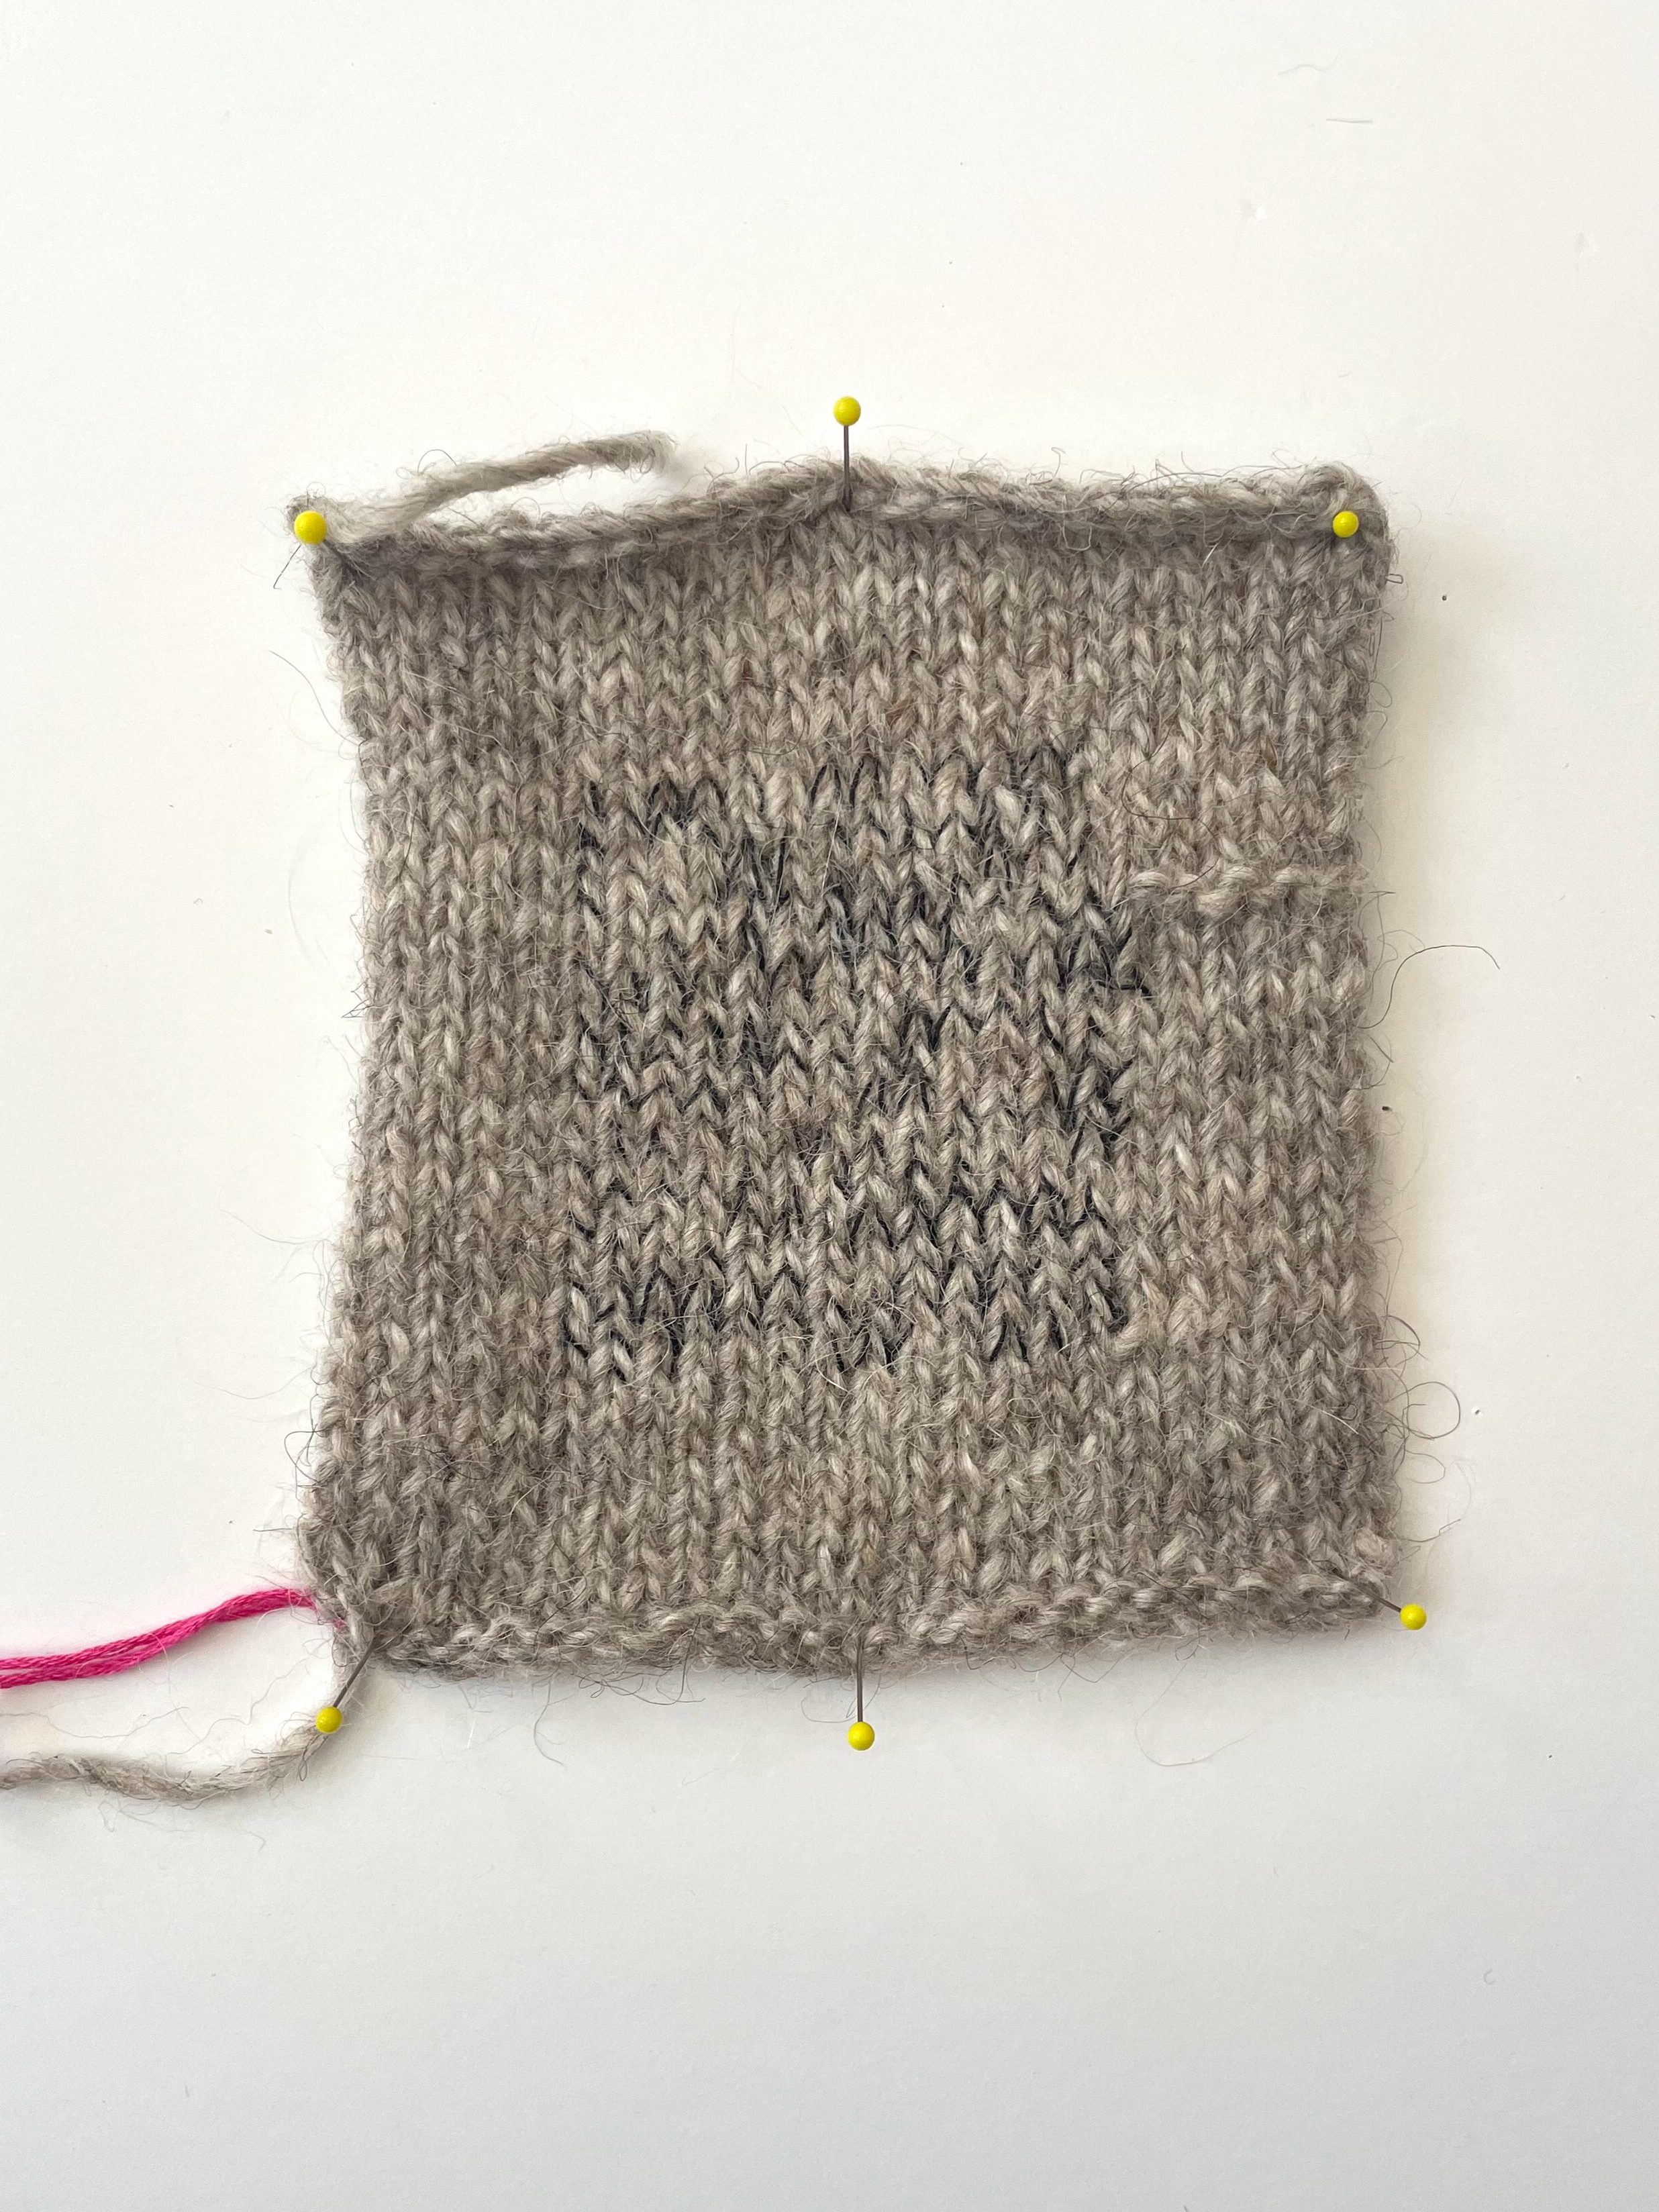
At the same time I was still 3D printing my 48 squares and noticed I produced some waste material everytime I purged out the machine. Because I had been knitting so much, this waste started to look a lot like yarn…


The image to the left was my very first test to see if I could translate from manual knitting to a knitting machine which would become my proof-of-concept for manufacturing.

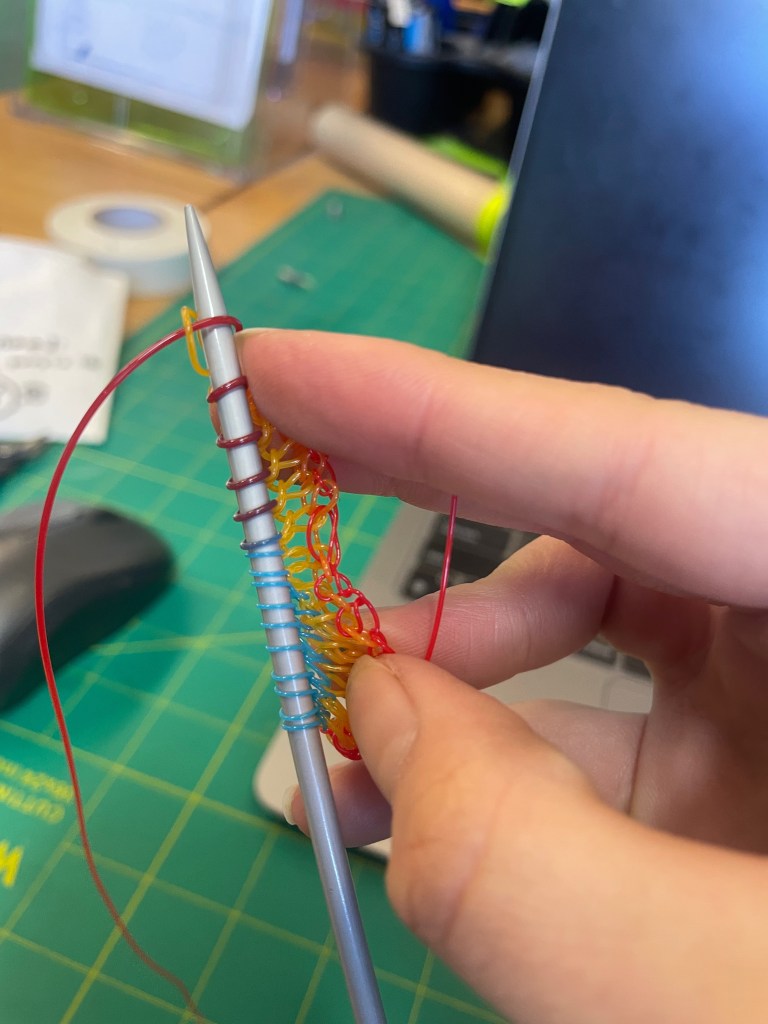
I then set off to make sweaters for me, Emma, and Sarah, each sweater being reinforced with this TPU thread in high wear areas.
I had never seriously used a knitting machine before and so had a large learning curve. I relied heavily on Youtube as well as Professor Sonia Roberts who granted me acess to her knitting machines in Wesleyan’s robotics lab. Throughout this long process I was constantly learning better methods of inserting the TPU into each sweater. (Sorry to Sarah whose sweater was first :,) .)
Video shows eight rows, 800% sped up
Creating the Exhibition


Initial North Gallery Mockups
As I prepared to install my thesis in the Zilkha Gallery, I spent time thinking about how my work would sit alongside the Studio Art seniors. What I enjoyed about their projects was that they embraced ambiguity, leaving space for multiple interpretations. That approach influenced me, but I realized I did not want there to be so much ambiguity.
This work is a story about disability — about friction, tools, and the systems that aren’t designed for us. I didn’t want viewers to leave uncertain. I wanted them to understand that these garments told real stories, and that those stories were worth paying attention to.
As Kat Holmes writes in Mismatch, disabled people move through a world full of small misalignments. My installation aimed to make those mismatches visible.
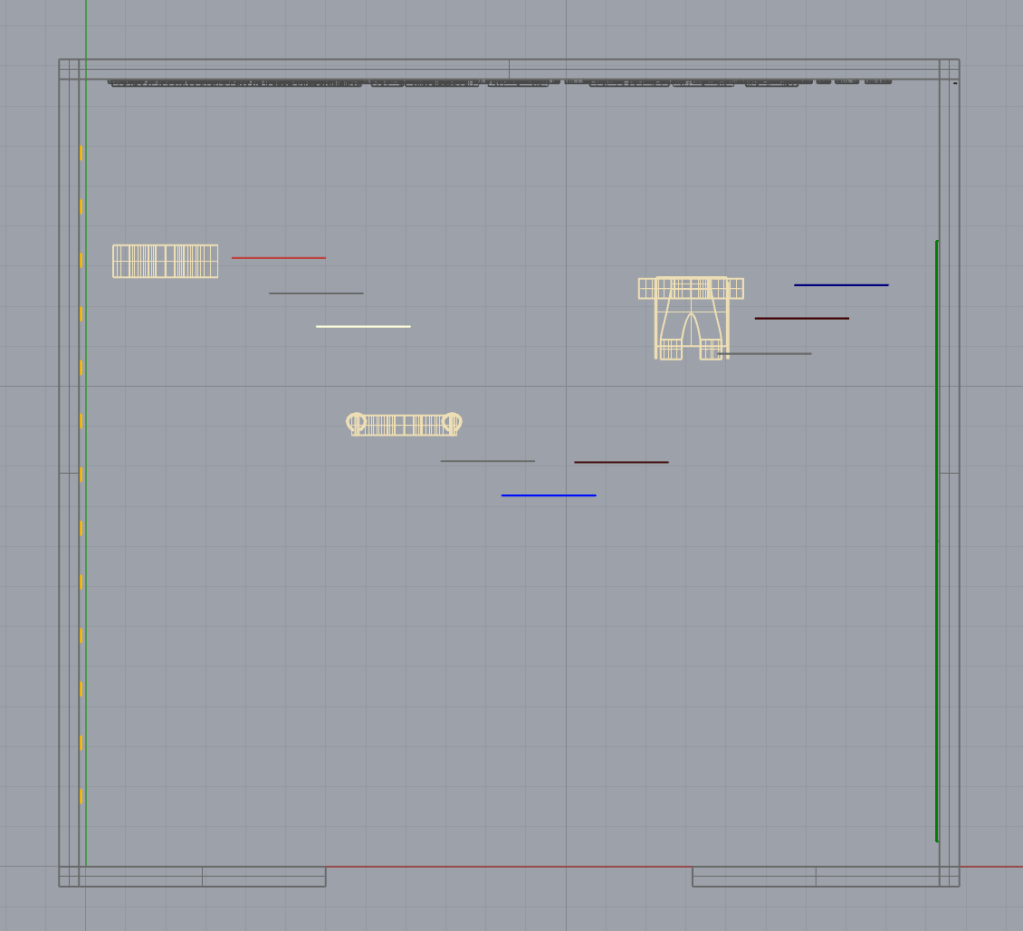
Body Mapping
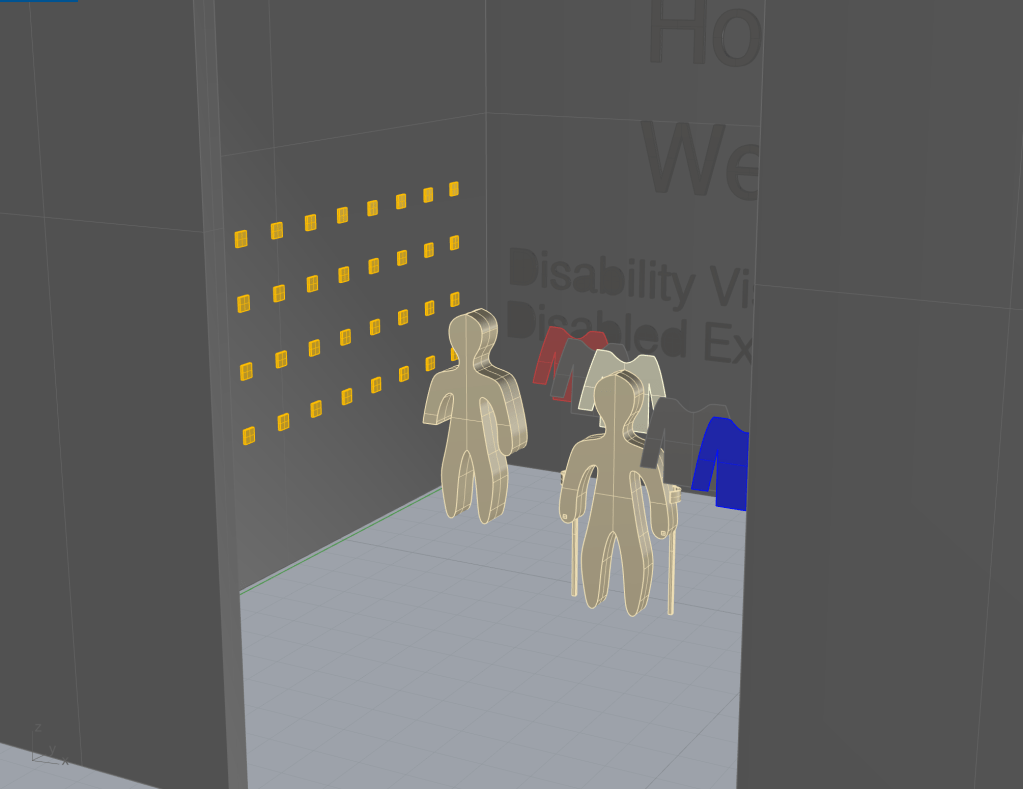
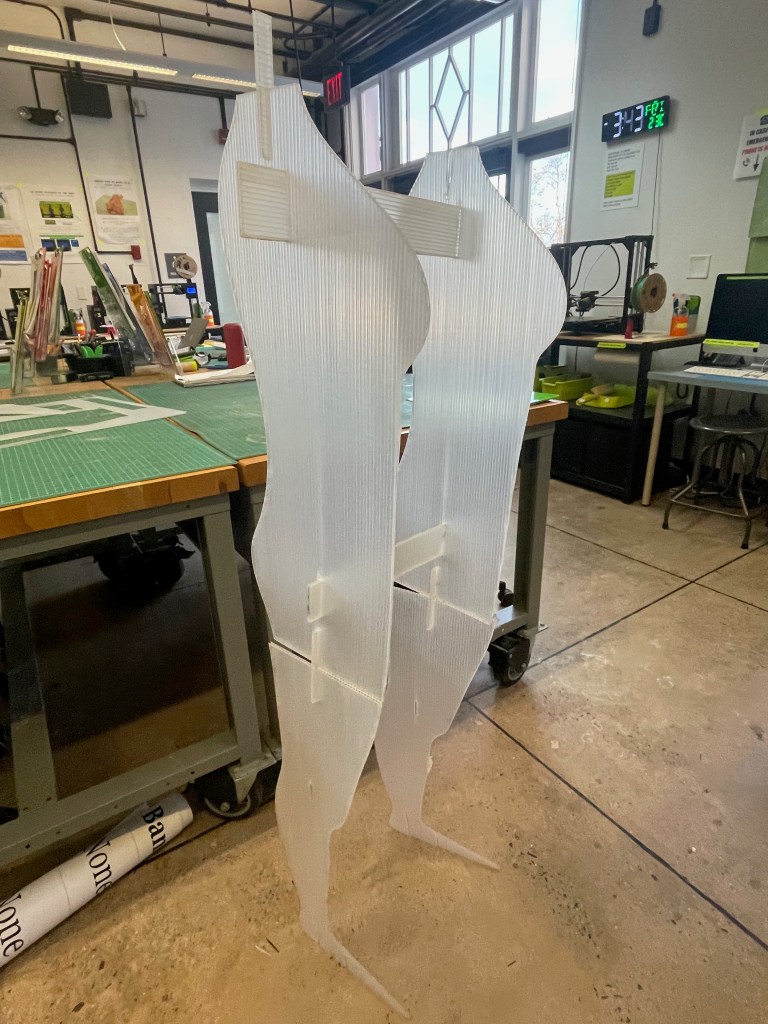
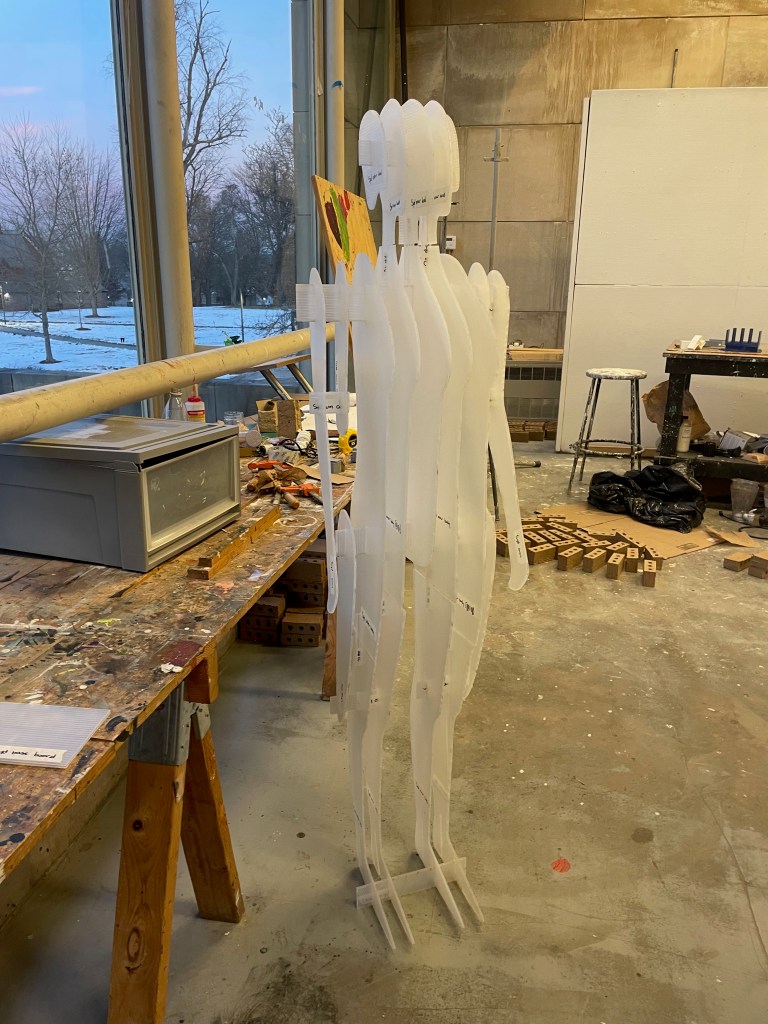
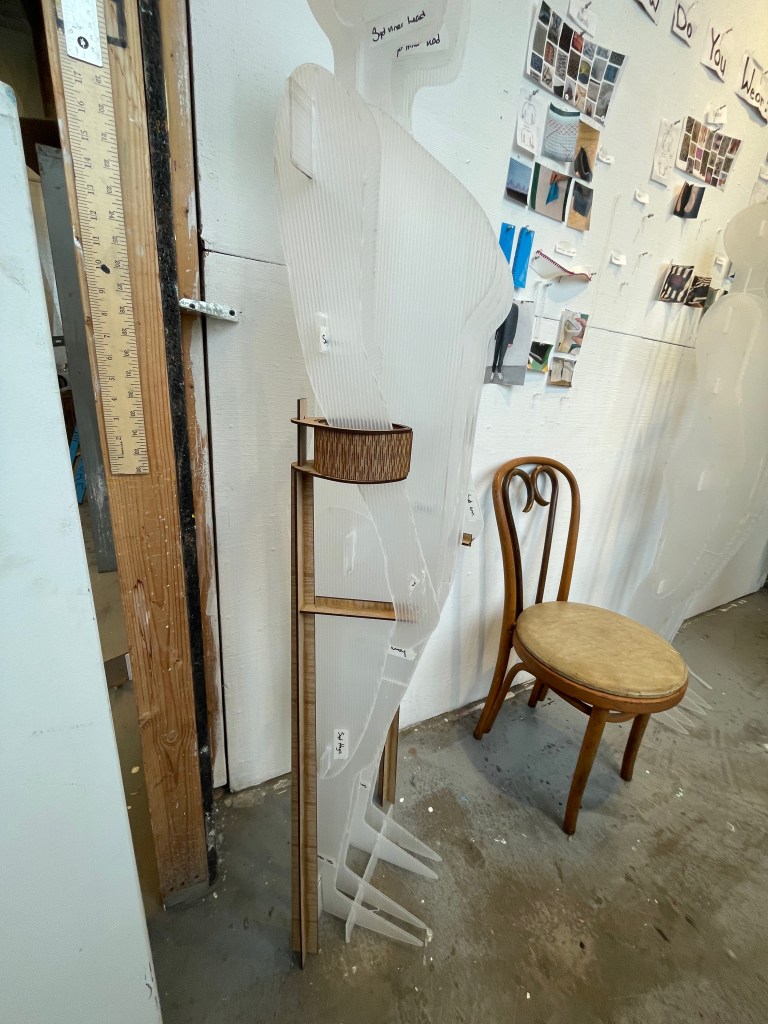
I knew that I wanted to have physical representations of each person (me, Emma, Sarah) in the exhibition so that it would be very clear that this work was talking about bodies and their interactions with adaptive tools. However, in order to honor the wishes of some of co-designers, images of each person could not be used. In some ways, this worked out well because it made me search for more abstract versions of each person. In creating these physical body maps in a single, neutral material I hoped that the initial person would still be represented, but that these people could encompass a much larger demographic at the same time. Design for one, expand to many.

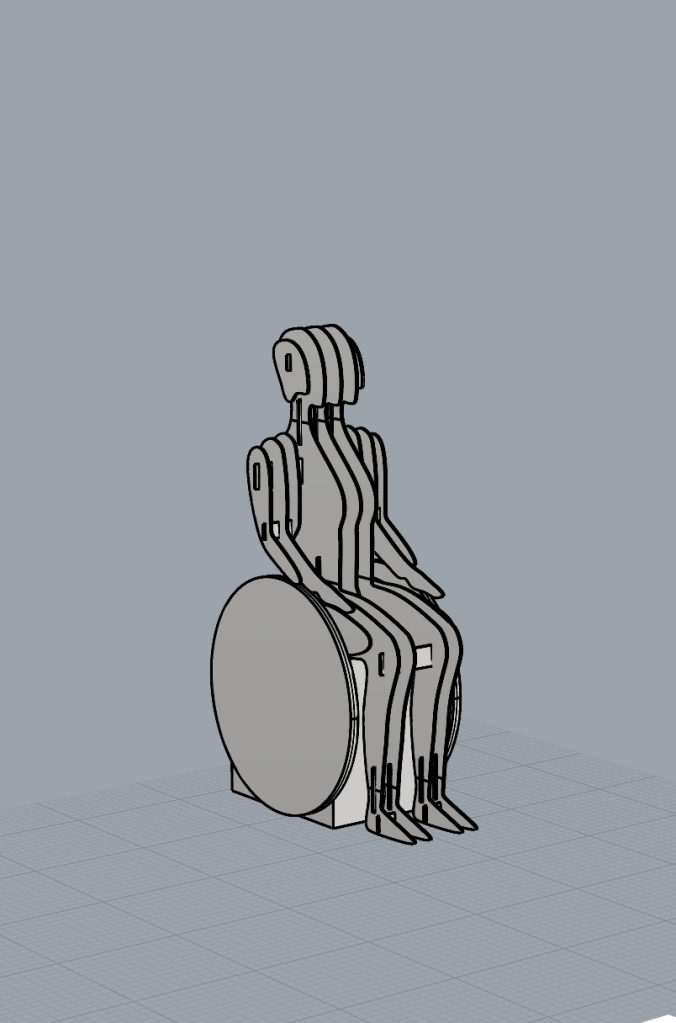
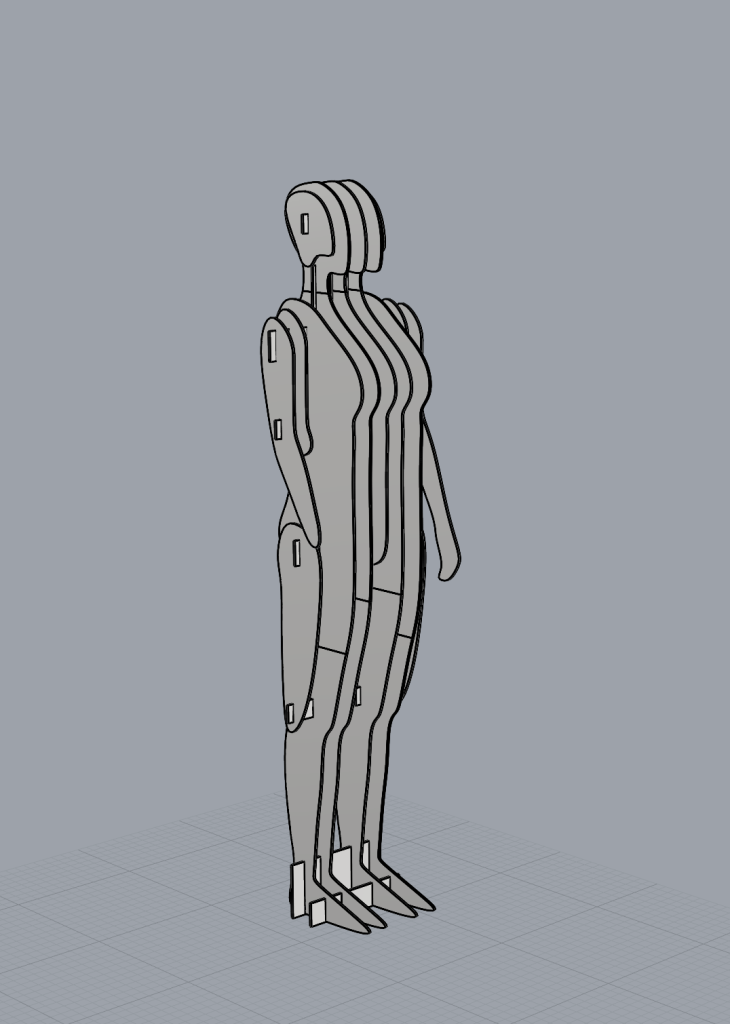
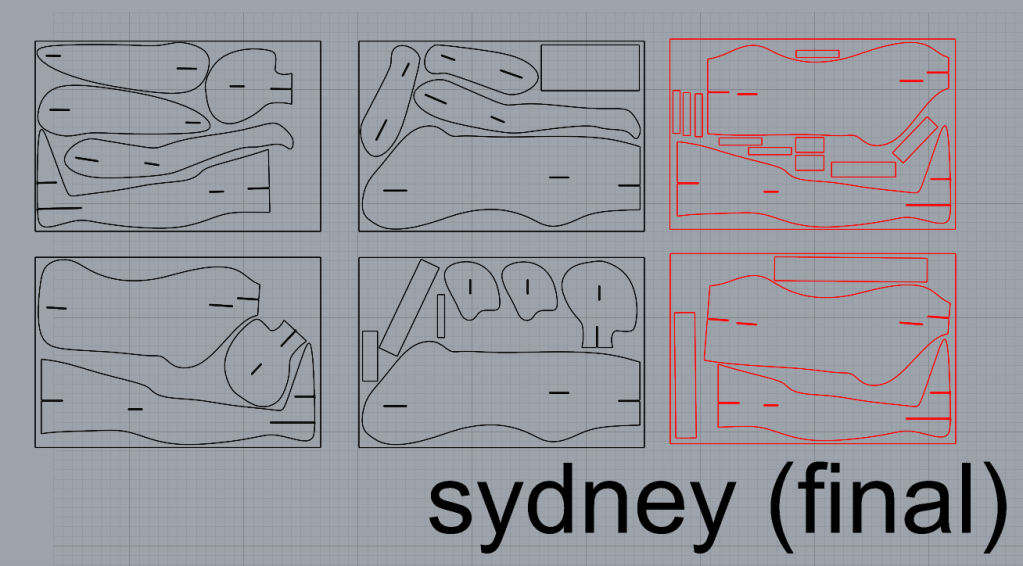
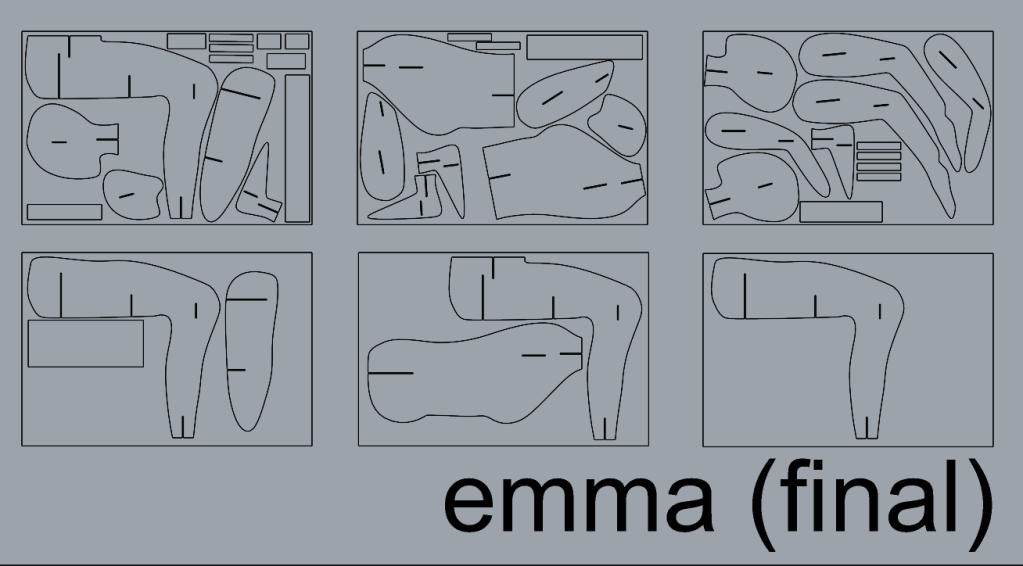

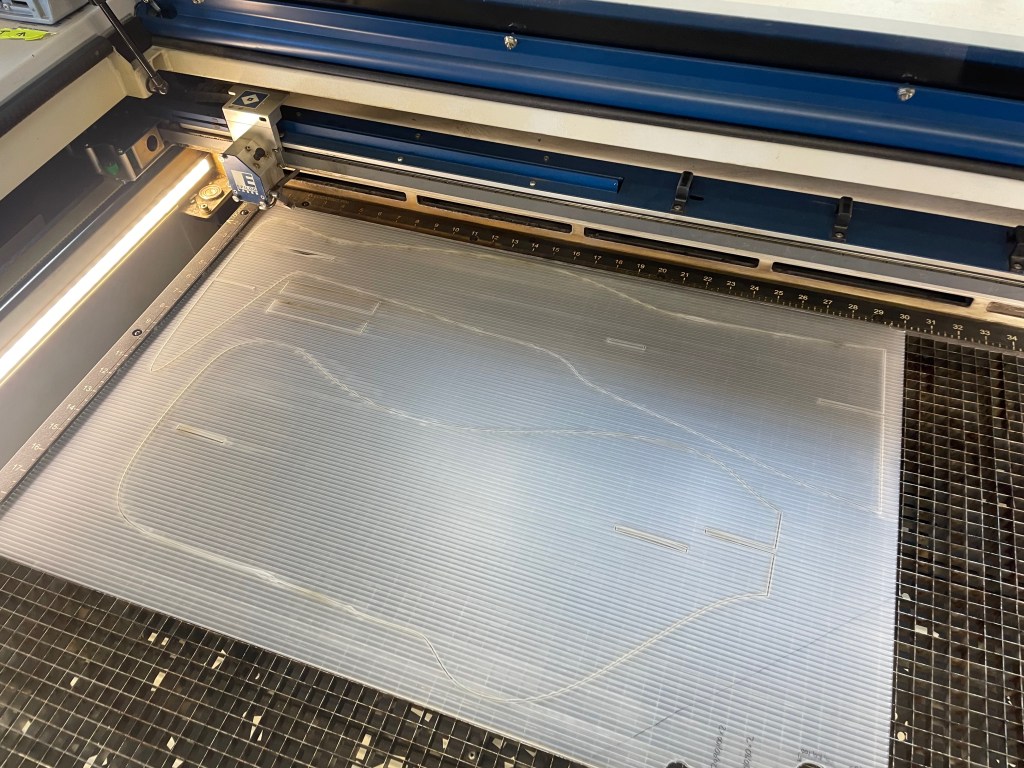
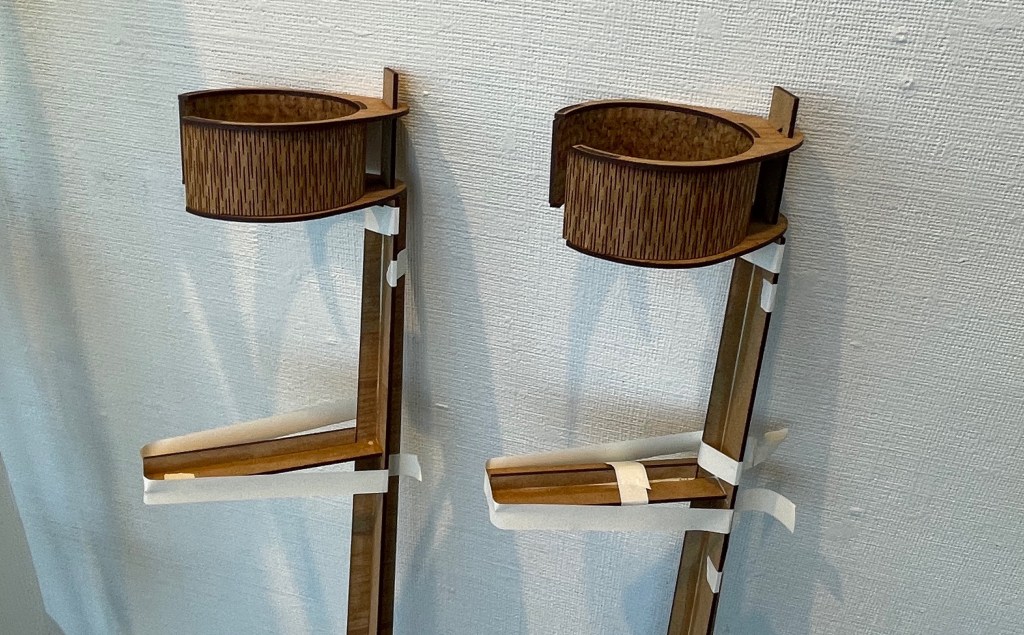
Once I had created the forms in Rhino it took me a lot of research and testing to figure out what material would be sturdy enough to stand up right but still be safe to laser cut as well as what the measurements would be to fit connecting braces through body panels snugly. I ended up with corrugated semi-transparent plastic sheets for the body maps and 1/8inch MDF for the adaptive tools.
One significant problem I ran into was that both the laser cutting bed and corrugated plastic sheets were too small to fit a whole persons height in (20x30inches is what I ended up using). I ended up cutting each person into three sections, staggering the cuts in the thighs for better stability and connecting them with small horizontal rectangles also cut from the corrugated plastic sheets [see above images and videos].


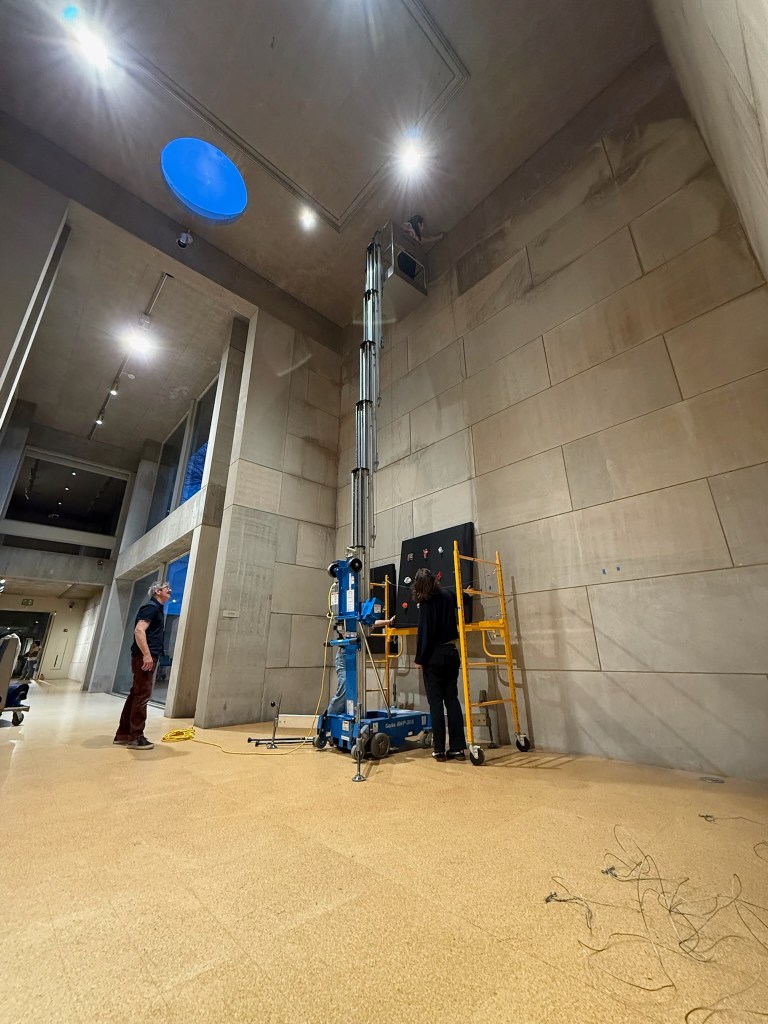
Install
I intended to hang the sweaters and extra versions of each of the patches in North Gallery. In order to do so, I consulted a lot with Paul Theriaults, the lead art preparer for Zilkha, who came up with a plan to suspend five poles from the ceiling that would then told the sweaters in the air by clear fishing line.
Of course, this was easier said than done, and we had less than 40 hours to install so everything no matter how planned out was somewhat rushed. I enjoyed this crazy time though and ended up having a lot of extra help from friends that made the install possible.


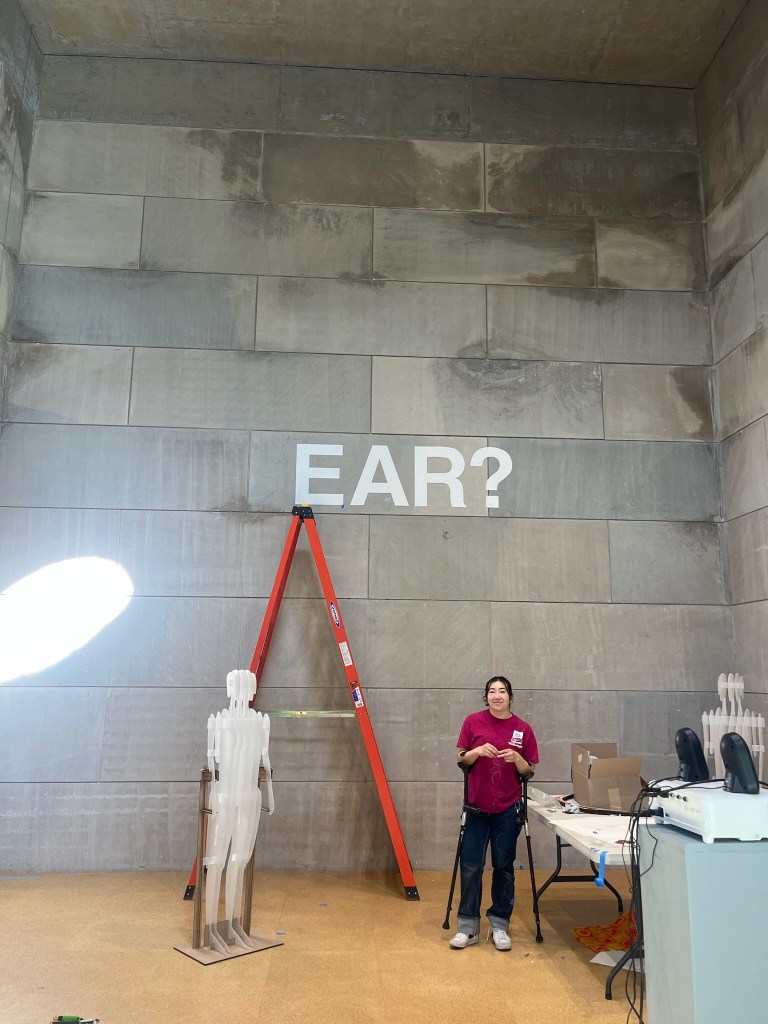

Final Exhibition


Looking Forwards
I genuinely had so much fun working on this major project over the course of almost 8 months. I want this work to continue to grow with me as my time at Wesleyan has come to an end.
Recently (summer 2025) I have partnered with Audrey Nelson, another Wesleyan alumn who is interested in journalism. Together we wrote this draft for a podcast episode and are pitching around to different shows.
Let’s Talk!
If you’re working on something that connects to disability, design, material systems, computational fabrication methods, and/or garment manufacturing — or if any part of this project resonates — I’d love to be in conversation. Whether you’re looking for a collaborator, researcher, designer, someone to join your team, or just want to yap: please reach out!
smkeller@wesleyan.edu
