The Hopper Project
Project Overview
Using a limited amount of material, create a “biological hopper” with a timer that when activated would take 8-60 seconds to trigger the hopper to jump.
Duration
1 month
Solo Project
Introduction + Rules
The hopper was meant to take influence from animals in nature, hence the name, “biological hopper.” The whole hopper had to hop as well; I was not allowed to make a base that the hopper jumped off of. In addition I had to make a personal design goal specific to my hopper.
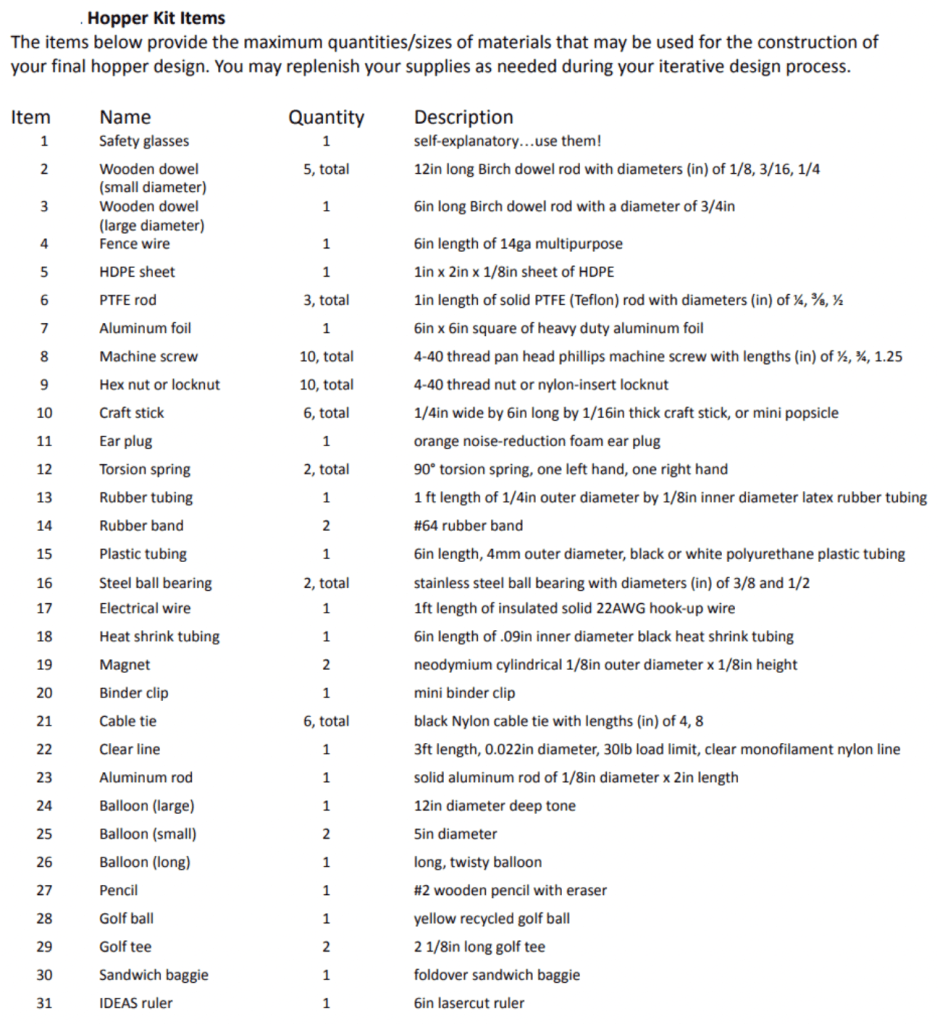
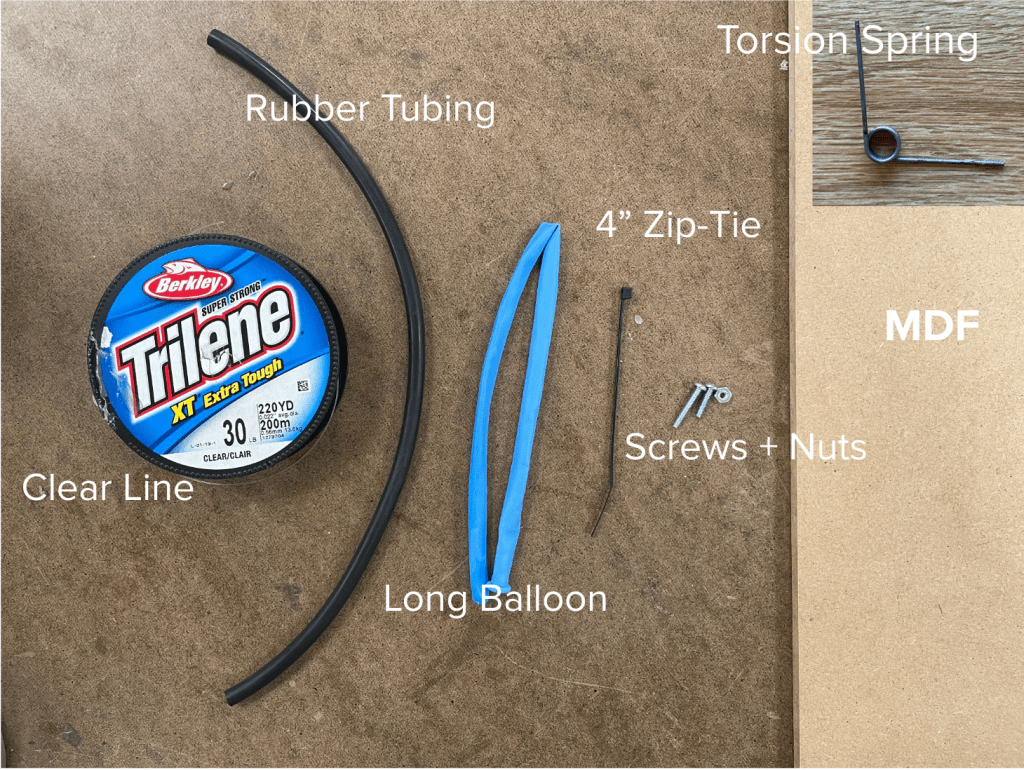
Material Kit
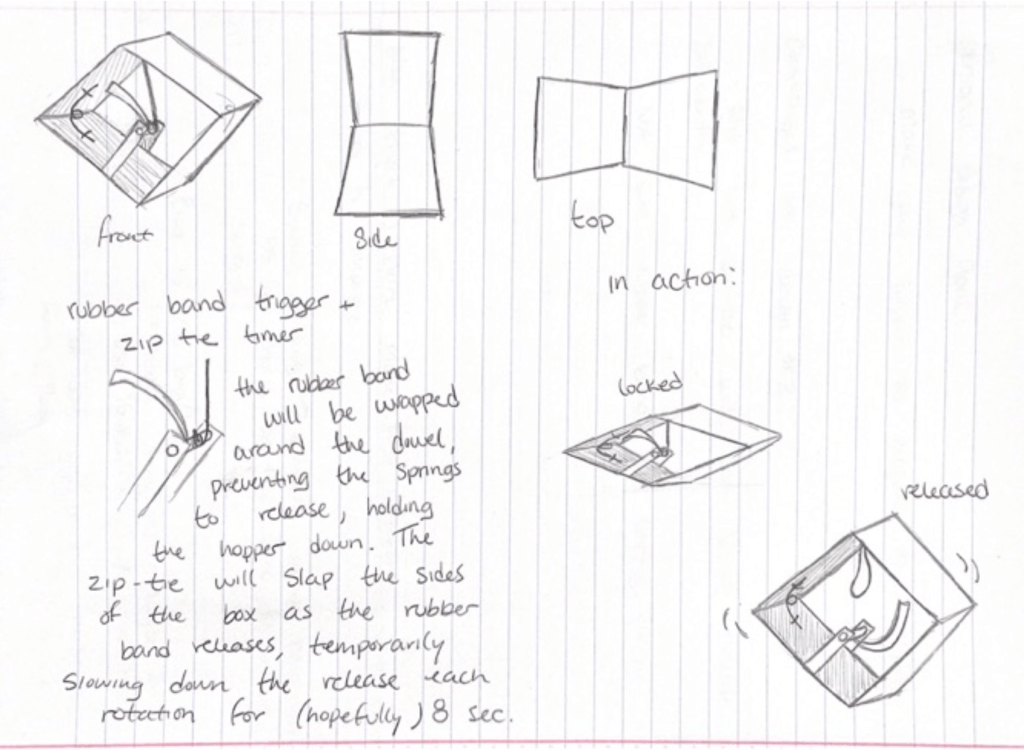
Preliminary Sketches & First Design Goal
I took inspiration from the flea who stores potential energy in its short legs and then releases that energy rapidly upon launch. Based of this research I created a box hopper. The timer/trigger mechanism is described to the right. The actual hopper mechanism would work by initially holding the box flat and then popping up, causing the box to hop. My initial design goal was to have as neat, clean, and consistent of a design as possible.
First Wave of Prototypes
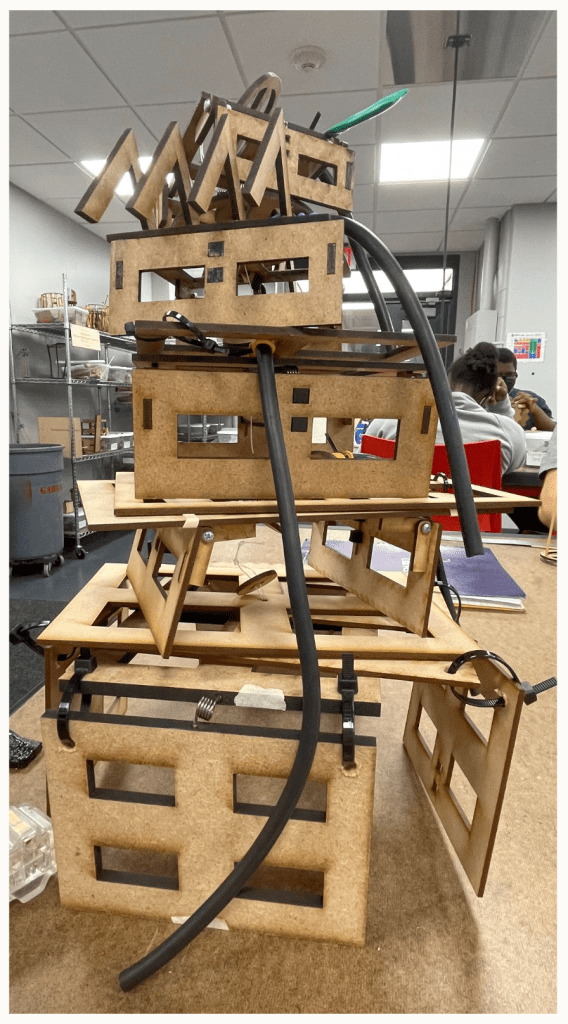
This was my first attempt at the hopper (seen below). I put torsion springs on either side of the box, however I learned that securing them with zip-ties and balloons was not enough as they were extremely wobbly. I decided to print in ¼” MDF as I thought ⅛” would be too thin to withstand all the pressure from the torsion springs. This was not a good approach as the hopper was overall very heavy and I started to think of different hopper ideas as I was very unsure my timer would actually work.
Take Two: Preliminary Sketches
I realized I didn’t need a whole box, just the bottom half of one. My hopper then became more of a triangle shape with the torsion springs still on each side. For my new trigger I created a button/string mechanism in which a button attached to a string would hold the “doors” of the hopper closed (pictured below) until the string loosened and the doors could then slip past the button. I came up with a balloon timer where two balloons would be blown up, holding the string taut, and as the balloon slowly released the string would loosen, causing the trigger mechanism to eventually release.
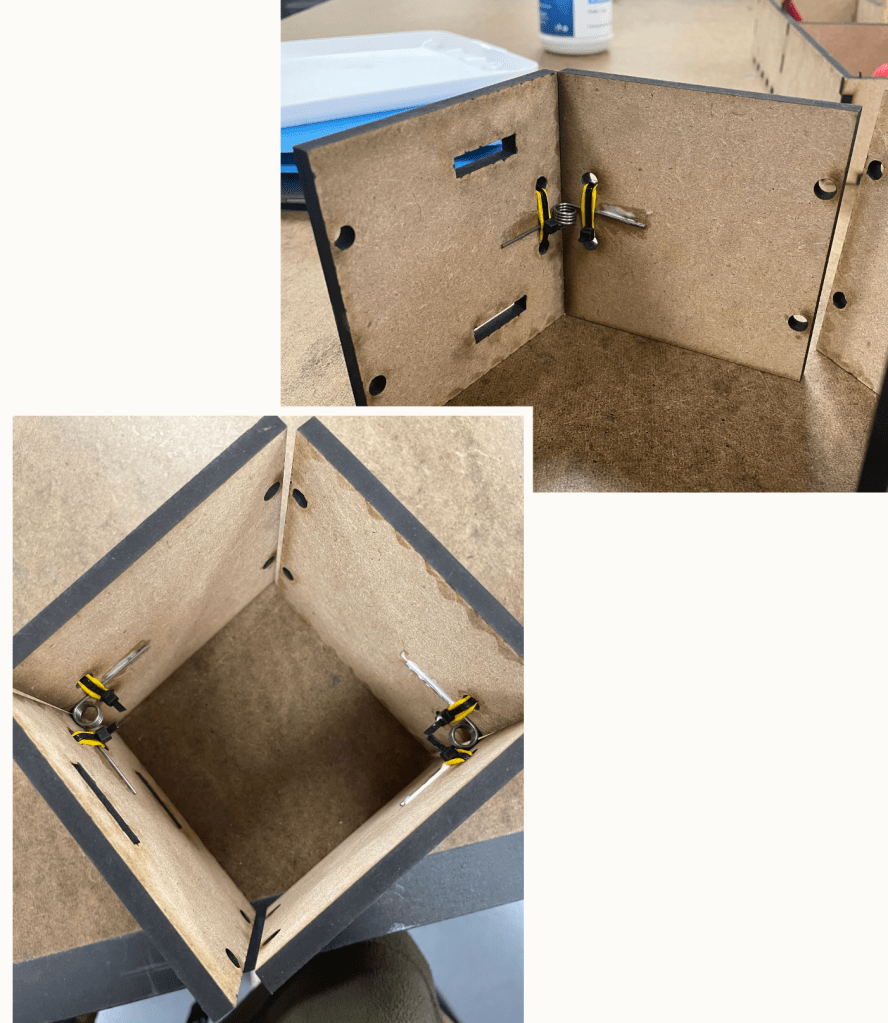
Second Wave of Prototypes
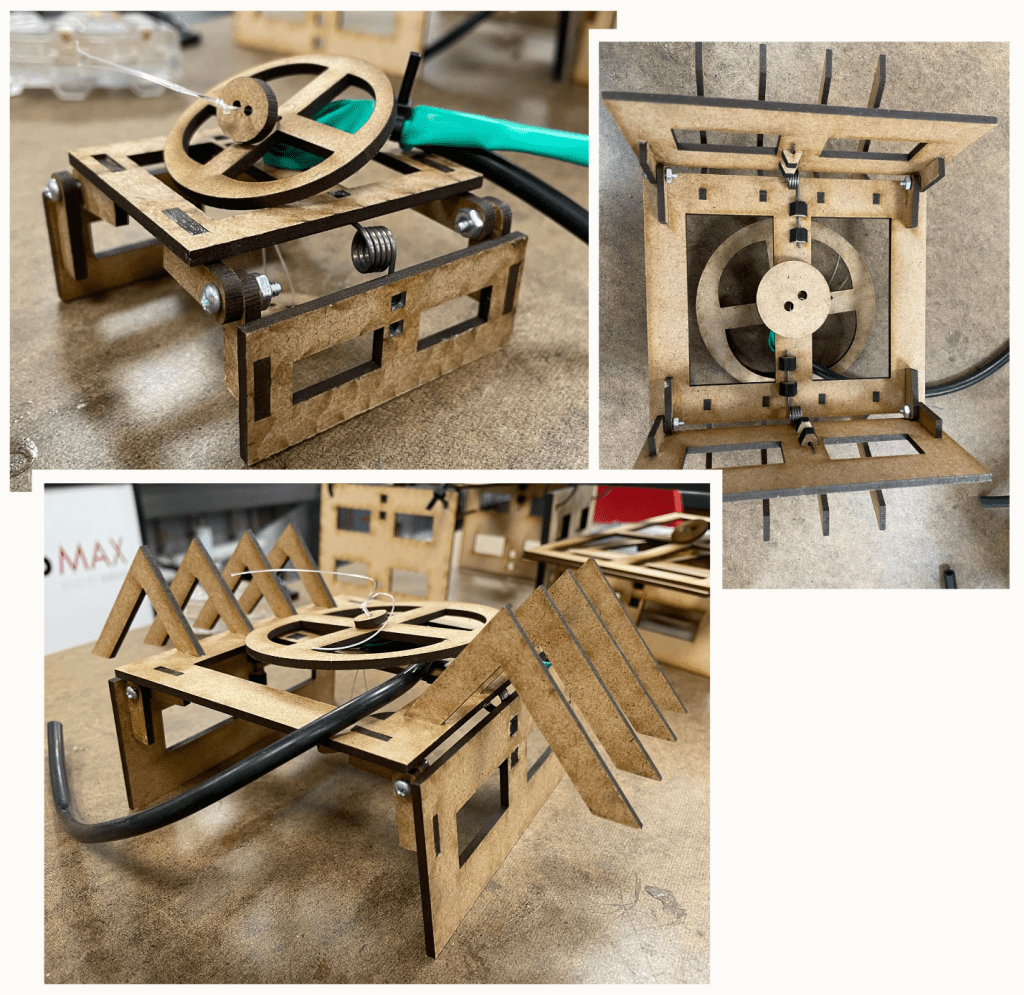
I started with ¼” MDF (bottom left image), thinking that drilling holes in the sides would be good for holding the springs. This secured them better and I added zip-tie hinges for more support. However, the hopper was extremely heavy and I realized I would have to go to ⅛” MDF, meaning I would need a new way to secure the springs. I created special holders (bottom right image) that were glued into the hopper base, holding them effectively and elegantly. The new hopper can be seen in the top image.
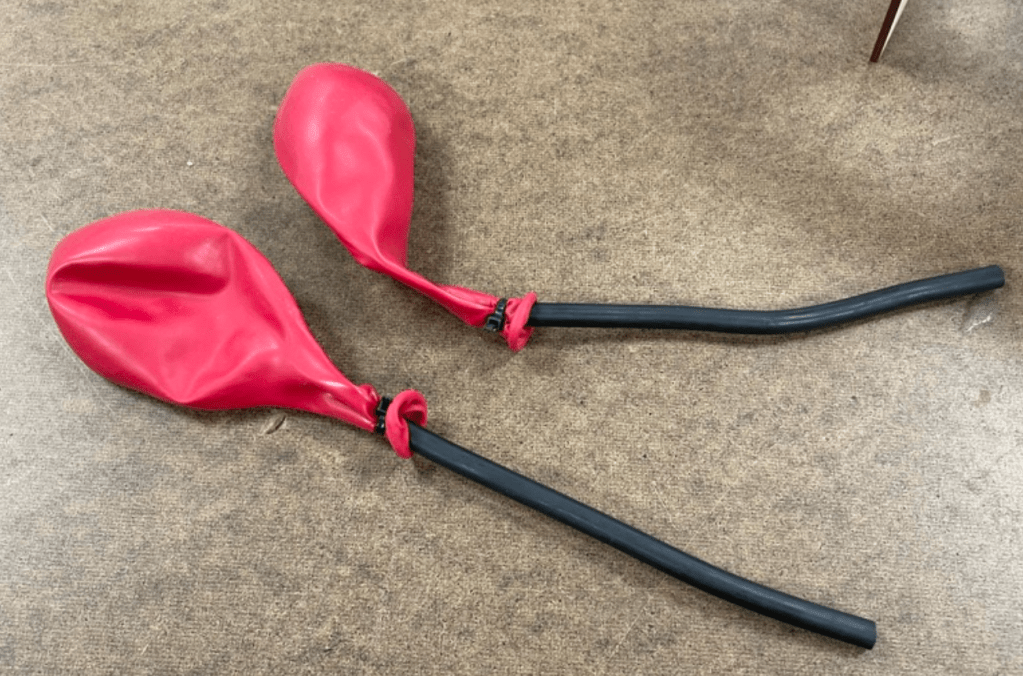
At the same time I was also working on my timer mechanism separately. I put two balloons over rubber tubing from our kits, securing them with zip-ties, trying to create a valve for the balloons that when released would let the air out of the balloon at a consistent slow rate. After much trial and error I soon understood how to control the flow of air and therefore the release time of my hopper by tightening/releasing the zip-ties
Third Wave of Prototypes
I brought the doors closer to each other, in turn making them shorter and giving the torsion springs more force in hopes that the hopper would jump higher. I also created real hinges out of MDF, screws, and nuts as the zip-tie hinges were not stable enough. I also switched to one long balloon tied in a donut shape as two balloons were extremely hard to manage having the same release time. At this stage I added the timer/trigger mechanism to the hopper and it worked!

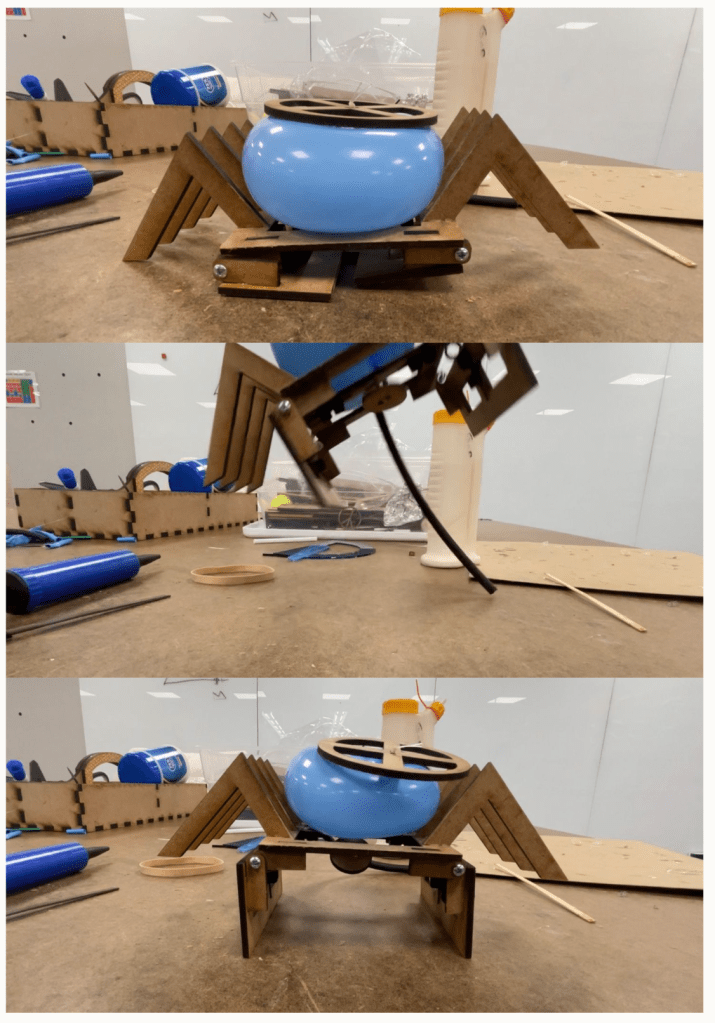
Fourth Wave of Prototypes & New Design Goal
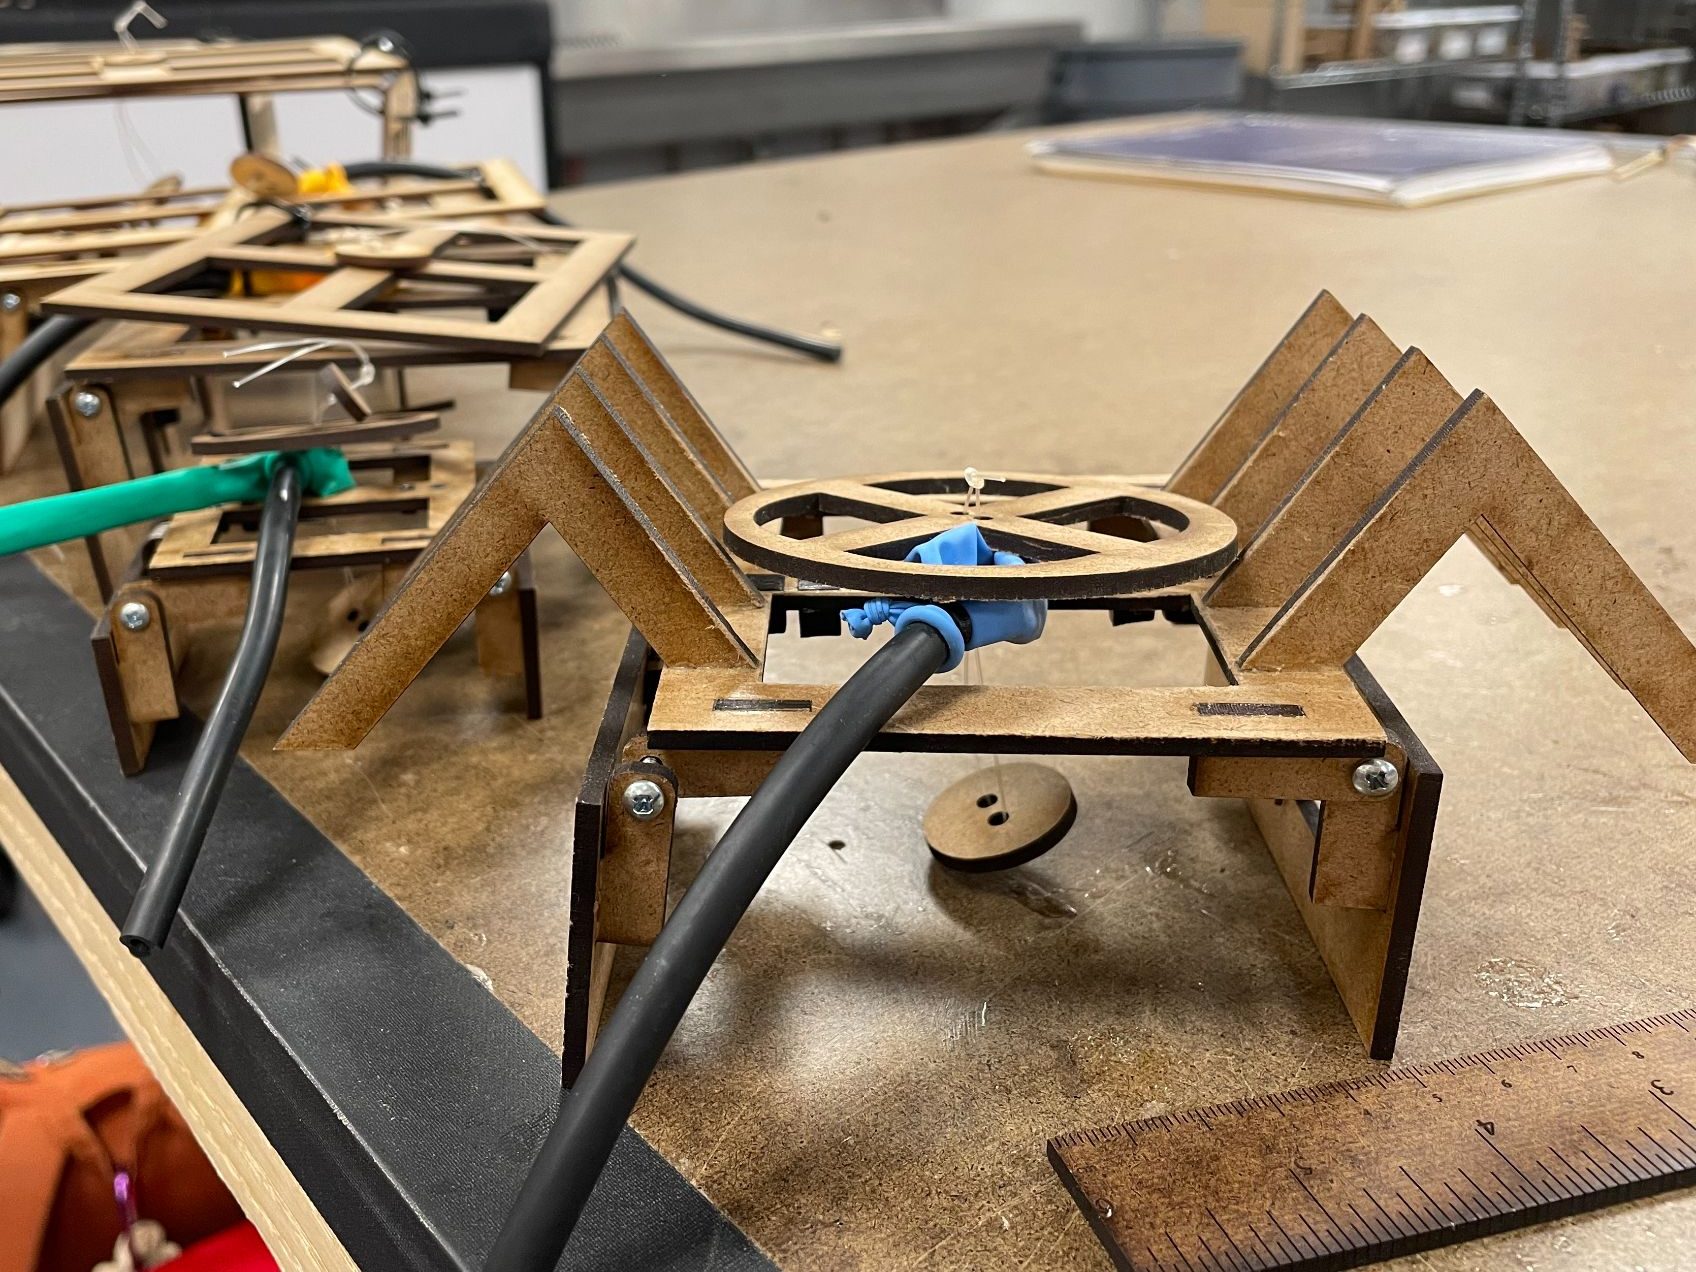
I had a working hopper that met all the requirements, but I still wanted my hopper to jump higher and to land flat on its feet as currently it landed sideways. My first thought was to shrink the hopper all together to cut down the mass. I also cut off the excess sides from my last hopper. This tiny hopper worked, but while the timer was physically able to shrink, it no longer held for eight seconds. I tackled the landing problem separately by adding some spooky spider legs to push the hopper back onto its feet as it landed. This solved the sideways landing problem and now all I needed to do was combine these adaptations into one final hopper.
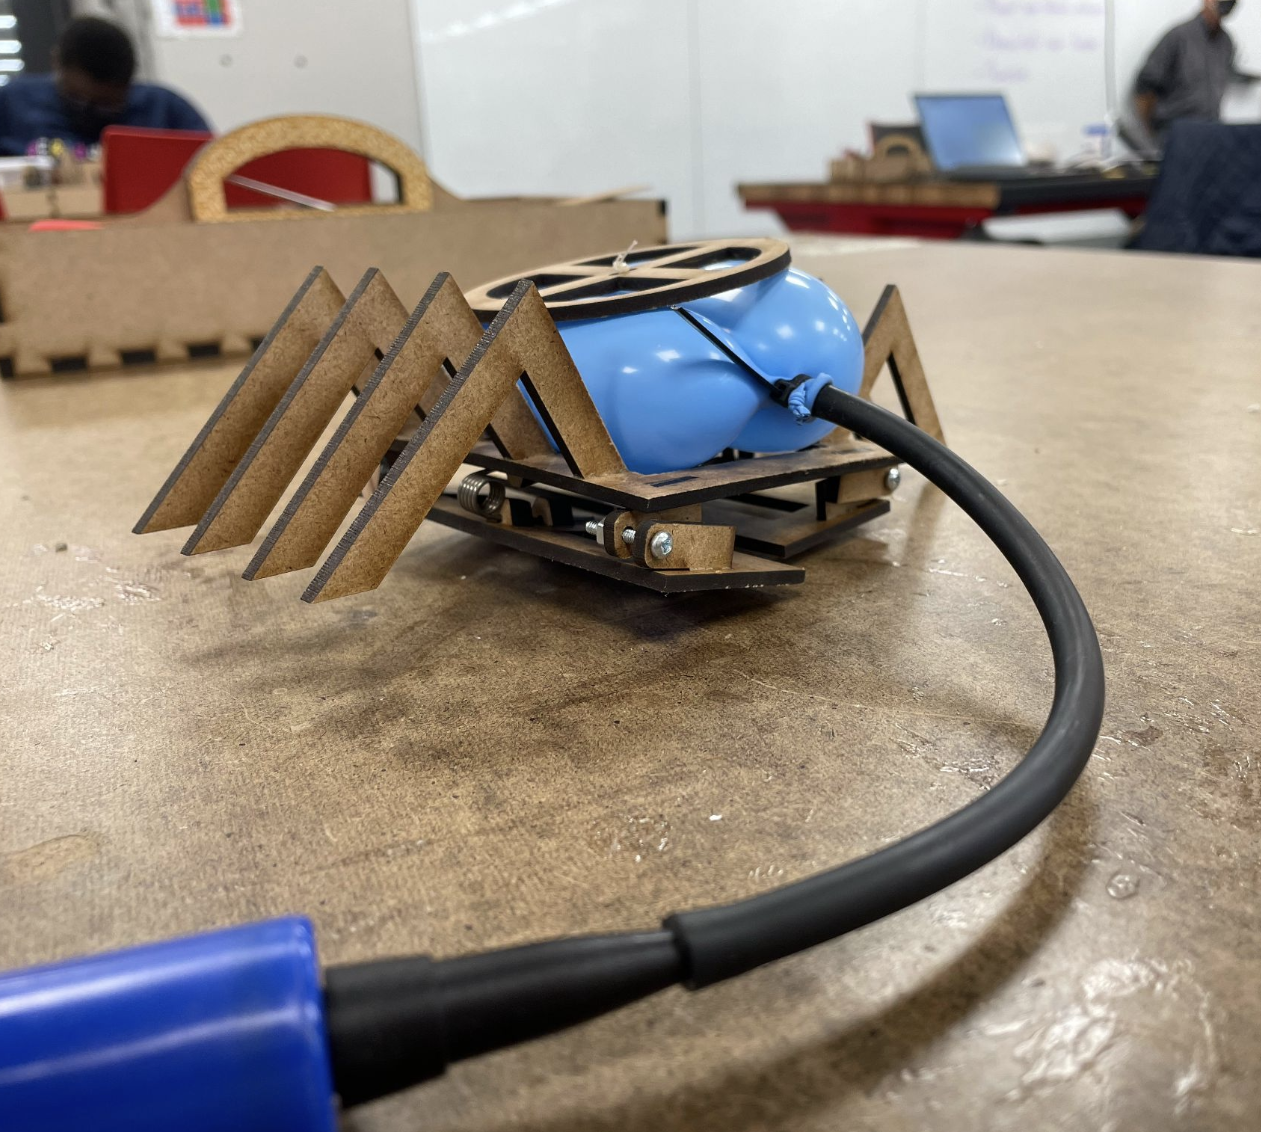
Final Hopper
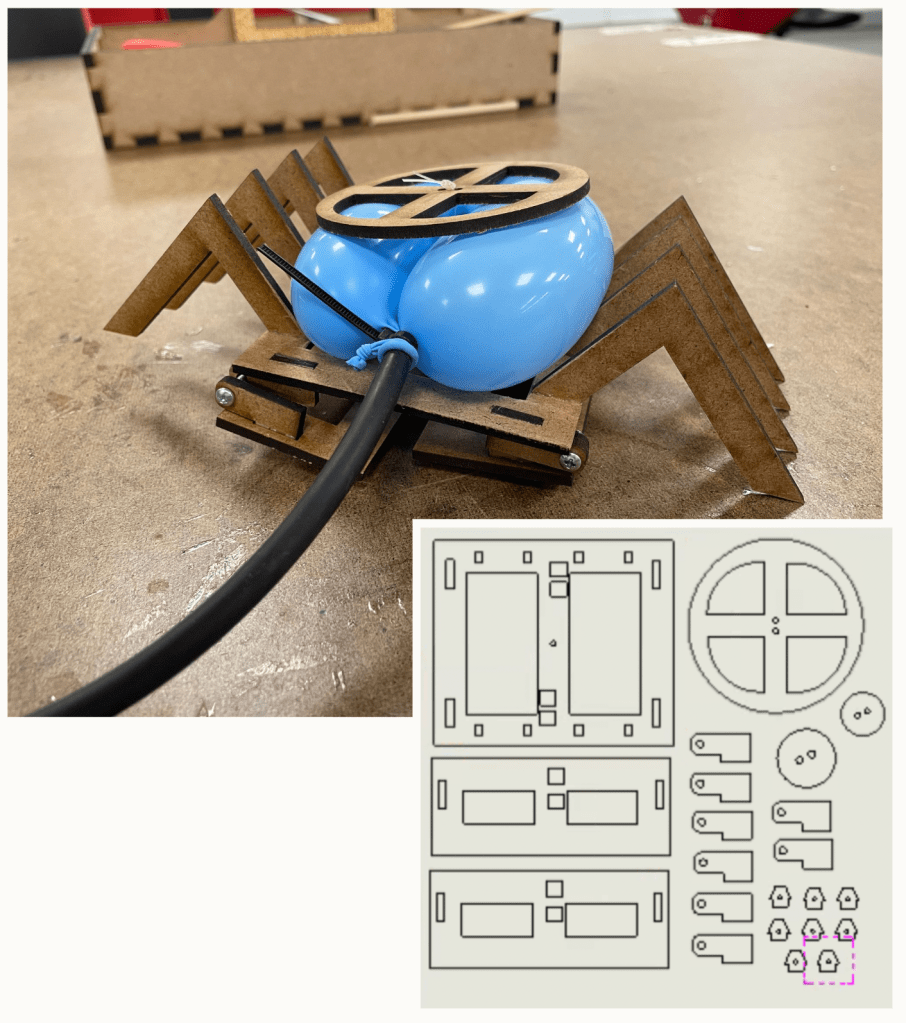
I created an in between sized hopper which worked perfectly, cutting off excess weight and allowing the hopper to jump higher. I then added the same spooky spider legs as my previous adaptation. My final hopper is pictured on the right with a screenshot of the solidworks pieces (minus the spider legs) underneath.